
These Homemade Corn Tortillas are still the most popular recipe on the site, so if you're new to them please consider giving it a go! I've updated this post with tips for the most common obstacles you'll encounter when making tortillas for the first time -- plus some brand options if you're new to Masa Harina.
Imagine walking into the grocery store early one morning and seeing this:
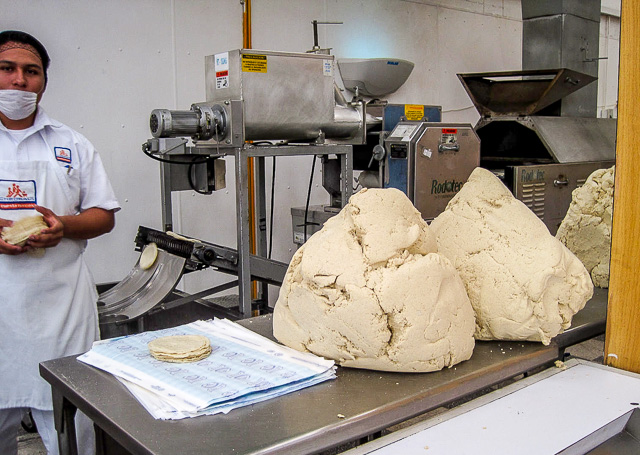
Cozumel, Mexico -- Photo by Chloe Miller
That's the dough used to make fresh corn tortillas each morning in the markets of Cozumel.
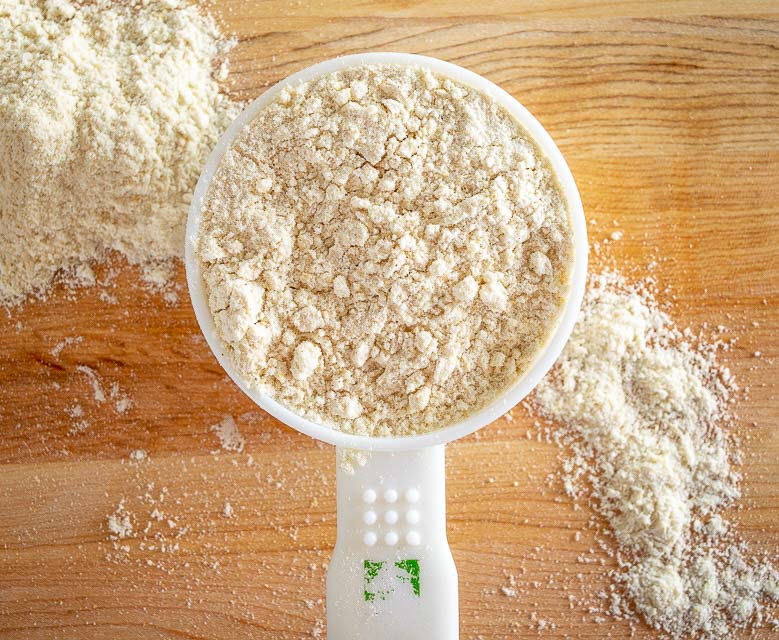
Producers will de-hydrate this corn dough and sell it in bags like this:
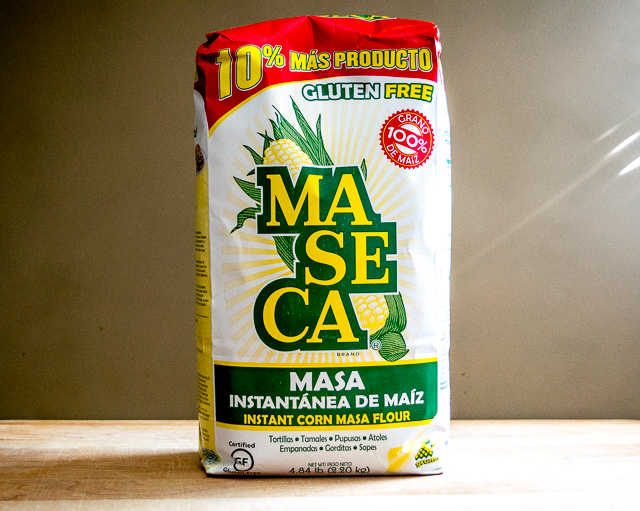
This is Masa Harina and it's your golden ticket to easy homemade corn tortillas!
Add some water, a bit of salt, and you've got masa on your hands -- which means you're only a few minutes away from an authentic stack of tortillas. What exactly is Masa Harina?
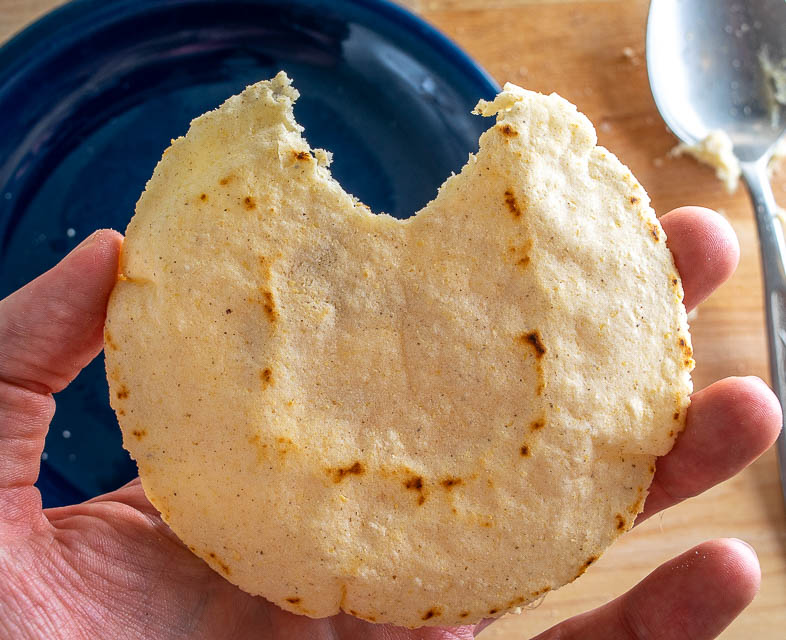
Making a batch of these beauties comes with two main benefits, the most obvious being a stack of corn tortillas that are good enough to be eaten on their own.
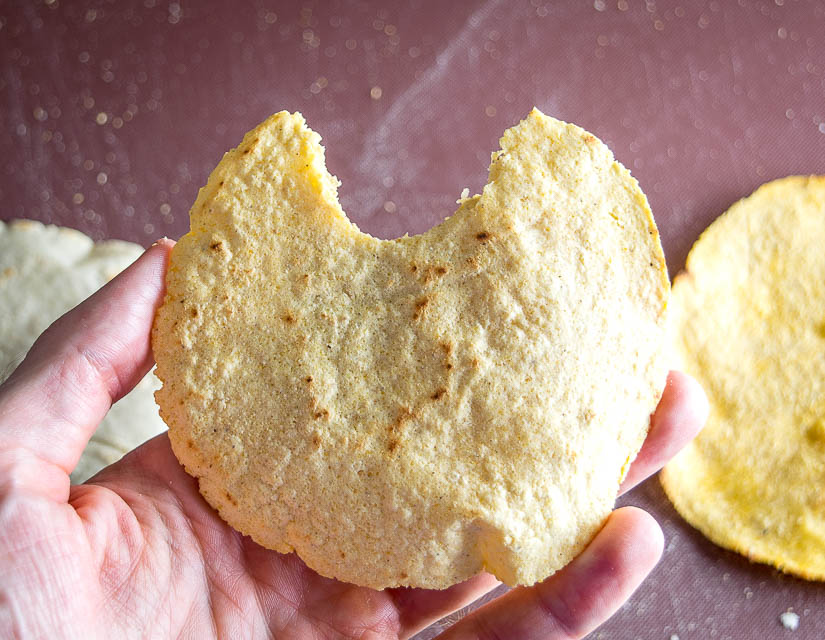
The other, hidden benefit is that your taste buds will now have a built-in tortillameter that you can use to gauge the quality of tortillas sold in your neighborhood.
This will help you stay away from store-bought tortillas that have strayed too far from the original process.
How To Make Corn Tortillas
First things first, get some Masa Harina in the house!
Here are the three brands that are most common in the States: Bob's Red Mill, Maseca, and Gold Mine.

Maseca is the most common brand and it's a worthy starting point. Lately I prefer the flavor of Bob's Red Mill so keep an eye out for that one too. More info on comparing these Masa Harina brands.
Update: Bob's Red Mill also sells an organic Masa Harina. More details on organic Masa Harina options.
Okay, here's your starting recipe:
2 cups Masa Harina
1.5 cups of warm water
1/2 teaspoon salt
Add the 2 cups of Masa Harina and 1/2 teaspoon salt to a mixing bowl.
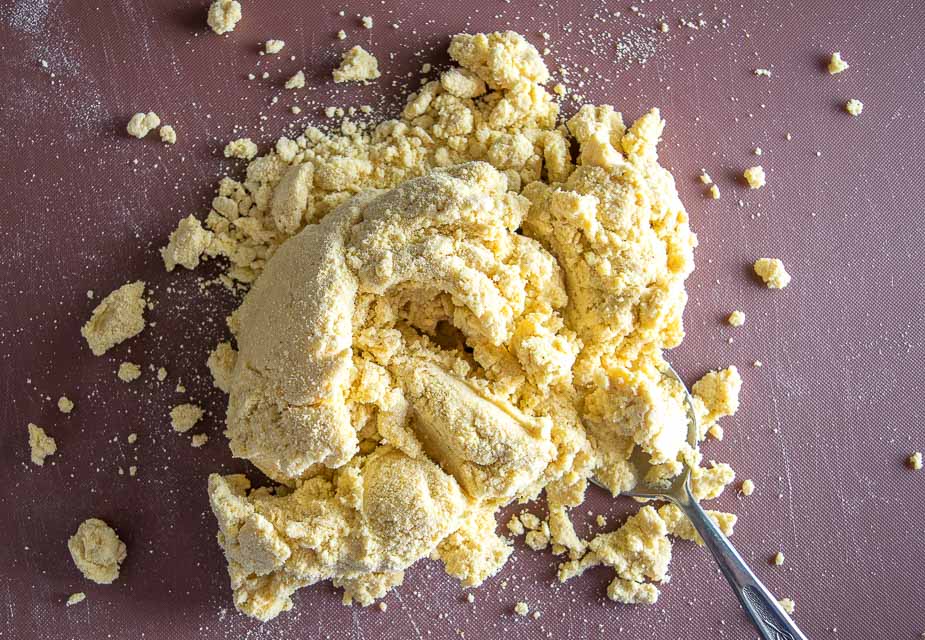
Add one cup of the warm water and stir until all of the water is absorbed.
It will probably look like this:
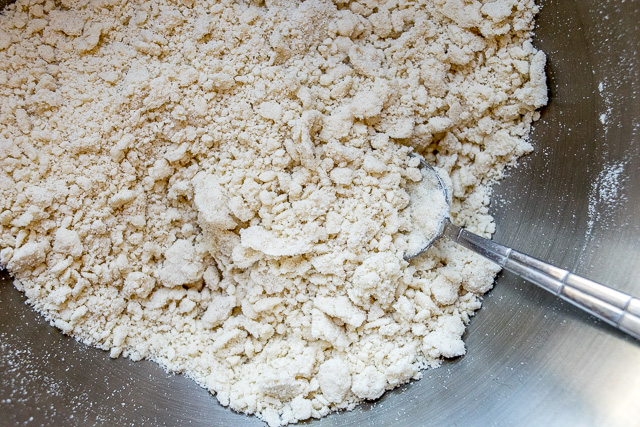
Now start adding the rest of the warm water incrementally, a couple tablespoons at a time, and stirring regularly.
The idea is to keep adding water until the flour bits meld into a dough. At that point you can pick it up with your hands and knead it together.
Eventually it will look like this:
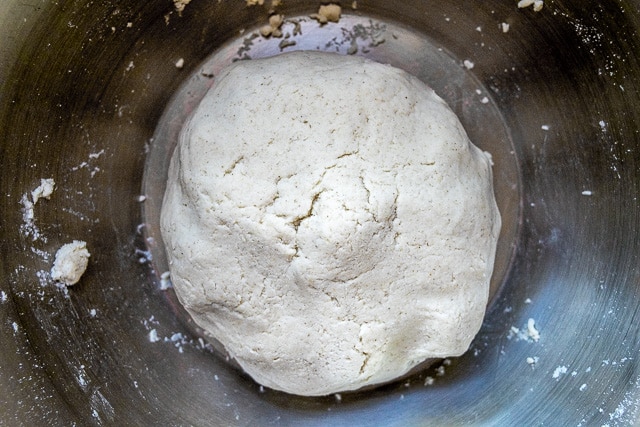
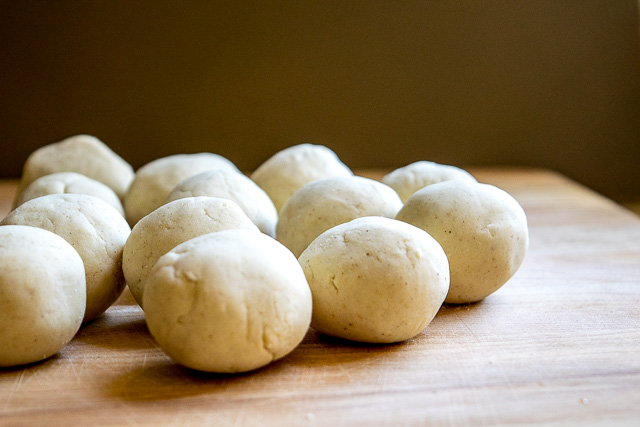
Next, separate the dough into golf ball sized chunks, rolling them between your hands to form a smooth ball.
This will make the tortillas about 4 inches across.
You'll need something to put on either side of the dough ball to prevent it from sticking when you flatten it.
You can use plastic wrap, but I’ve found that a large Ziploc bag cut in half works best:
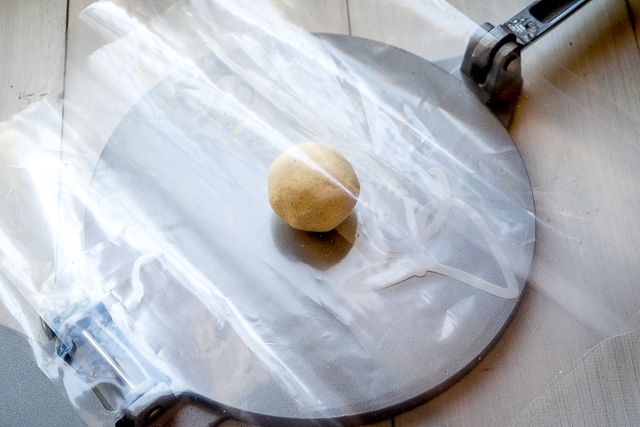
So that’s half a Ziploc bag on either side of the dough ball.
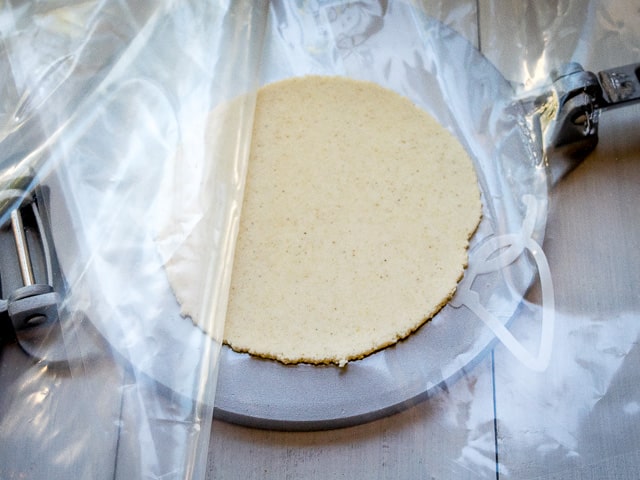
And after flattening it the plastic should peel off effortlessly. If it’s sticking then there's probably too much water in the dough.
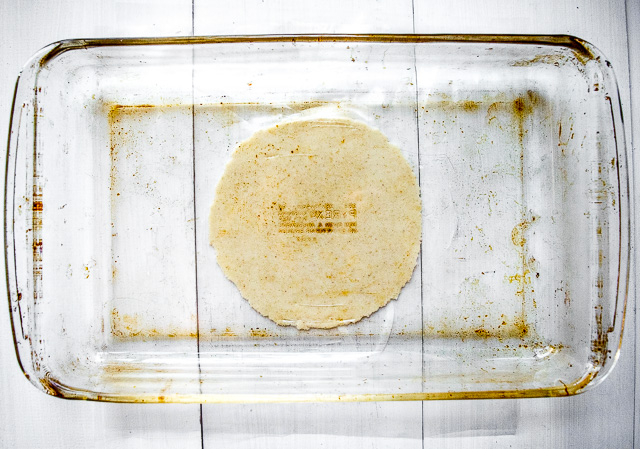
Do I Really Need A Tortilla Press?
No, you definitely don't need a tortilla press, so please don't let that stop you from making your own tortillas!
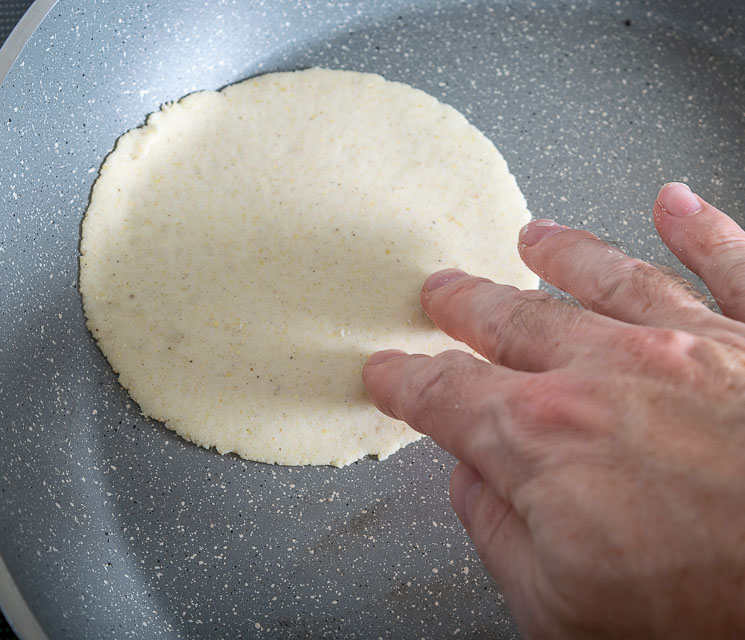
You can use a skillet or any flat-bottomed dish to squish 'em.
Here I'm using a casserole dish and it's just as effective as a tortilla press. Just be sure to put plastic on either side of the dough ball before flattening it.
How To Cook Your Corn Tortillas
Okay, there are two schools of thought when it comes to cooking the tortillas.
The first simply cooks them on each side for about a minute, or until brown spots start to appear on the underside.
The second school flips the tortilla 10 seconds after putting it on the skillet and then cooks each side for about a minute. The idea is that those first 10 seconds will seal in some of the heat and help the insides cook quicker.
I’ve found the second method makes the tortillas lighter and fluffier, so I use that one. It’s a little bit more work, but I think it’s worth it.
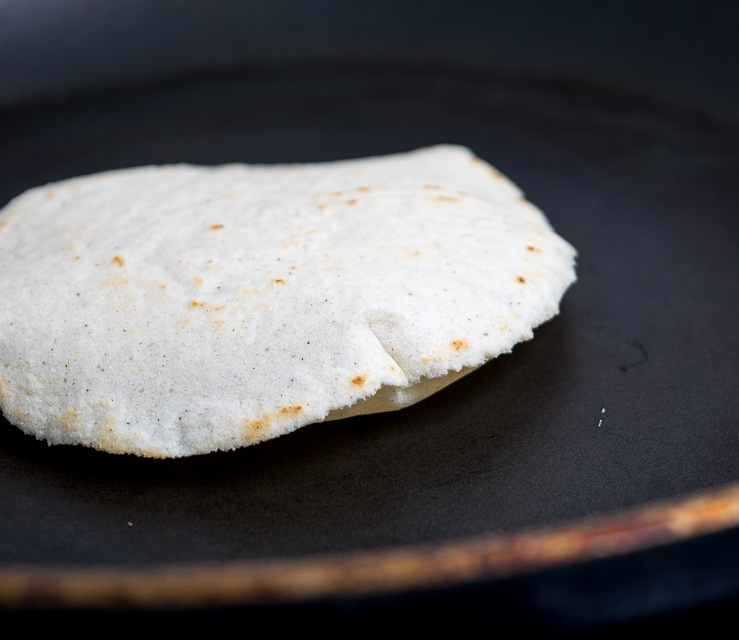
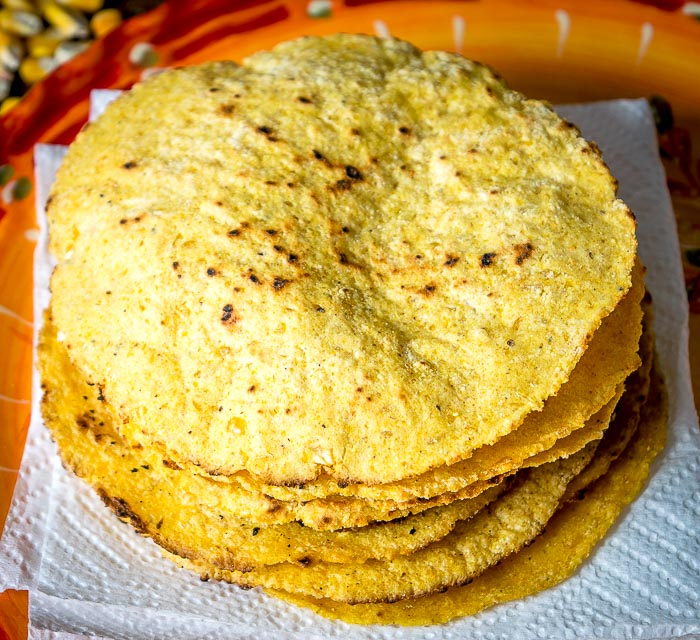
So again...heat the skillet to medium-high heat. Add a tortilla and flip after 10 seconds, then cook each side for about a minute or until brown spots form on each side.
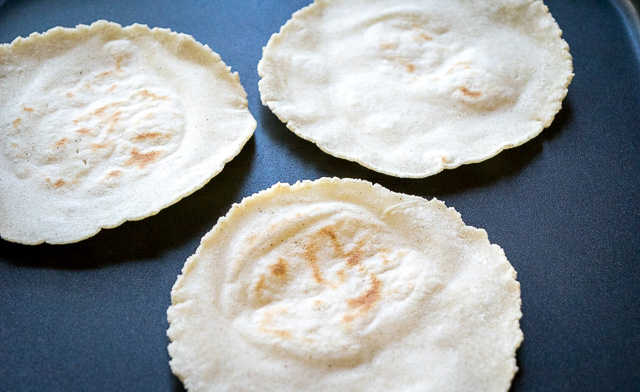
Don’t be surprised if they start to puff up during cooking, that’s a good sign!
You can also try pressing down on them with a spatula once you flip to the final side -- sometimes this will make them puff up instantly!
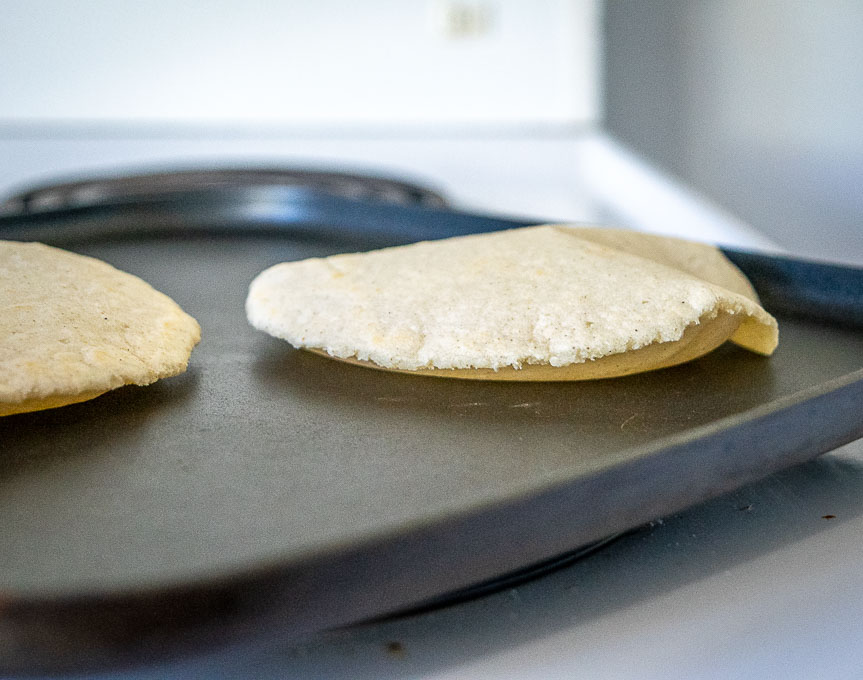
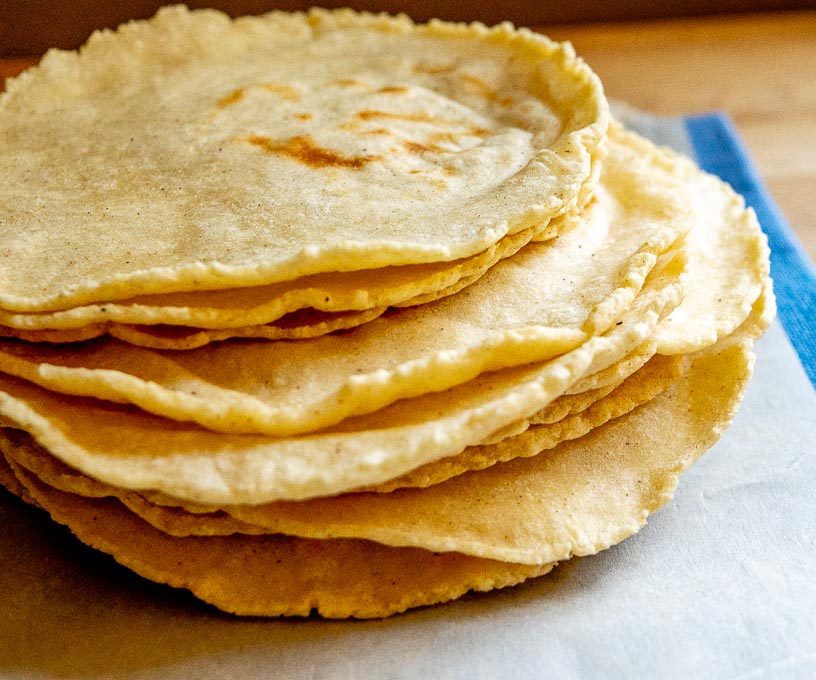
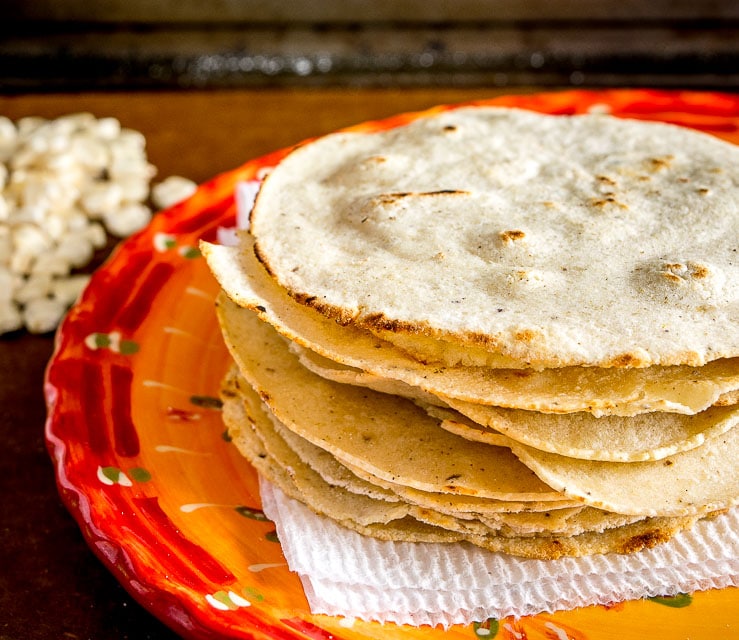
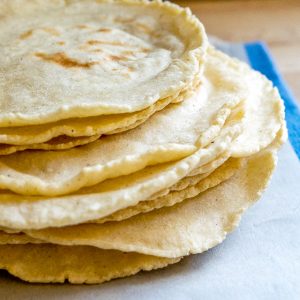
Eventually, you’ll have a stack of warm, steaming corn tortillas.
They are best eaten as soon as possible. If you want some friends for life feel free to share with neighbors.
Tips For Making Tortillas The First Time
There are two main sources of frustration that you should know about before venturing into tortilla land.
First, getting the consistency of the dough right can take some fiddling.

Ideally, you can handle the dough without it sticking to your hands. If it's sticky then simply add a few sprinklings of Masa Harina to dry it out.
And conversely, if the dough is crumbly and not coming together then it means you are low on water. Simply add splashes of water until it forms a cohesive ball.
That's why I typically recommend adding the final 1/2 cup of water incrementally -- this will help you find the right consistency quicker.
And the second pitfall is the temp of the stove. You might need to make a tortilla sacrifice to get the temperature of the stove right so don't sweat it if this happens!
For my stove that means a little over medium heat does the job.
This will have brown spots forming on the underside in about 60 seconds or so. This also makes it easy to flip the tortilla with your fingers as it will be sliding around the pan in a matter of seconds when the temp is right.
If it's taking significantly longer for brown spots to form then you'll need to raise the heat. Conversely, if you're getting black spots forming in a matter of seconds then you need to lower the heat.
How To Store Corn Tortillas
These are best eaten right off the skillet! But you can keep them warm by simply wrapping them in a tea towel or by using a dedicated tortilla warmer.
They'll keep for a few days in the fridge, but don't forget that you'll need to reheat them to bring them back to life after they have chilled down.
I always use a dry skillet over medium heat to do this -- simply add as many tortillas as you need to the skillet and give them 30-60 seconds per side to warm up. Using the stovetop will also crisp them up slightly and that's when they are most tasty.
Can I Freeze The Tortilla Dough?
I haven't tried freezing the masa dough but I 've gotten multiple emails saying it doesn't work! Once thawed the masa dough seems to be crumbly. Sure, you could probably add some water to rebuild it, but it would probably be quicker and tastier to start over.
Instead, I will sometimes use only half of the dough to make tortillas and store the rest of it in the fridge where it will keep for at least a few days.
Simply wrap the leftover dough in plastic and foil, and then store it in the fridge. The next day you can pull off a chunk, flatten it, and cook up a warm, homemade tortilla in a matter of minutes 🙂
Okay, I hope this solves Homemade Corn Tortillas for you! For reference, here are some additional articles on my site to fill in any gaps:
- 3 Different Masa Harina Brands To Choose From
- Organic Masa Harina Options
- What the heck is Nixtamalization?
- Trying out the Masa Harina from Masienda
- Homemade Masa Dough Using Dried Field Corn
- Corn Tortillas Made With Fat
- Masa Harina vs. Cornmeal: What's the Difference?
- Masa Harina Cornbread
- Corn Tortillas Made From Popcorn Kernels
- Half and Half Tortillas (Corn + Flour)
Please use this post as permission to just go for it! Making your own corn tortillas is a massive upgrade for your home kitchen -- plus it will give you an expert tortillameter for life 🙂
Buen Provecho.
Want the latest recipe? Click your favorite from these options and follow me: Instagram, Facebook, Pinterest, TikTok, YouTube.
Homemade Corn Tortillas
Ingredients
- 2 cups Masa Harina
- 1/2 teaspoon salt
- 1.5 cups warm water
Instructions
- Add 2 cups Masa Harina and 1/2 teaspoon salt to a mixing bowl. Add 1 cup of the warm water and stir until the water is absorbed. Add the rest of the water incrementally until the flour melds into a dough. Use your hands to knead the dough into a cohesive ball.
- If the dough is sticking to your hands simply add a few sprinklings of Masa Harina to dry it out. Conversely, if the dough is still crumbly then you can add splashes of water until it becomes cohesive.
- Separate the dough into golf ball sized chunks, this will make tortillas approximately 4 inches across.
- Flatten the dough balls using a flat bottomed pan or a tortilla press. Be sure to line each side of the dough ball with plastic or Ziploc pieces. I usually just cut off the top of a gallon sized Ziploc bag and then make slits down the sides, leaving it connected at the bottom.
- Heat a skillet or comal to medium-high heat. (Lately I use a tad over medium heat on my stove and this will have brown spots forming in about 60 seconds.)
- Add a tortilla to the skillet and flip it after 10 seconds. Then cook each side for about a minute or until light brown spots are forming on the underside.
- Continue cooking the rest of the tortillas. I usually put one in the skillet and flatten the next one to expedite the process. Once cooked you can keep them warm by wrapping them in a tea towel or using a dedicated tortilla warmer. Serve immediately.
- Store leftovers tortillas in an airtight container in the fridge. To reheat, cook them in a dry skillet over medium heat until warm and crispy.
Notes
This article we wrote on types of tortillas has a current list of all the tortilla recipes we have on our site, including this one for making corn tortillas from fresh masa dough.
We also just used some Masa Harina to make a batch of Tamales.
And our latest post shows how to make a batch of tortillas from dried White Olotillo Corn.

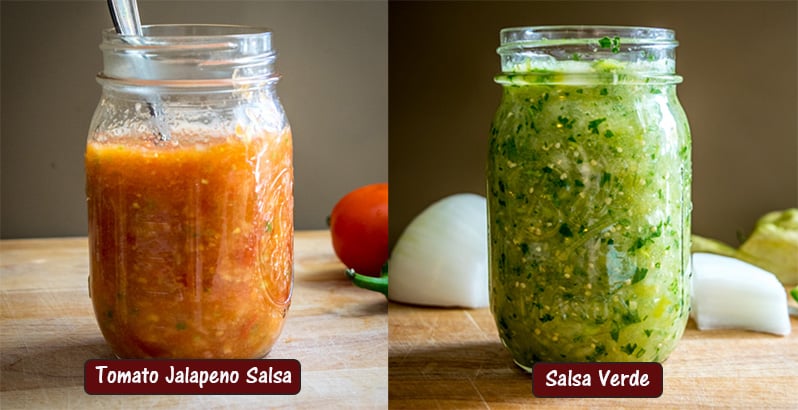
Wondering which Salsa to make first? Check out this page.
Still hungry?!
Want to receive Mexican Please recipes via email when they are posted? Sign up below to subscribe. All recipes are spam free.
Patrizia
Hello there, can I use yellow corn flour?
Thanks,
Patrizia.
Patrick
Hi Patrizia, sometimes the labeling can get confusing but you'll have the best success using Masa Harina for this recipe. Here are some brands to choose from:
Masa Harina brands
There are also corn flours out there that are not Masa Harina, meaning that the corn has not been nixtamalized, and those corn flours won't give you the same flavor so I usually don't recommend them. Cheers.
What's the Difference Between Masa Harina and Cornmeal?
Alexander
Thanks for this recipe! I know masa harina is quite a different product than “normal” corn flour. But do you think it is possible to make these tortillas with normal corn flour or maybe corn flour from the brand P.A.N. (supposedly that flour is meant for arepas, as far as I know, but maybe?)? Those are the only types available where I live ..
Patrick
Hey Alexander! That PAN flour is a precooked cornmeal mixture that hasn't been nixtamalized so it probably won't have the same flavor as traditional corn tortillas. I get this question occasionally so I will try to experiment with a batch soon. In the meantime, do you have any online options for masa harina in your area?
margaret Hefner
I understand that Maseca is the handiest product to get you from 0-tortillas but that product is crap. It's GMO, first of all but that's only the beginning of the problems it causes for the health of Mexico. Consider adding information for your readers about alternatives, and what to look for. In the first place, Bob's Red Mill makes a non-GMO masa harina that's distributed across Canada and US. But beyond that there are lots of tortillerias where you can buy masa nixtamalizada - freshly made, not from a dehydrated flour (harina) and adhering to traditions. Masienda is one in LA and they do mail order masa harina if you can't get there to buy the dough itself but in a lot of cities, now, you can get the fresh product. I'm hosting Zoom cooking classes right now that connect with plant foods in Mexico and I'm trying to make sure our attendees avoid Maseca. Would love to tell you more, if you're interested!
Patrick
Hi Margaret thanks much for your notes. For anyone who is interested, here are some posts on the site that talk about the products you mention:
3 Masa Harina Brands To Choose From
Making Corn Tortillas With Masienda Masa Harina
Cheers.
Tracey
I started making homemade corn tortillas a few weeks ago and I could not get them to puff up, which every video and recipe I watched and read says “it’s a good thing”. I was super frustrated! Then, I came upon this recipe. That 10 sec. flip is magic. Now, my tortillas puff every time and have the texture I was looking for. 10/10.
Patrick
Thanks Tracey, I'm so glad you found this post. Happy puffers 🙂
Erin
Can I use Maseca Nixtamasa for this recipe? What’s the diff in nixtamasa and Harina? Nixtamasa is what I have onhand. About to try (my second time around...first time was a flop so I decided to look for a recipe online which led me here...) making some for our carnitas this evening. Thoughts on Nixtamasa in place of the Harina?
Thanks so much!
Patrick
Hey Erin! Yeah you can use that Nixtamasa for your tortillas so I would go for it. I'm pretty sure the only difference between that and a traditional bag of Maseca masa harina is the addition of a softener (CMC gum?) to help prevent cracking, but it should give you an equally good result. Cheers.
Kristin
I've probably commented on this recipe before but I still refer to it constantly. In fact, that's why I'm back! I made tortillas this weekend (using this recipe) and did street tacos with shredded pork and pineapple salsa, and then turned the 2 day old corn tortillas into TAQUITOS after a brief steam in the microwave. They were so good I'm back to make a smaller batch for the dregs of pork hiding in the fridge.
I will say I have found the 10 second flip is absolutely KEY. As is the towel basket. I use a small square Pyrex that has a snap-on plastic lid as my "tortilla warmer," although I make them so often I should probably buy a proper one. Anyway all this is to say other recipes online don't talk about these critical steps and I always want to yell at them as they're setting up hopeful tortilla eaters to face the crushing defeat of cracking corn tortillas. Keep up the good work Patrick! You have made my life more corny, in the best, most delicious way.
Patrick
Oh snap I'm so happy I've made your life more corny 🙂 Seriously though thanks much for your notes Kristin as it's super helpful for peeps to hear about your routine. Cheers.
Lisa
I've been making tortillas this same way for a few years. I've gotten good enough at it that I long ago stopped buying tortillas at all, it's so easy to whip up a batch of exactly what I need.
I've never gotten those brown spots, though. 🙁 I keep wondering, maybe it's my Circulon pan?
Patrick
Hmmm that's interesting. I haven't used those pans but I think it's more likely due to stove temp. You could sacrifice one next time and do a test to see how long it takes to form those brown spots -- just leave it in there and keep peeking on the underside. If it's taking significantly longer than a minute then I would probably turn up the heat a little. Cheers.
Lisa
Hi Patrick, the flavour of the tortilla is delicious. My tortilla keeps falling apart, but the mixture seems the perfect consistency; not too dry or wet. Do you have any suggestions about how to get it right?
Thank you
Lisa
Patrick
Hi Lisa, if they are crumbly or falling apart it usually means there's not enough water. I would try adding splashes of water to make the dough more cohesive. Cheers.
Alma
Hi Lisa. Also use warm water. I find the hotter it is, the better my tortilla. Just add water as hot as you can take it! Then, keep adding water till you get that play dough consistency.
Alice
How long do these generally keep for in the fridge? And would you cook them before storing in the fridge for future meals?
Patrick
Hi Alice, they'll keep for a few days in the fridge. But lately I prefer to keep some of the dough in the fridge as opposed to cooking all of them at once as they will always taste best right off the stove. Then you can simply pull off chunks of dough and make them to order over the coming days. I usually wrap the dough in plastic and foil and it seems to keep for 3-5 days. Cheers.
Jason
So good! The recipe worked perfectly the first time too.
Patrick
Thanks Jason!