I've been getting questions about the process of starting a food blog, with the most common one being...Is it easy to start a food blog?
And the answer is yes, it is easy! You can have your food blog (or any website) up and running within the next 10 minutes if you want. I'll outline the basic steps below and you can send me an email or use the comments section at the bottom of the page to ask any questions about the process. Bueno?
Starting A Food Blog
First, I'm going to assume that you want to keep costs down. A low startup cost means you can easily keep your blog afloat until the passive income starts rolling in. In fact, you'll probably be surprised how little you need to get started.
Of course, in order to keep costs down there is some do-it-yourself required, but trust me it is super easy and anyone with even a hint of computer experience can quickly set up a blog to their liking.
The easiest way to keep costs down is to run your site using WordPress. Why? Because it's free! WordPress is open source and easily the most popular content management system for millions of websites out there.
WordPress makes it easy to add content (posts) to your website just by typing them into a simple text editor. Then, behind the scenes, it converts your post into the requisite format so the entire world can access it on the web. But just because it's free doesn't mean it's second-rate; you can accomplish just about anything you want to by running a site on WordPress.
So while WordPress itself is free, you will have a couple other up front costs that cannot be avoided no matter how hard you try: domain name, hosting, and a theme. But don't worry, it's possible to keep these costs low and still create a website that can easily compete with the traffic leaders in your niche.
Choosing a Domain Name
Okay, first you need a name for your site. Got one already? If not, then simple, readable domain names are usually recommended, the kind that people can remember easily. Imagine telling your website name to a stranger in an elevator, if they have to ask again for the name or need it written down then you probably have room to simplify.
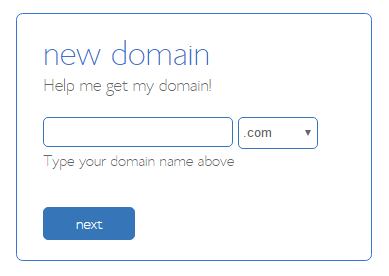
Before you get attached to your domain idea it's best to check to see if it's available. Type it into a domain checker like this one at Bluehost (click the hosting tab and choose domains if the domain checker doesn't pop up right away).
If it's available you just got lucky! You'll find that most of your domain ideas will be taken. That's okay though, you just have to get a little creative and you'll have plenty of options.
Some companies like Bluehost are known for both domain registering and web hosting. Others, like GoDaddy and Namecheap, seem to specialize in domains. GoDaddy is the more established brand, and Namecheap is known for being, well...cheaper, without necessarily losing too much quality. You're looking at $10-20 per year for each domain that you own. It's a small price to pay to get your site out in the world, but it is an annual charge so don't forget about that aspect.
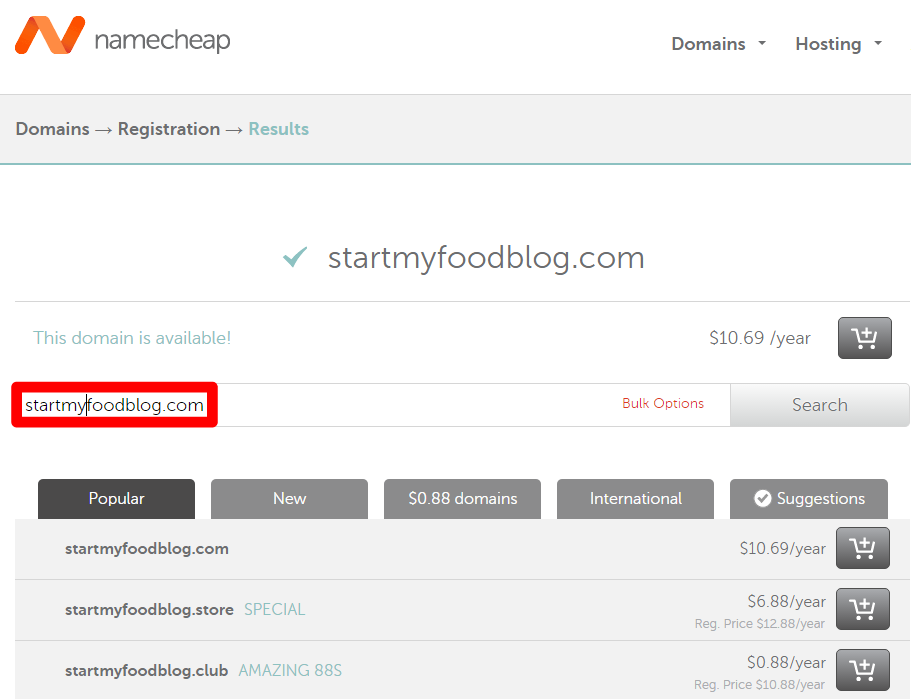
So let's say you want to build a website called Start My Food Blog and you want to do it for as little money as possible without sacrificing quality. In other words, you want your site to look as good as your competitors without costing nearly as much. Here's what happens if you search for Start My Food Blog on Namecheap:
It's available! Let's buy it! Note that domain names with the .com extension are recommended for most sites. You'll see quite a few other extension options, but .com is going to be the one people are most familiar with.
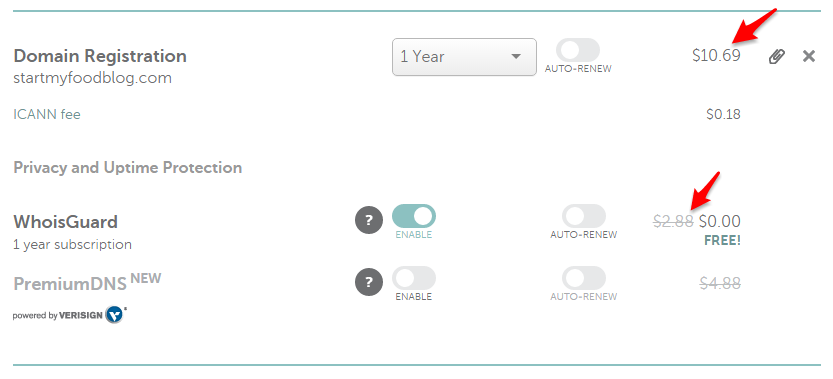
You can also consider adding privacy protection to your domain; this will keep your registration details confidential. I think it's worth it to do this but it's definitely optional. It will add a few bucks per year to your cost but it prevents spammers from being able to find out who owns your website (you!). So on Namecheap you are looking at ~$10 bucks a year for a domain and $3 per year for the privacy protection. It also looks like they give you the privacy protection free for the first year.
Website Hosting
Okay, got your domain registered? Now you need someone to host it online. Hosting providers charge a monthly fee for using their server to broadcast your site to the world. Think of this as renting a parking place for your website online.
The easiest way to keep costs down is to go with a shared hosting plan from one of the bigger names like Bluehost or Hostgator. The costs of a shared hosting plan are lower because the hosting company will put multiple websites on a single server. And since most new websites have very little traffic, they can put dozens of sites on a single server without it getting clogged up.
This type of hosting plan will be more than adequate for a new website. Yes, down the road when your site is getting loads of traffic, it will be worth switching to a dedicated server, i.e. a non sharing server, but for new sites just out of the gate a shared hosting plan is the quickest and cheapest way to get an online foothold for your site.
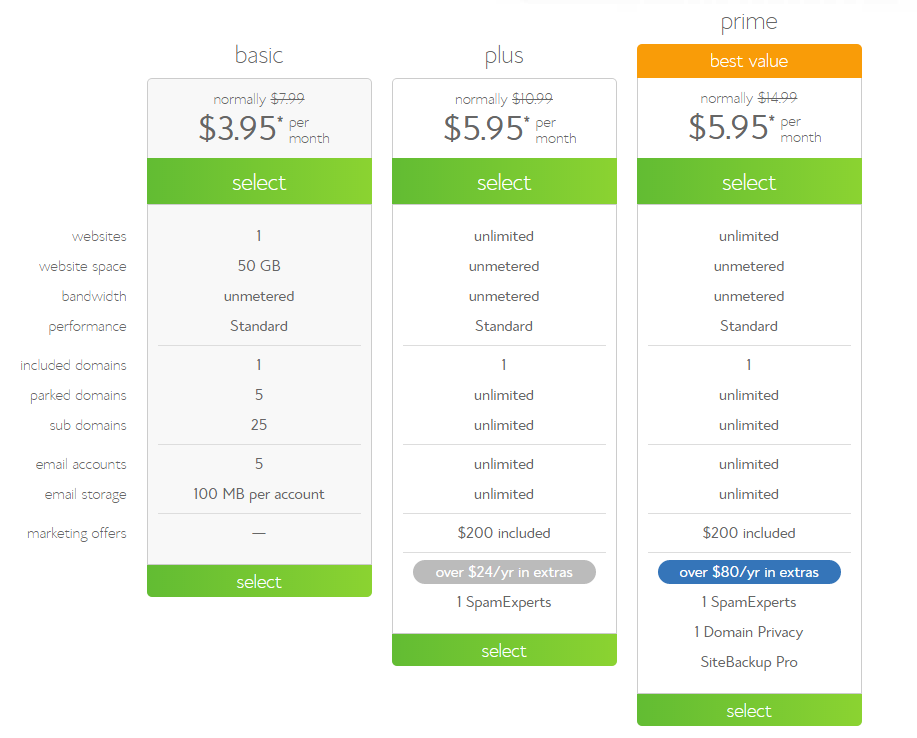
Check here or click the pic below to see the current costs for Bluehost Shared Hosting:
As a new customer you'll get a discounted monthly rate, so the real number to look at is the one that's been crossed out; that's the monthly rate you'll be charged once the introductory period expires. In the middle column above that would be $10.99 per month. But remember, this is going to be the vast majority of your food blog's startup cost, so in the big picture 10 bucks per month ain't so bad right?
It's also worth mentioning that most shared hosting plans will let you add additional websites at no additional cost. Yup, you heard that right. Once you purchase a shared hosting plan, adding additional websites are free (for domains that you own). This is assuming you don't choose the cheapest plan; see the 'websites' entry in the above pic and note how it says unlimited for only the middle and right hand plan.
Since I currently use Bluehost, adding a brand new site like Start My Food Blog to my current hosting plan is free. Cool right? Website hosting is a hyper-competitive industry and the hosting companies like to tell people they can have unlimited bandwidth and host unlimited websites. Of course, once your site starts getting tons of traffic they will strongly suggest a dedicated server, but in the meantime, for the purpose of websites just starting out in the world, a shared hosting plan is one of the easiest ways to get started.
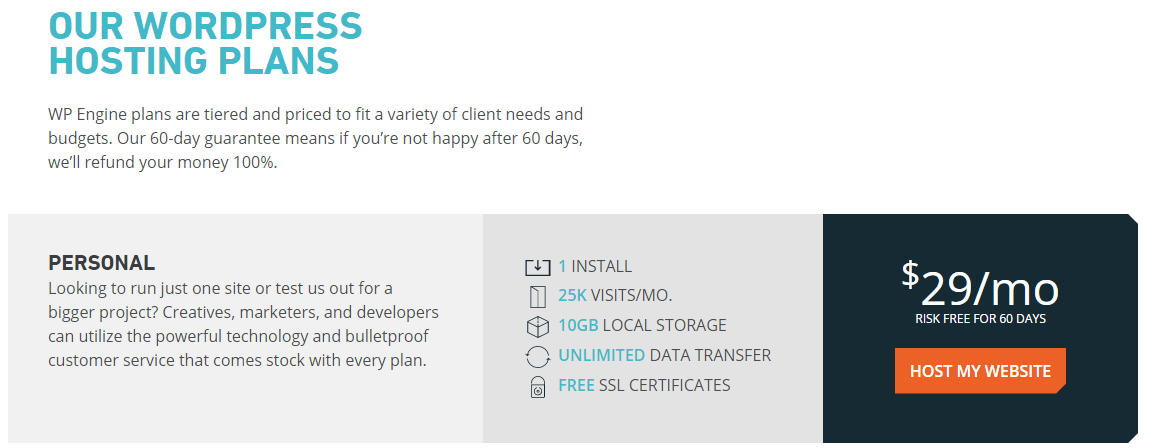
When the time does come and you are getting thousands of page views per day, you'll start to look around at dedicated server options. This means it's just your site on the server, you aren't sharing it with anyone else. Of course, this comes at a greater cost. WPEngine and Cloudways are both trusted hosting companies to look at when your blossoming food blog needs a bigger parking spot. Click here to see the current monthly rates for WPEngine and here for Cloudways.
You may have also noticed the 'included domains' in the above Bluehost pic. Most hosting companies will pay for your domain registration for the first year when you sign up a hosting plan. This does make it a little cheaper to get started, but I like the flexibility of having my domains registered separately from my hosting plan. So when the time comes and you want to switch hosting companies, you won't have to worry about switching domain registration, it's just a matter of pointing your domain to your new hosting company (this is easy and I'll go over it below).
Installing WordPress to your new website
Okay, got your hosting plan set up? Let's install WordPress into our new site.
First, since I bought the StartMyFoodBlog domain on Namecheap, we'll need to let them know that we are hosting the site on Bluehost. If you registered your domain with Bluehost you don't have to worry about this step.
In the Domains tab in your Namecheap account, enter the Bluehost servers in the nameservers tab:
This will link your domain to your hosting plan on Bluehost. Here's a support link on how to change nameservers for other domain registrars.
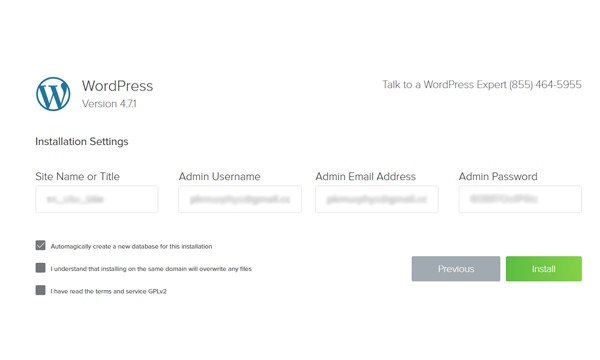
Next, log into your Bluehost cpanel account here. Scroll down until you find the website section and click Install WordPress.
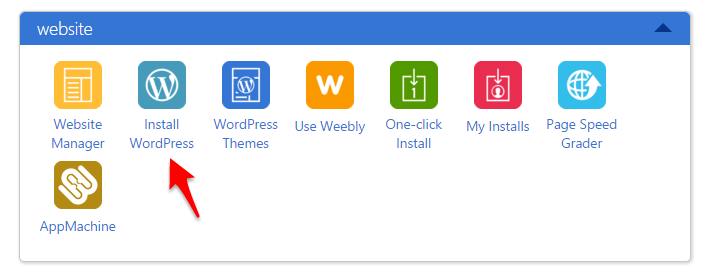
And before you click install, be sure to copy your username and password as shown in the pic below (they'll be sent to you by email as well). You'll use these to log into your WordPress admin page. You can always change them later but just know that you'll need these shortly.
Click install and you are almost done! (Note: sometimes the look of these Bluehost pages will change over time so don't fret if they look different than the ones you are seeing here. Here's the current Bluehost support page for installing WordPress.)
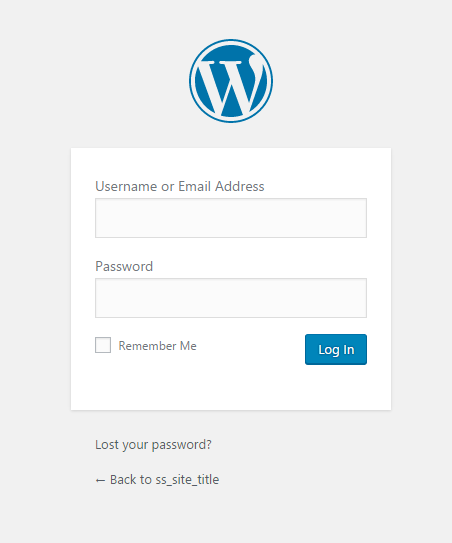
To log into your WordPress dashboard navigate to your admin url. This is your site name plus /wp-admin. So for our brand new site it is startmyfoodblog.com/wp-admin.
And now you can log into your site using the username and password you copied earlier.
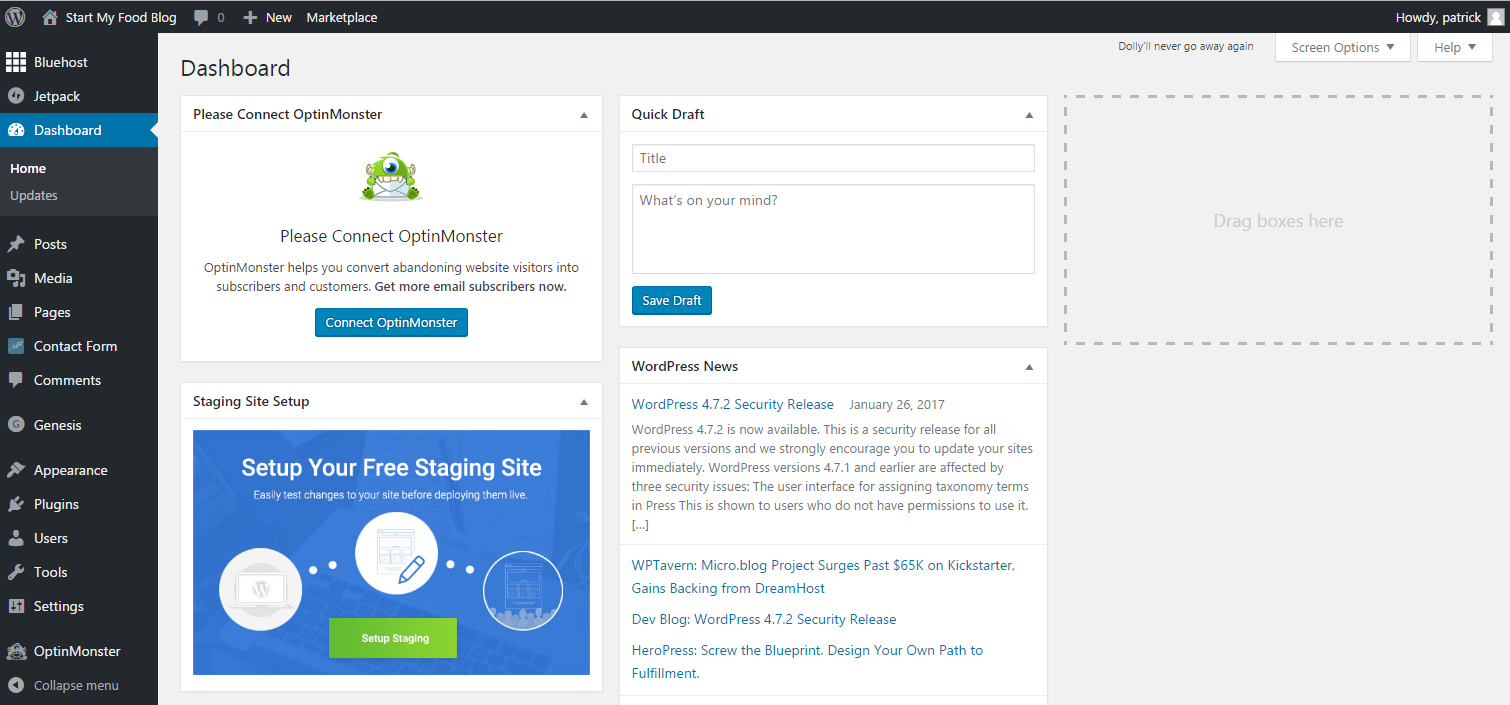
Are you in?!! Welcome to your site's WordPress dashboard!
Now it's time to make your site a bit more user friendly.
WordPress Themes -- What do you want your site to look like?
Okay, you've got the engine (WordPress) installed, now it's time to decide what you want your car to look like. Themes refer to the various models you can choose from.
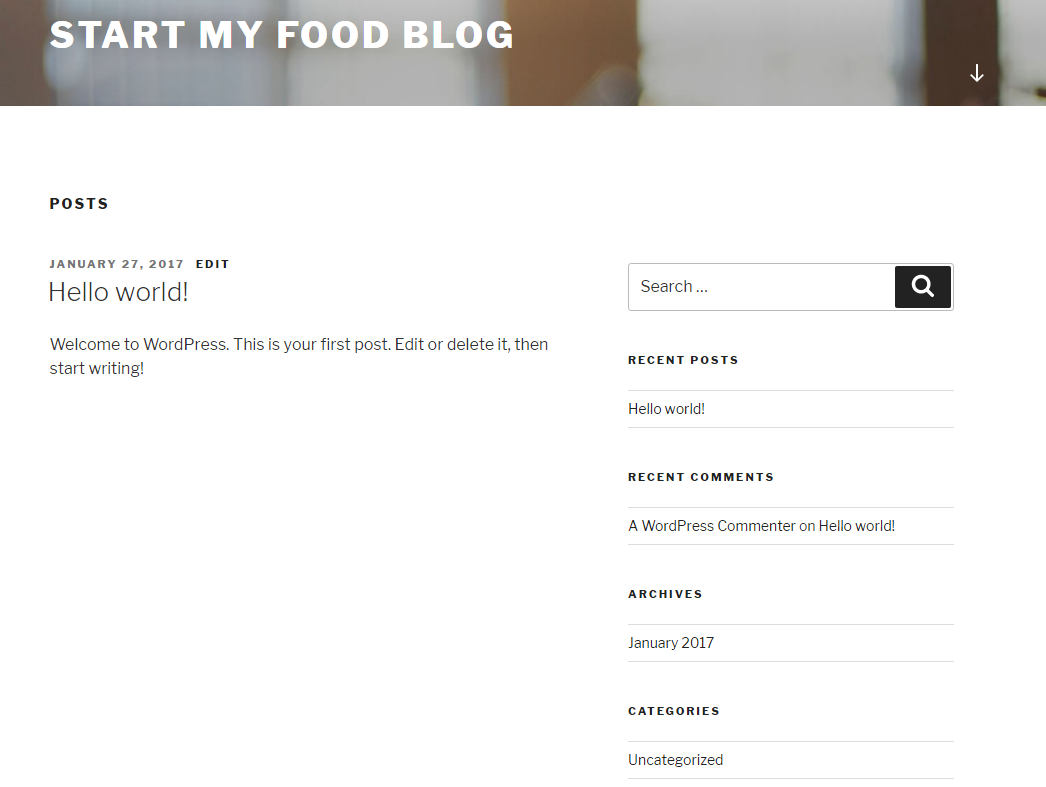
Before looking at the options you've got for premium themes, it's worth noting that there are loads of free options out there. In fact, WordPress will come with some built-in free themes. They might look a little plain to you, but it's a good option if you just want to get some of your content up on the web. Here's the 2017 theme that comes included with WordPress:
A bit lackluster, eh? Luckily, you've got plenty of choices to jazz up your site and the good news is that themes are a reasonable one-time fee, unlike the monthly/annual charges required by domains and hosting plans.
MexicanPlease runs on Genesis and the Foodie Pro theme. Genesis is kind of like a WordPress foundation that allows you to run a number of different themes. Here is the current cost for Genesis and themes range anywhere from $20-80. So basically the overall expenditure for the MexicanPlease theme was $100. This includes future updates and is a one-time fee. Not so bad right?
Here are the current themes that are running on Genesis. Clicking the individual themes will show you pricing and will give you a live demo button to get a sense of how the themes will look on your phone or computer.
There are also two other options worth considering when you're out and about doing some theme shopping.
MyThemeShop has a number of reasonably priced themes designed for WordPress use. They've also got some free options to check out as well. You can browse their themes here.
Elegant Themes is another theme vendor that's been around for awhile. You can see their selection of WordPress themes here.
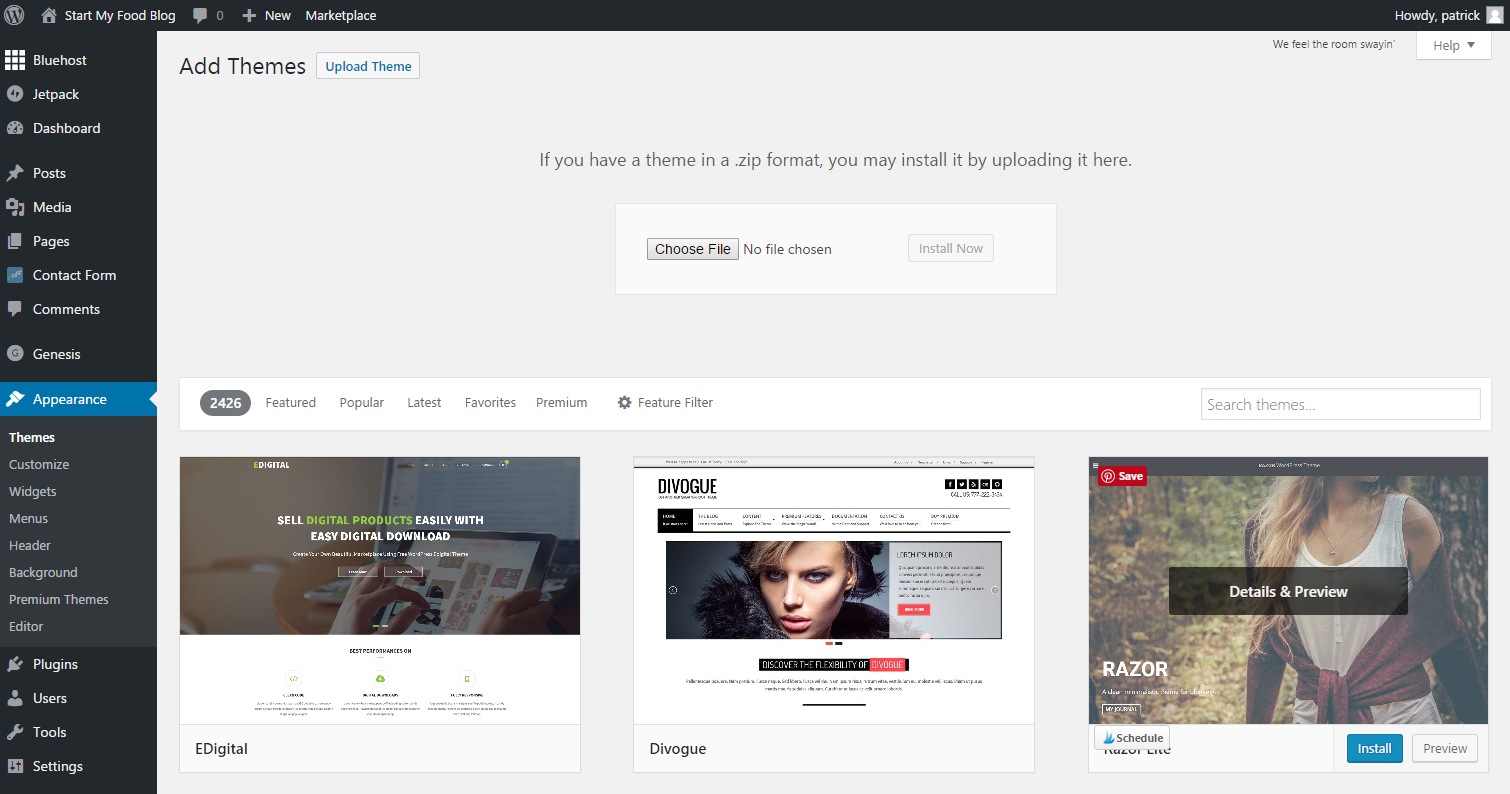
Once you've purchased and downloaded your theme, then it's just a matter of uploading it to your site. You'll find the theme upload page by using the navigation tabs on the left side of your WordPress dashboard. Appearance --> Themes --> Upload Theme.
Then it's just a matter of activating your theme. You can do this by hovering your cursor over a theme and clicking the Activate button.
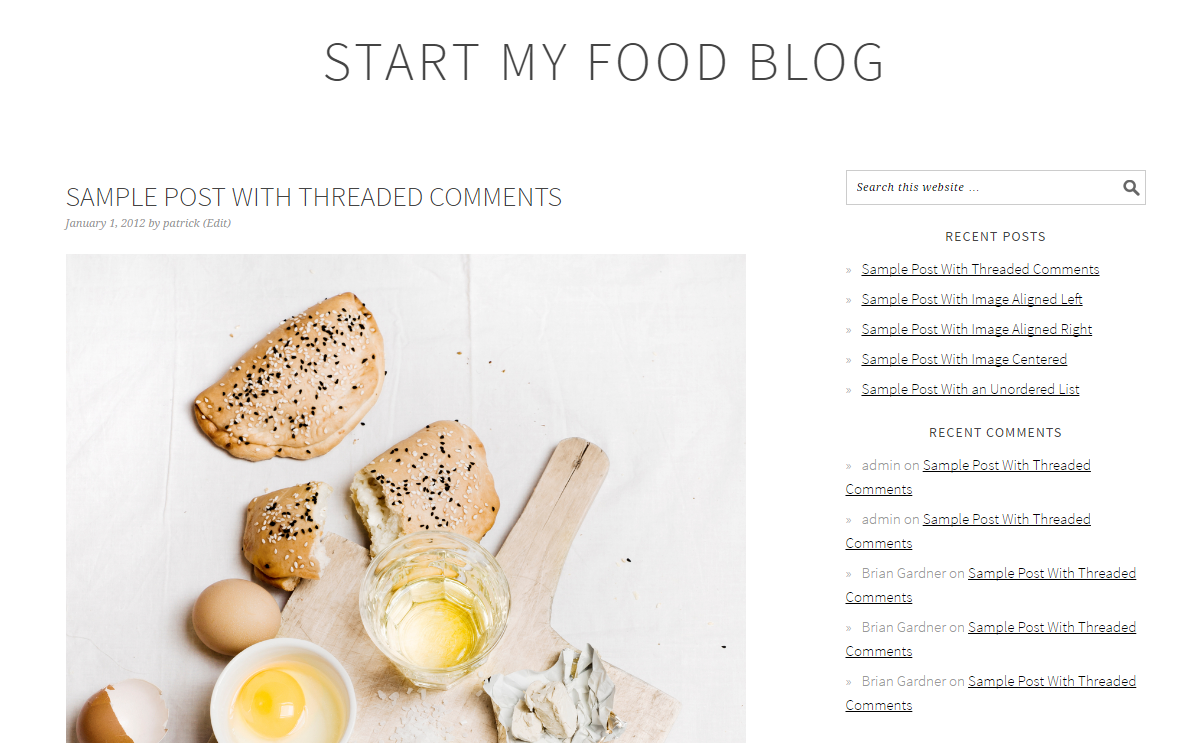
So after uploading the Foodie Pro theme and activating it we have reached our final destination: a food blog!
That's what Foodie Pro looks like out of the box. Some themes will come with sample content to help you get familiar with the layout of the theme so that's what you're seeing above.
The advantage of using a food-centric theme is that it comes with built-in recipe capabilities. You'll have loads of options on how to organize and display your recipes. Here's what one of the recipe pages looks like on my site:
Then it just takes a little bit of tinkering to add a few menus and you've got yourself a platform to share your recipes and food ideas with the world.
And that's pretty much it. Starting a food blog is easy right? You can do this!
If there is one main takeaway you get from this article I hope it's this...
Not only is it easy to get your website out there for all the world to see, but the do-it-yourself aspect of WordPress means you can do it for very little money and still compete with the established blogs in your niche. No one will know the difference! You essentially have the option of creating one of the most efficient business models in existence: minimal overhead with unlimited potential. That's a great combo to have if you want to bring in some passive income.
Each day Google gets 3.5 billion searches and some of those people want to hear what you have to say!
If you have further questions feel free to use the comments section below and I'll get back to you pronto. Good luck with your new site 🙂
P.S. Don't forget that there is a wealth of support out there for new food bloggers, so you don't have to worry about being isolated and struggling to figure everything out on your own. Food Blogger Pro is a reasonably priced community that makes the plunge rewarding and fun. They only accept new members a couple times a year and you can check them out here to see if they have an opening.
Disclaimer: Yes, there are affiliate links on this page. That means I get a small percentage of the sale if you decide to try it at no additional cost to you. But my opinion is not for sale and I only recommend products that I actually use and trust. Email me if you have questions about this.
Still hungry?!
Want to receive Mexican Please recipes via email when they are posted? Sign up below to subscribe. All recipes are spam free.
