• Skip to primary navigation
  • Skip to main content
  • Skip to primary sidebar
  • Skip to footer

Mexican Please

  • Home
  • Recipes
    • Most Popular
    • Most Recent
    • Salsas
    • Appetizers/Sides
    • Beans
    • Breakfast
    • Dessert
    • Drinks
    • Enchiladas
    • Main Dish
    • Mexican Cooking 101
    • Tacos
    • Soup
    • Tortillas
    • Vegetarian
  • Articles
  • Cooking Course
  • About Me
  • Contact
menu icon
go to homepage
  • Start Here
  • Recipes
  • Course
  • Contact
  • About Me
    • Facebook
    • Instagram
    • Pinterest
  • search icon
    Homepage link
    • Start Here
    • Recipes
    • Course
    • Contact
    • About Me
    • Facebook
    • Instagram
    • Pinterest
  • ×
    Home » Most Recent

    Mayocoba Pot Beans

    April 10, 2019 By Patrick 38 Comments

    1786 shares
    • Share
    • Tweet
    Jump to Recipe Print Recipe

    I've gotten a few emails about these Mayocoba beans from Rancho Gordo and I finally got around to making a batch:

    1 lb. Rancho Gordo Mayocoba beans

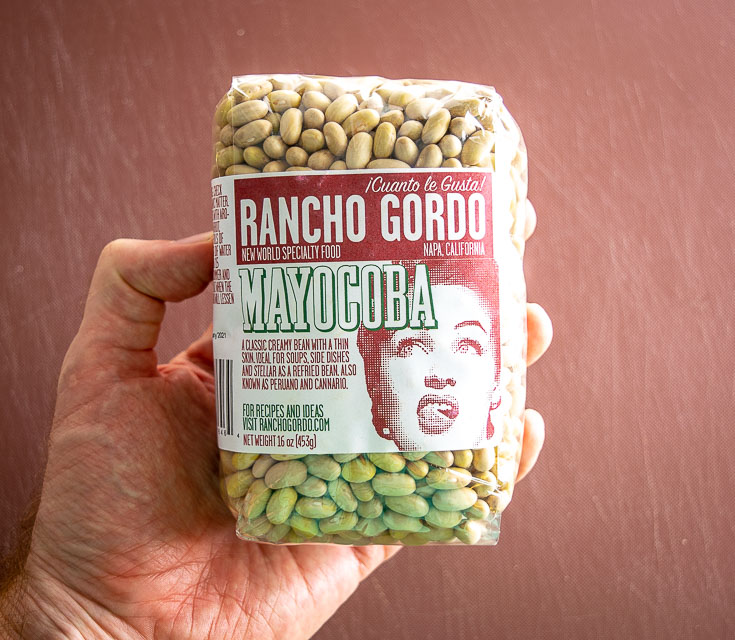
    Overall I thought they were delish and on par with varieties I've tried in the past.  Once cooked they have a mild, buttery flavor that makes them a prime choice for some epic batches of creamy refried beans.

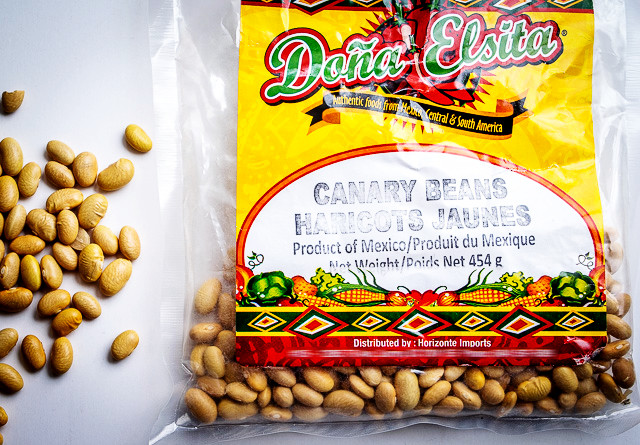
    In Mexico it's more common to see Mayocobas referred to as Peruano or Canary Beans, so if you come across a yellow bean labeled like that in your area then you're on the right track!

    Peruano Beans (aka Canary, Mayocoba, Peruvian, Mexican Yellow Beans) mexicanplease.com

    I don't have any affiliation with Rancho Gordo but they are wildly popular amongst bean fanatics -- they're based out of California and you can see their heirloom bean selection here.  (I've also tried their Cranberry Beans and was happy with them.)

    RG can be a bit spendy so if you fall in love with these beans (definitely possible!) then it's probably worth comparing them to a local option in your area.

    Traditional Frijoles de Olla (Pot Beans) will bypass any soaking and just let the beans simmer on the backburner for a couple hours, so that's what we'll do with this batch.

    And note that traditional versions will simmer the beans in lard.  It gives them a rich, full flavor that you're probably already familiar with.   I will typically use home-rendered lard to make pot beans, but right now all I have is this:

    Bacon fat saved in Mason jar

    That's leftover bacon drippings that I've been storing in the fridge for the past couple weeks.   I've been using it more frequently (in Tortillas and Gorditas) and it's a viable substitute for traditional lard that's rendered from back fat.  And note that you can substitute oil in place of lard but your taste buds might get angry with you!

    Start by rifling through 2 cups of the Mayocobas to check for any rocks or debris.  (A single pound of dried beans will give you a bit over 2 cups worth.)

    I usually give them a quick rinse, removing any floaters or struggling beans.

    Rinsing Mayocoba beans

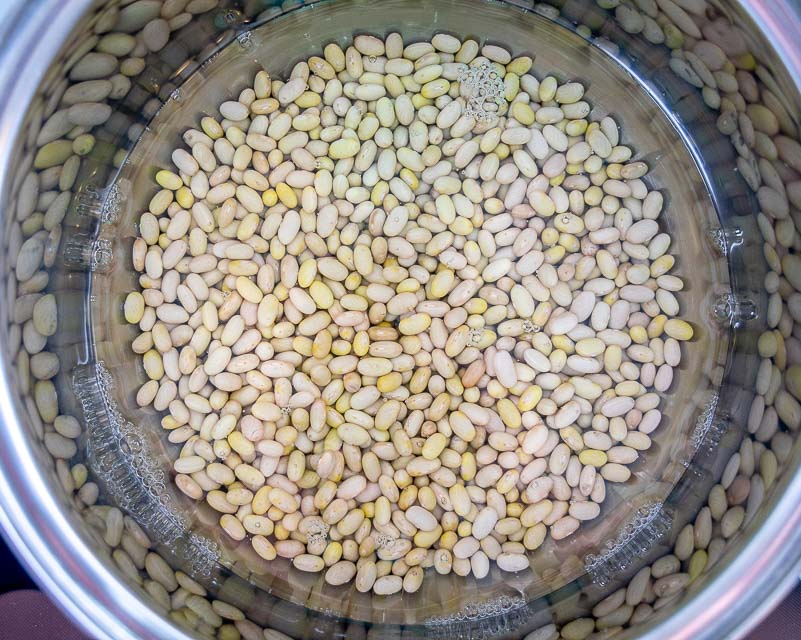
    Drain the rinsed beans and add them to a pot along with 2-3 quarts of water.  You'll want the water level to be about 2" above the beans.  I usually eyeball it knowing that you can always add additional cups of water as they simmer.

    Add 3 tablespoons of the bacon drippings and a roughly chopped small onion.

    Adding onion and lard to Mayocobas

    Bring this to a boil and then reduce heat to a simmer, partially covering them.

    These will need around 2 hours to fully cook but they won't tell you exactly how long.

    It's best to start taking bites of them after 90 minutes or so.  If they are still hard and grainy then you'll know they need a bit more time in the pot.  If the water level gets low and they are no longer submerged simply add some additional cups of water.

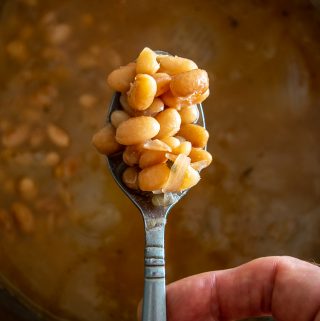
    Here's how this batch looked after 90 minutes:
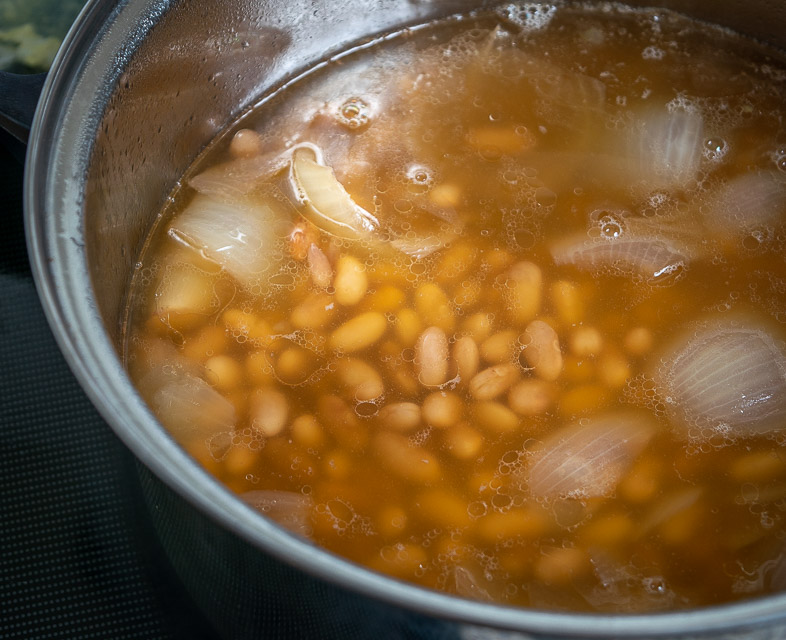
    Mayocoba pot beans after simmering for 90 minutes

    Nice!

    I added a heaping teaspoon of salt at this point and let them simmer for another 20 minutes or so.  This final simmer with the salted broth makes a huge difference in flavor so don't skip it!

    So why not add the salt at the beginning?  Supposedly it affects how they absorb water, but this is something that I would love to test at some point.

    I also added a pinch of Mexican oregano at this point but you can consider this optional.

    Spoonful of Mayocoba beans after cooking for two hours.

    Ideally they are still swimming in some broth when they finish cooking as the broth is delicioso and it makes it easy to control the consistency of your epic refried beans that are on the horizon.

    Take a final taste for seasoning, adding more salt if necessary.  Beans are hypersensitive to salt amount so don't be shy with it the first time you make these beans.  I added another generous pinch so that is about 2 teaspoons total for this batch.

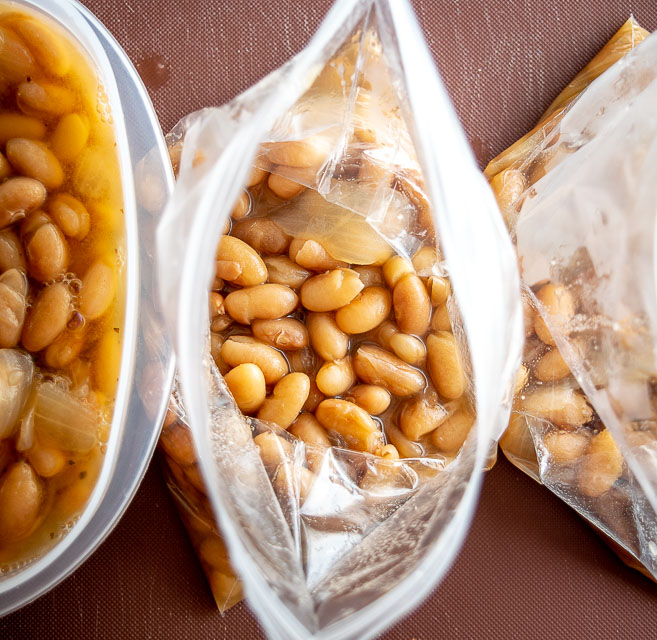
    Cooked beans will only keep for a couple days in the fridge so I usually portion out 1-cup servings and freeze a few of them.

    Portion beans into ziploc bags

    You can serve them as is but one of the advantages of having broth leftover is that it makes it easy to whip up a batch of refried beans.

    You can simply add the beans and broth to a skillet over medium heat.  Once heated you can easily smoosh them with a firm spatula.  Cook until they have the consistency you prefer.  To thicken them up let them cook longer.  To thin them out add a splash of water.
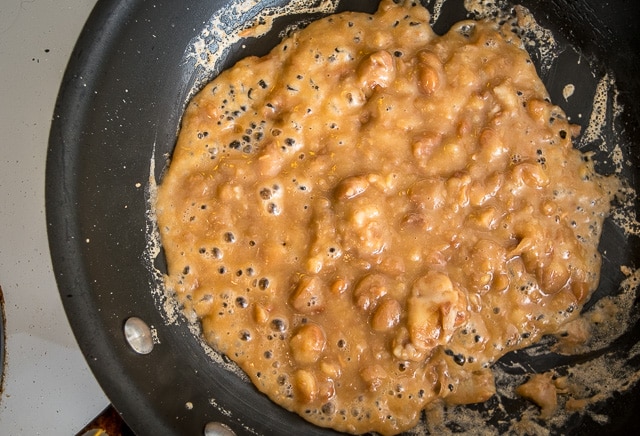
    'Come and Get It' Huevos Rancheros Skillet mexicanplease.com

    Yum!

    Cooked this way they are already delicious, with a buttery consistency that makes them a great alternative to Black and Pinto.

    But of course for a traditional batch of refried beans you'll want to cook them off in a tablespoon of, you guessed it, lard!  Along with a bit of onion.  You could use a tablespoon of bacon fat along with 1-2 tablespoons finely chopped onion and you'll have some very happy campers in your household.

    And if you want to go full flavor you can always make something like these chipotle infused refried beans.

    However you fry them up, it's worth keeping an eye out for these Mayocoba/Peruano/Canary beans in your neighborhood.  And if you don't spot any then give the Mayocobas at Rancho Gordo a try -- it's a great way to see if your taste buds want them in your kitchen.

    Buen Provecho.

    Spoonful of Mayocoba beans after cooking for two hours.

    Mayocoba Pot Beans

    Here's an easy way to get some Mayocobas (Peruanos) in your life!  I cooked this batch in bacon fat but you can use lard if you want (or oil).
    4.69 from 32 votes
    Print Pin Rate
    Prep Time: 5 minutes minutes
    Cook Time: 2 hours hours
    Total Time: 2 hours hours 5 minutes minutes
    Servings: 12 (6 cups)
    Calories: 59kcal
    Author: Mexican Please

    Ingredients

    • 2 cups dried Mayocoba beans
    • 1 small onion
    • 2-3 tablespoons bacon drippings (or lard)
    • 1-2 teaspoons salt (plus more to taste)
    • 2-3 quarts water
    • pinch of Mexican oregano (optional)

    Instructions

    • Sort through the beans and discard any rocks or shriveled beans. Rinse and drain well.
    • Add beans to a pot and cover with 2-3 quarts of water, or so the water level is 2" above the beans. Add the roughly chopped onion and 2-3 tablespoons of bacon drippings (or lard). 
    • Bring to a boil. Reduce heat to a simmer and partially cover. Let simmer for 1.5-2 hours.  Ensure that the water level is well above the beans by adding more water as they cook if necessary.  
    • Start tasting them after 1 1/2 hours. If they are hard or grainy they need a little more time.
    • Once cooked add 1 teaspoon of salt and simmer for another 10-15 minutes.  I also added a pinch of Mexican oregano at this point.  
    • Give a final taste for seasoning, adding more salt if necessary.  I added another generous pinch, so that is about 2 teaspoons total.   Serve immediately.
    • If you want, portion them into 1 cup sized bags along with plenty of the broth for freezing.  

    Notes

    You've got three options to make refried beans out of these cooked Mayocoba beans:
    Add them to a skillet over medium heat along with plenty of the broth.  Once warm smoosh them with a firm spatula or a potato masher.  To thicken them up let them cook longer.  To thin them out add a splash of water. 
    Saute 1-2 tablespoons of finely chopped onion in a tablespoon of lard (or bacon fat).  Once the onion is softened, add 1-2 cups of beans along with some broth.  Once warm smoosh with a spatula or potato masher. 
    Add even more flavoring by making something like these chipotle infused refried beans. 
    Like this recipe?Click the stars above to rate it or leave a comment down below! @mexplease

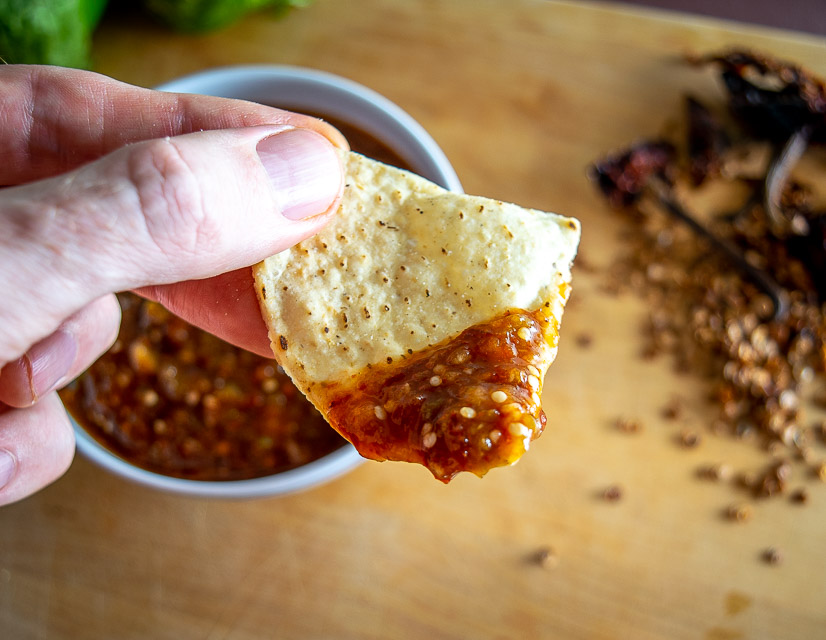
    Our latest post is this fiery Pasilla de Oaxaca Salsa. 

    Taking a bite of Pasilla de Oaxaca Salsa

    Still hungry?!

    Want to receive Mexican Please recipes via email when they are posted?  Sign up below to subscribe.  All recipes are spam free.

    And don't worry, we hate spam too!  You can unsubscribe at any time.

    Thank You For Subscribing!

    « Roasted Tomato and Tomatillo Salsa
    Fiery Pasilla de Oaxaca Salsa »

    Reader Interactions

    Comments

    1. Cheryl Florence

      April 17, 2023 at 11:01 am

      5 stars
      I followed your recipe exactly. I had to order Mexican oregano, so glad I did it is a wonderful herb, I had never used it before. Because there is only 2 of us I froze all but 1 cup of the beans and some broth in 1 cup portions as you suggested. I sautéed the onion in bacon fat, smooshed the beans and added another heavy pinch of the oregano, YES, awesome beans. I topped my portion with raw onion and cotija cheese, love that on almost everything. Thank you for sharing, it’s a keeper.

      Reply
      • Patrick

        April 20, 2023 at 12:52 pm

        Oh wow sounds delicious. Thanks Cheryl!

        Reply
    2. Susan Coppola

      January 24, 2023 at 1:32 pm

      5 stars
      Great recipe thanks. Cooked in a crockpot, so easy. Added arugula, cilantro, spinach and a pinch of oregano. Beans & greens. Yummy.

      Reply
      • Patrick

        January 25, 2023 at 9:19 am

        Ooh sounds great 🙂

        Reply
    3. Pearland Larry

      November 04, 2022 at 4:37 pm

      5 stars
      I tried this recipe some time ago, which led me to purchase several pounds for prep storage. Dry beans vac seal well, which extends shelf life. I am also a fan of seasoning meats, so the suggestion of adding sausage is a spot on. Smoked ham hocks, turkey necks or smoked pork necks (my choice for the World Series game 6 tomorrow) only make the pot better. Finally, you will never buy refried beans again once you make them with these beauties. Great recipe, great site. Thanks for the tips!

      Reply
      • Patrick

        November 11, 2022 at 6:47 pm

        Hey thanks for your note Larry, so glad to hear you enjoy these beans as much as I do! Cheers.

        Reply
    4. Sylvia W

      September 05, 2022 at 10:30 am

      5 stars
      The current economy impelled me to stock up on rice and dried beans recently, and in the interest of variety I grabbed a few unfamiliar beans, including Mayocoba. Once I got home I did a search which led me to this page, and I am so glad! I followed your directions almost exactly (left off the added salt to the broth, as my plans would add salt at need).

      So far I have made an absolutely delicious soup by simply slicing some spicy Andouille style sausage Publix had on sale, searing it a bit, then simmering it in the beans & broth. This is the first time I ever did beans this way, and the creamy texture and mild flavor was a perfect foil for the lively sausage, and the broth was well worth sopping up with crusty bread. Yummy! Thank you!

      Reply
      • Patrick

        September 07, 2022 at 10:10 pm

        Hey thanks much for your note Sylvia! Super helpful to hear how you served up these beans, sounds delicious. Cheers.

        Reply
    5. Nancy S.

      December 25, 2021 at 7:15 pm

      5 stars
      Hola! We learned about Peruanos from our Peruvian friends. Thank you for the nice recipe. Next time I'll make the beans as refritos. Just fixed it using the seasoning you mentioned (including the oregano), and added some marjoram and a bit of Italian seasoning. And used gourmet garlic salt. Sabrosas y deliciosas! Muy bien! My husband really likes the beans with the rice and tamales I made for him. We had all of this with roasted butternut squash (also a traditional American food). Wonderful!

      Reply
      • Patrick

        January 07, 2022 at 1:01 pm

        Sounds delicious Nancy! Cheers.

        Reply
    6. Kim

      October 06, 2021 at 9:52 am

      We sell these Mayocoba beans at Butera in Lindenhurst Illinois.. produce department.. but they never last long.. get them while you can... Yummy!

      Reply
    7. Bitterman

      March 21, 2021 at 6:10 pm

      5 stars
      Made this tonight with Rancho Gordo Mayacopas (big love for everything they do). So simple and delicious. Great recipe, thank you!

      Reply
      • Patrick

        March 26, 2021 at 2:13 pm

        Thanks B! So glad you tried out this recipe. Cheers.

        Reply
    8. Karen S

      March 21, 2021 at 11:20 am

      I had these on a trip to puerto Vallarta and they added a splash of cream to them! The were amazing

      Reply
    9. george w. iliffe jr.

      March 13, 2021 at 12:58 pm

      5 stars
      they turned out great even though I forgot to time the beans cooking , and did a few more testings then the recipe had called for

      Reply
      • Patrick

        March 15, 2021 at 3:19 pm

        Thanks George!

        Reply
    10. Jackie Chakhtoura

      March 06, 2021 at 6:40 pm

      Mayocoba are delicious! Mild, buttery, easy to cook, blend well with other ingredients in soups & casseroles. Thank you for sharing this no-stress recipe. For what it's worth, I have found that adding salt early in the process does help tenderize the beans and may reduce cooking time.

      Reply
      • Patrick

        March 08, 2021 at 4:11 pm

        Thanks Jackie!

        Reply
    « Older Comments

    Leave a Reply Cancel reply

    Your email address will not be published. Required fields are marked *

    Recipe Rating


    Primary Sidebar

    Hey, I'm Patrick! I spent 2 years living in Cozumel and got obsessed with Mexican food. I built this site to share all the recipes and techniques I've learned along the way. Read More…

    Footer

    Mexican Recipes

    Cooking Course

    Mexican Cooking 101

    Ingredients

    Salsas

    Starting a Food Blog

    Enchilada Recipes

    About Me

    Contact

    Disclaimer

    © 2025 Mexican Please
 - Privacy Policy