
Rendering your own lard is super easy and you'll get a significant bump in quality compared to store-bought lard. If you're new to this technique please consider giving it a go!
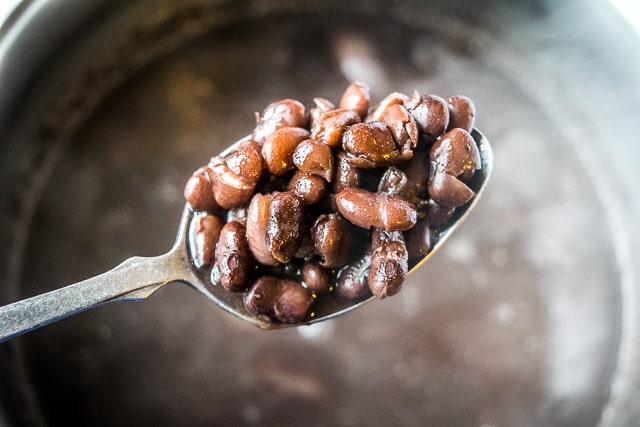
Refried beans, flour tortillas, tamales...they all have a secret ingredient in common that makes them taste Mexican. What is it?

Yup, it's lard.
Be honest, when you hear “lard” what’s the first image that pops in your head?
Traffic jam at the main aorta valve? A pair of treasured jeans that you can no longer button?
Lard gets a pretty bad rap these days. Part of it is misinformation. Part is the fat-shaming culture. And part is the word itself.
Lard.
It sounds….fatty, right?
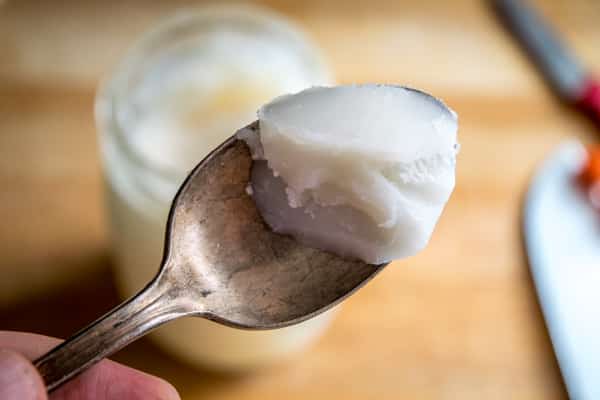
But the truth is, good lard is healthier than most butters that you regularly cook with. Lard is classified as a monounsaturated fat, so it’s rich in the same fatty acids that the lauded olive oil has.
And while “no one can agree on nothing” when it comes to diet, in general it’s believed that diets higher in saturated fats produce more LDL (the bad cholesterol), and diets high in unsaturated fats produce more HDL (the good cholesterol).
This is why olive oil has become so popular recently. It’s loaded with unsaturated fats. And so is lard.
Maybe it’s just the name. Lard. How about from now on we just refer to lard as white butter?
Either way, lard is an integral part of Mexican cooking, used in tortillas, refried beans, and countless sauces. I hope I can convince a few of you to take a closer look at it!
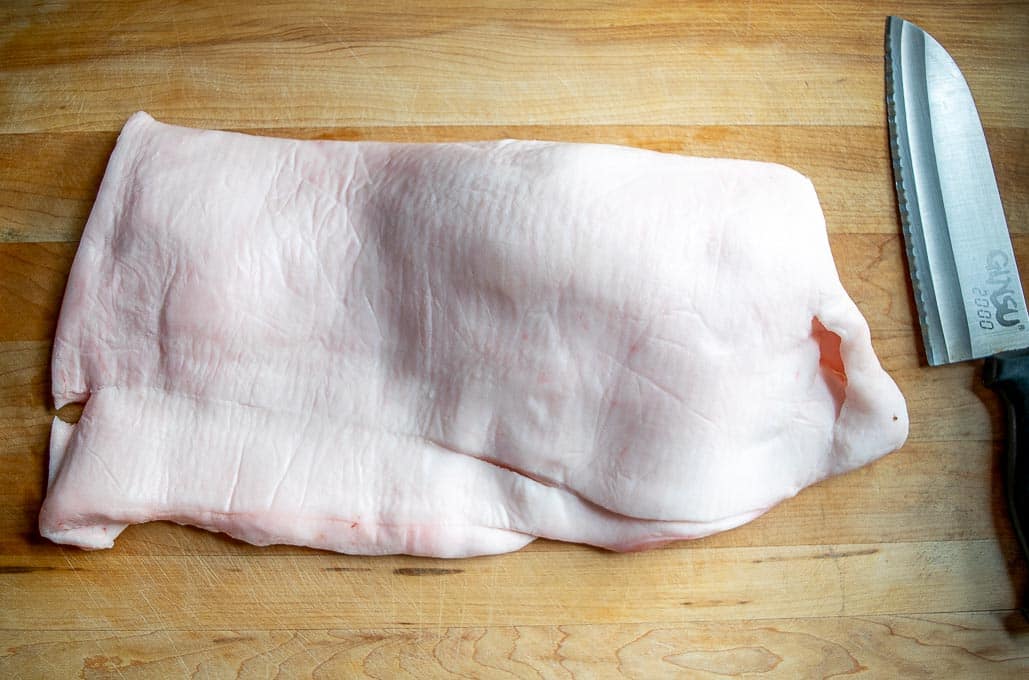
OK, there are two types of pig fat used to render lard: back fat and leaf fat. Leaf fat produces a lighter, whiter lard that is traditionally used for pastries. Back fat produces a more robust version and is more commonly used for general cooking purposes.
You can usually find both types of fat at your local butcher. You’ll have to ask for it though as they tend to keep it back in the freezer.
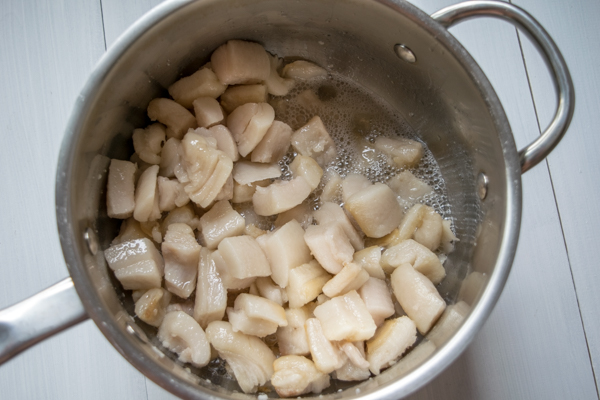
Here is what 2 pounds of back fat looks like:
This will produce approximately 2 cups of the cleanest lard you’ll ever use.
The process is simple. We’ll be cooking the fat on low temp, and as the solids produce liquid we’ll strain it off into a holding container.
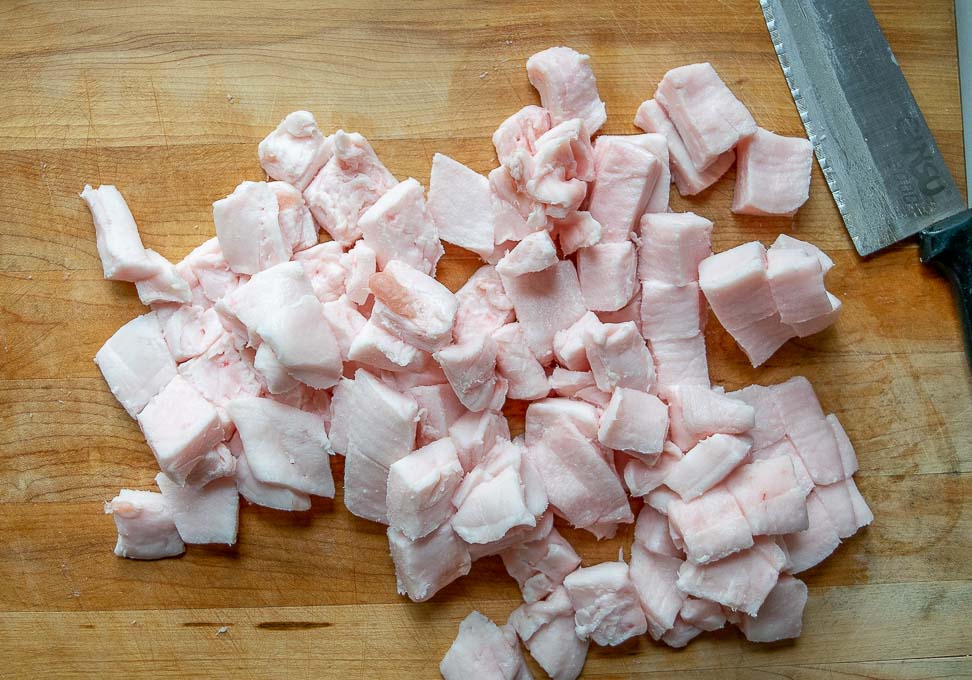
First, cut up the back fat into evenly sized chunks; about ½ inch works well. There is wiggle room on the size of the chunks, but make sure you are consistent so that the pieces will cook evenly.
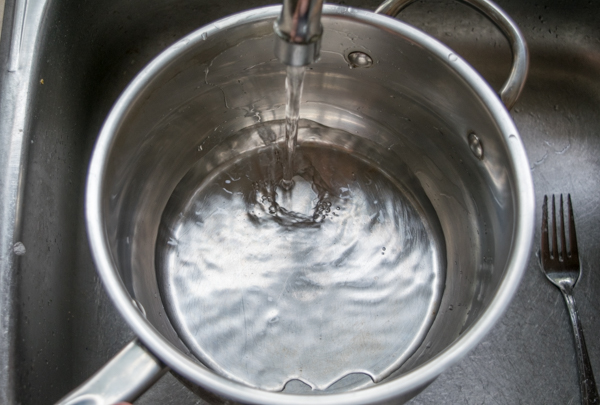
Add a couple tablespoons of water to your pan.
This thin layer of water will prevent some initial sticking and it’ll burn off as the fat heats up.
Now add the chopped fat to the pan and cook over medium-low heat.
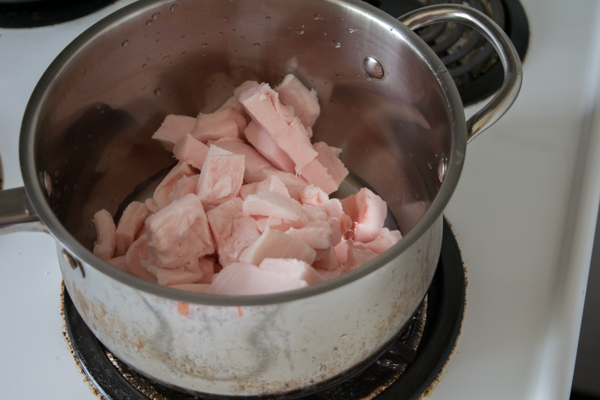
Nothing will happen for awhile. That’s good!
We want to draw out the liquid fat slowly to prevent burning.
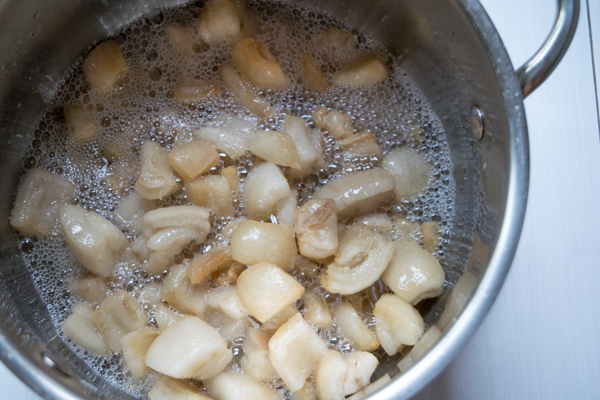
After 15 minutes it’ll look something like this:
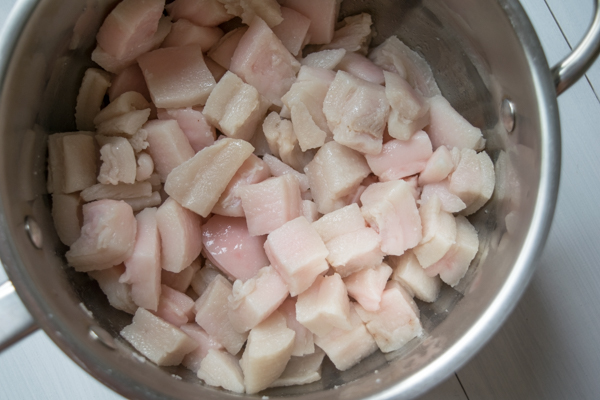
You can stir occasionally to prevent any sticking.
At 30 minutes you’ll be somewhere around here:
Now we’re talking! Some of the liquid fat is forming at the base of the pan.
And at 40-45 minutes it will look something like this:
Now it’s time to pull some of the fat out. This prevents any future burning but will also expedite the rest of the process as the solids will have more direct contact with the heat source.
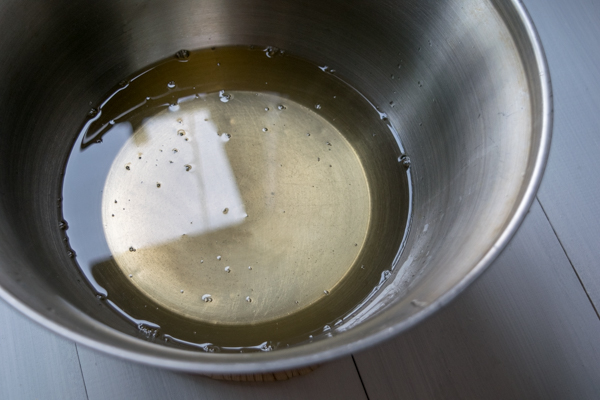
Set up a holding container with a fine-mesh strainer and pour some of the fat through it. I used a stainless steel bowl for this batch.
I also lined the sieve with a cheesecloth to keep out some of the solid bits, but don't sweat it if you don’t have a cheesecloth as the strainer will suffice.

Let the rest of the fat continue to render on the stove.
For this batch I strained liquid fat out four times over 90 minutes.
Eventually the solids will reach a point where they’re not producing any more liquid:
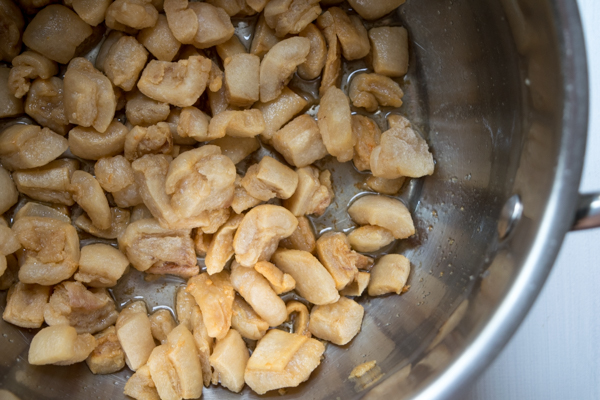
That means they’re done!
Strain off the remainder of the liquid. Here is what I have after all that; about two cups worth:
Let it cool for a bit as it’s no fun spilling piping hot fat when you are jarring it 🙂
In the meantime, congratulate yourself on unknowingly making one of Latin America’s true delicacies: pork chicharones.
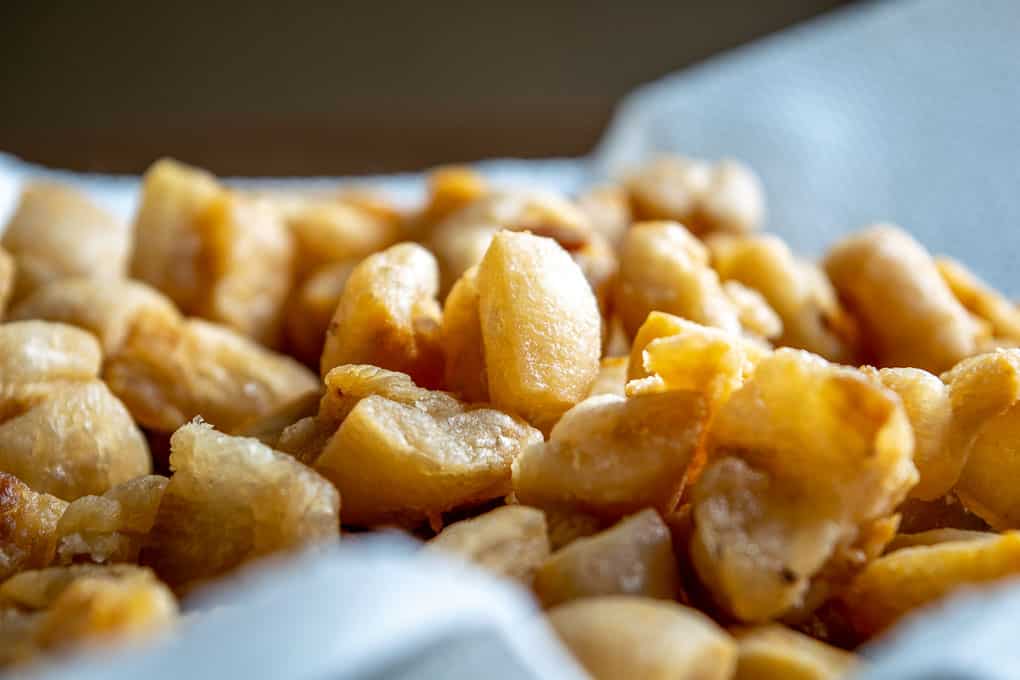
The solid bits of compressed fat left over in the pan are the chicharones. Drain them on paper towels, add a little salt, and give ‘em a taste.
Texture will vary depending on how much skin was attached to the back fat, but most likely they will be delicious (at least for some of us). Just be sure to put the brakes on once you start gobbling them down because they are, uhmmm, kinda fatty.
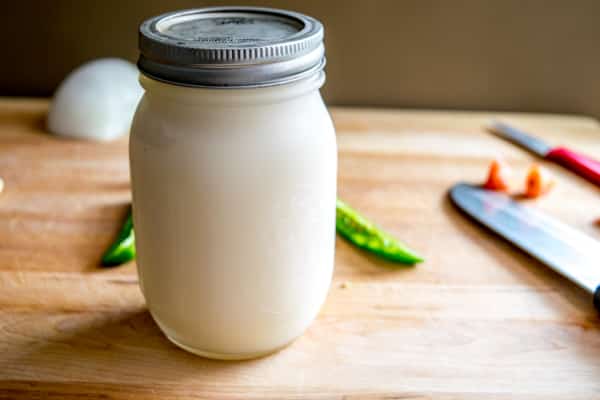
After the liquid has cooled a bit, pour it into your jar of choice.
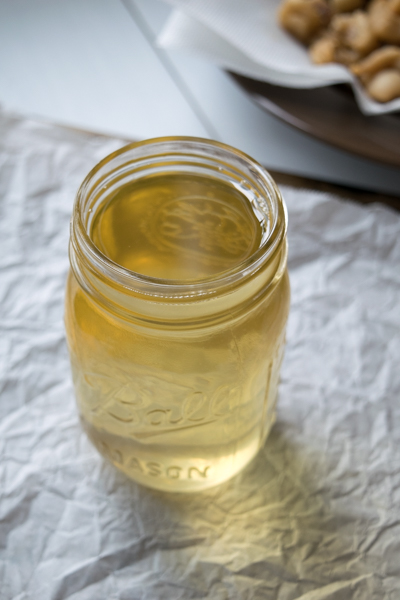
I typically use a pint-sized Mason jar to hold the lard.
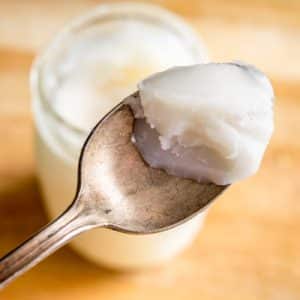
This will turn opaque and solidify in a couple hours, eventually looking like this:
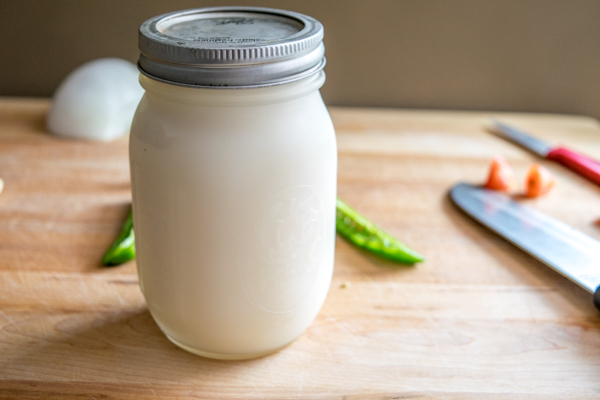
I usually put this in the fridge where it can last for months. If you make a huge batch you can also freeze some of it.
And that’s it! You now have two cups of one of the cleanest cooking fats you’ll ever get your hands on. Congratulations!
One last note on the world of lard...
The lard you find in the baking section of grocery stores has been hydrogenated to increase shelf life so I usually stay away from it. But it's worth asking your local butcher if they sell any house-rendered lard -- sometimes they do as seen in this pic from the freezer of my local meat dude:
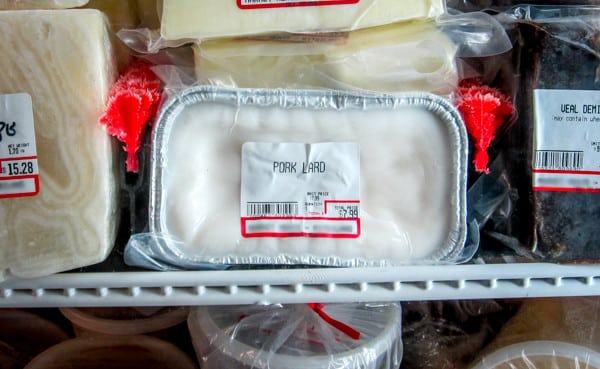
This can be a decent middle ground if you're in a bind and need some lard on the fly, but I still recommend that peeps render their own as it's a superior product. Plus it's kinda comforting to know exactly where your cooking fat is coming from 🙂
Okay got your home-rendered lard handy? Now what?!
It'll give you immediate access to these authentic Mexican recipes
And don't forget that you can crisp up your burritos in a teaspoon of lard if you want to turn Pro 🙂
Buen Provecho.
Homemade Lard
Ingredients
- 2 lbs . pork back fat
Instructions
- Chop up the pork back fat into evenly sized chunks, approx. 1/2 inch sized. There is wiggle room on the exact size but try to be consistent so that the pieces will cook evenly.
- Add 2 tablespoons of tap water to a sauce pan, this will prevent some initial sticking and will eventually burn off.
- Add the fat pieces to the saucepan and cook over medium-low heat. It's best to draw the fat out slowly so don't worry if nothing much happens for the first 10-15 minutes.
- Stir occasionally to prevent sticking. When you start to get a pool of fat in the pan, strain some of it off through a fine mesh sieve. Doing this occasionally can expedite the process as it will allow the solid bits to have more direct contact with the pan. Use caution when pouring the hot fat as spills can be dangerous. I typically pour it into a large, stress-free bowl for now. Once cooled you'll be transferring it to your storage container of choice. Wipe off any fat that is dripping down your cooking pan after pouring.
- Continue cooking the fat until it no longer produces any more liquid. That took close to 90 minutes for this batch.
- Strain the final bit of liquid into your holding container and let it cool on the counter.
- The leftover bits of fat are pork chicharones, you can save these for munching if you want to!
- Once cooled you can transfer the lard to your storage container of choice. I typically use a pint-sized Mason jar.
- Store the lard in the fridge where it will keep for months at a time.
Still hungry?!
Want to receive Mexican Please recipes via email when they are posted? Sign up below to subscribe. All recipes are spam free.
JoeW
I've rendered leaf fat a couple of times, both in a slow cooker, and in the oven. Works great.
Last time, I bought 10 pounds of the fat, and ran all of it, after slicing it into large strips, through a meat grinder (KitchenAid). A LOT easier than knife-chopping it.
I'm sold on it, as well as using bacon drippings.
Patrick
Hey thanks for mentioning that tip Joe. Cheers.
Kathy
Hi again Patrick!
You're probably much younger than I am so you may not have ever seen this on TV, but the old Saturday Night Live show had a character named Rosanna Anna Danna, played by Gilda Radner. Each skit, she would go on a rant about something or other, then someone would point out the error (or stupidity) of what she said and she would pause, smile and then say "Never mind."
Well, I just sent you a comment about my success on making lard per your instructions. I said I got 4 cups of lard as opposed to your 2 cups. "Never mind." I must have been giddy with my exuberant success, because I thought I had a quart sized jar in my hand, when in fact, it was a pint jar. (The word "twit" comes to mind.) Anyway -- that apparently was my rendition of Rosanna Anna Danna. Edit my comments if you like.
Again though, thank you for your great ideas!
Kathy
Patrick
Ha I've seen that!
No worries Kathy, so glad to hear that this process worked out well for you. And really glad to hear that you tried it out with some homemade tortillas as it really gives those recipes a bump in flavor. Cheers.
Janey Boyd
Awesome!!!! What a bad rap Lard has had. My inlays lived to be 94 and 99 yrs old. Took their hog to the butcher. Got a few gallons of lard. My mother-in-law treated it like gold.No heart problems for her. Makes a person want to study all the oldsters ways!!
Sue
Thank you SO much for these great instructions. I've never considered making it myself and actually never thought of using it at all. But now that everything you buy in the grocery store seems to present health risks, this was an option I wanted to consider. The fact that it's monounsaturated was really a pleasant surprise! Can't wait to try your flour tortillas, too. Keep up the great work!
Patrick
Yeah go for it Sue, I still use this technique on a regular basis and get so much mileage out of the lard. Cheers.
Carol
Thank you for the information and the recipe for homemade tortillas with lard. I'm going to try it.
Patrick
Go for it Carol, I hope they treat you well. Cheers.
Donna
Haven’t tried this yet, but I can’t! Alpha-gal Syndrome: no mammal meat. What about home-rendered chicken fat? Do you have any experience with that??? Thank you, Donna Stokes
Patrick
Hey Donna! Yeah some people do use chicken but I haven't tried that yet. The only thing is....it's much easier to get bigger chunks of fat from a larger animal, so when using chicken you'll have to gather it a bit at a time. There might be some butchers out there that will sell chicken fat but I've never asked about this before -- I buy carcasses to make chicken stock but I've never bought fat before. Kinda curious about it now though 🙂 Cheers.
Jonas
This weekend a will make some carnitas. I will be braising pork belly and butt before adding some lard. Do you think duckfat could be a good substitute for lard in this case? I have trouble finding pork back fat where I live
Patrick
Hey Jonas! My first reaction is "Sure, go for it!" as that sounds fine on paper, but to be honest I don't cook with duckfat much and haven't tried out that combo yet. Cheers.
Franci
Thanks for the instructions! I have few sheets of back fat and it looks like all of the skin is on. Do I need to cut the skin off before rendering the fat? It's super tough, so I would guess "yes", but it's pretty difficult to remove so I wouldn't mind skipping that step for the other sheets.
Patrick
Hi Franci! Yeah you can leave the skin on during the rendering process. The fat will melt away and you'll be left with crispy skin bits at the end (chicharrones). Cheers.
Terri Yoakum
Thank you
Toth Patricia
Is lard good for deep frying in a fry daddy and can it be left in the fryer for an extended amount of time for many uses?
Patrick
Hi Toth! Hmmm I can't speak on the exact differences between lard and frying oil, but I don't think lard would be a good option for a fryer like that. Cheers.