
Homemade Gorditas are an easy way to turn leftovers into a meal that you actually look forward to! Is that possible?!
Picture thick, delicious masa cakes stuffed with your choice of filling and you're on the right track.
The thing is...you've got loads of choices on how to make your Gorditas:
Thick vs. thin
Fried vs. cooked
Lard vs. no lard
So many options! I'll go over the pros and cons of these choices and then list out my preferred style that will get Gorditas in your kitchen without a hitch.
How To Make Gorditas
Of course, all of this depends on having some masa dough in the house.
Sure, you can make your own, or pick some up from a local tortilleria (if you're that lucky!), but most of us are going to use this method:

Masa Harina is de-hydrated masa dough and you can use it to make delicious corn tortillas, tamales, and yes, Gorditas!
You can find it in most supermarkets these days, usually in the Latin goods section. (Masa Harina details and brands to choose from.)
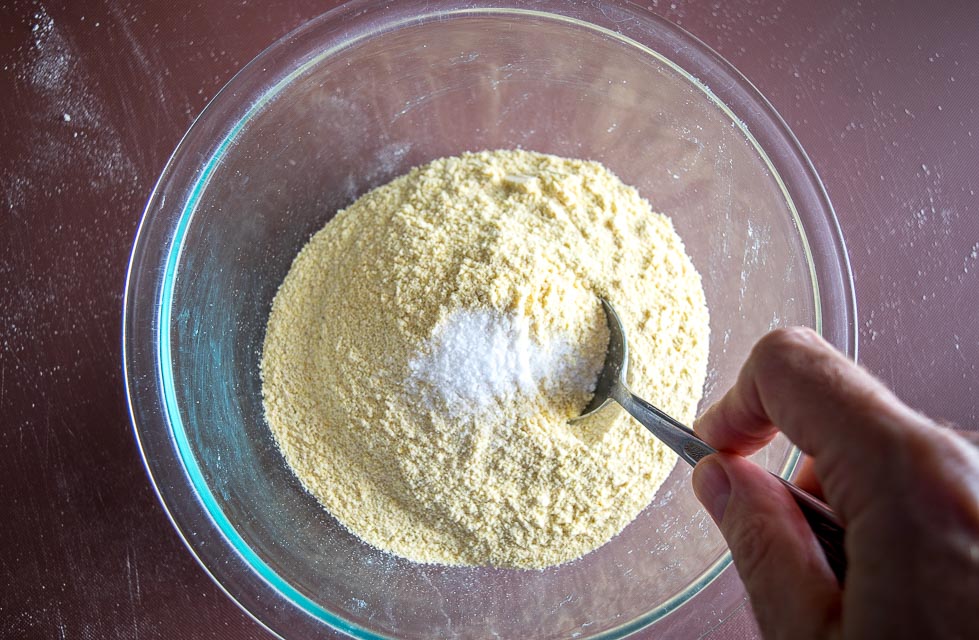
In a mixing bowl we'll start with:
2 cups of Masa Harina
3/4 teaspoon salt
1 teaspoon baking powder
And we'll also add 2 Tablespoons of lard:
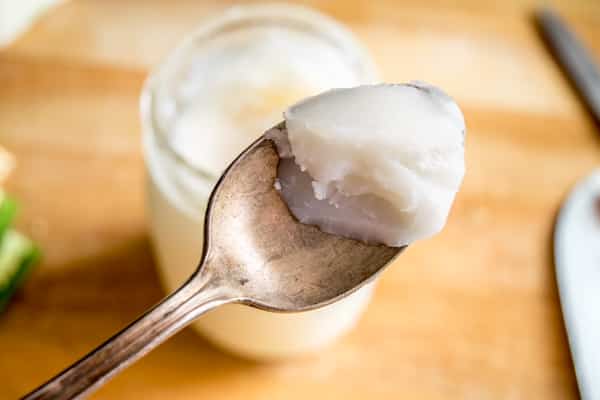
Yes, lard!
Lard is traditionally used for both tamales and Gorditas -- to add flavor and to keep them from drying out too much during an extended cook.
I use home rendered lard but you certainly don't need to do that for this recipe. But I do think it's worth tracking down some high-quality lard if you find yourself using it often. I tend to stay away from the lard in the baking aisle as it is typically hydrogenated. (More lard details.)
I use both lard and butter in our tamales recipe for some added flavor and you could do the same here -- you could probably even substitute all butter and still get a good result. Either way, it's definitely worth adding some fat to these Gorditas and you've got lots of options for that element.
You'll need about 1.5 cups warm water for these 2 cups of Masa Harina.
I usually add just 1 cup of the water and then combine it as much as I can with a spoon or spatula, then dumping it onto a work surface:
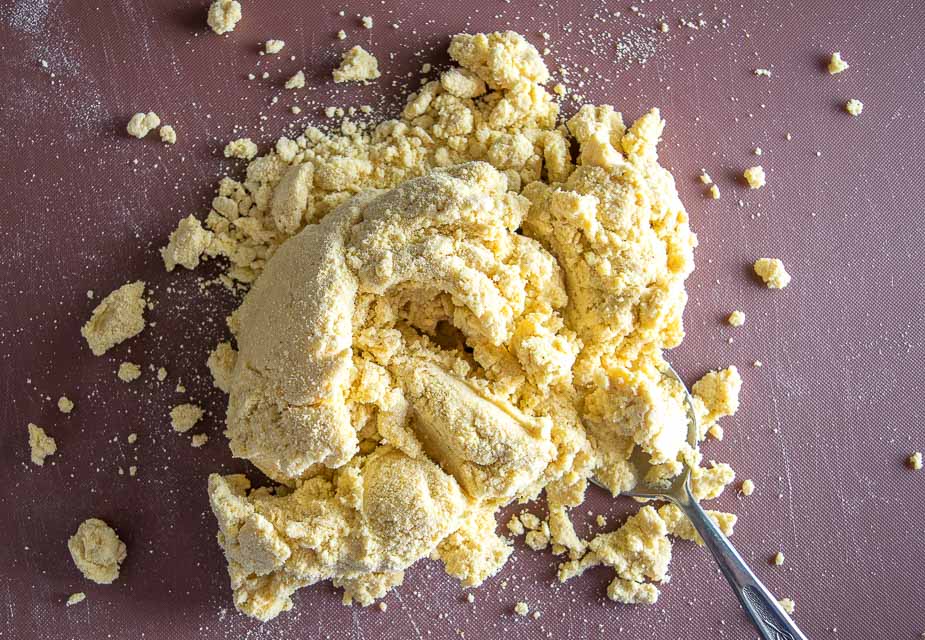
And then you can add the rest of the water incrementally as you knead it into a cohesive ball.
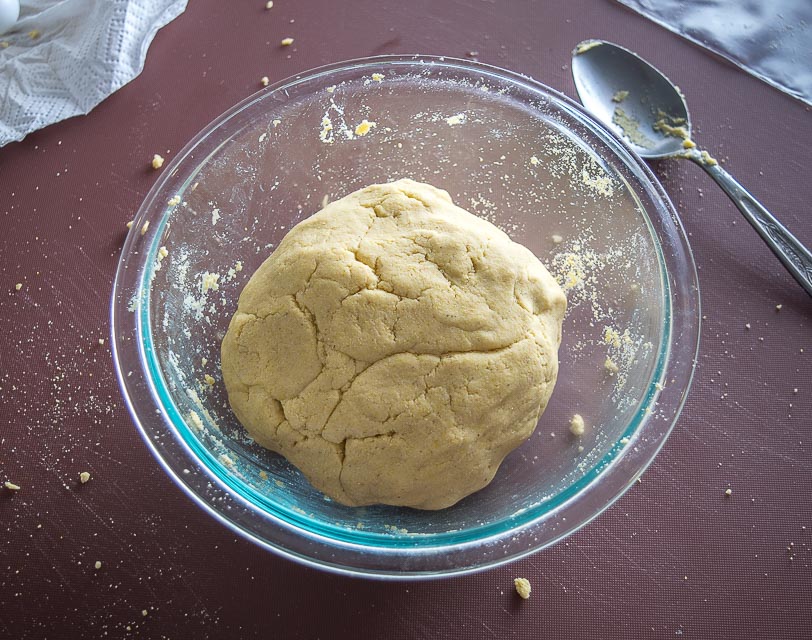
The exact amount of water will vary so adding the final bit incrementally makes it easier to find the right consistency.
When the dough forms a cohesive ball without sticking to your hands then you're in good shape. If it's still crumbly then you need to add more water. Conversely, if it's sticking to your hands then most likely there is too much water -- simply add a light dusting of Masa Harina until you can handle it without it sticking to your hands.
I used to dedicate 30-60 minutes to let this dough rest, but I don't really do that anymore for masa products. I usually just cover it and let it sit until my pans are ready to start cooking the Gorditas.
Okay, next decision is thickness, or how much Gordita do you want in your Gorditas?!
I usually make them somewhere between 1/8" and 1/4" inch thick. This will take about 3 oz. of masa dough, or something like this:
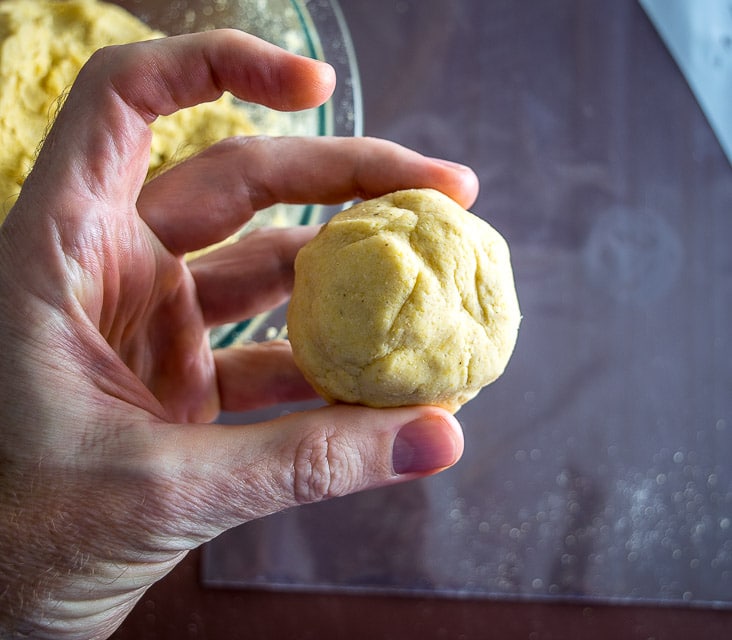
I prefer this thickness because it makes them substantial, i.e. they fill me up! But they aren't so thick that they overwhelm the fillings. For reference, a typical corn tortilla will use about half of this masa amount.
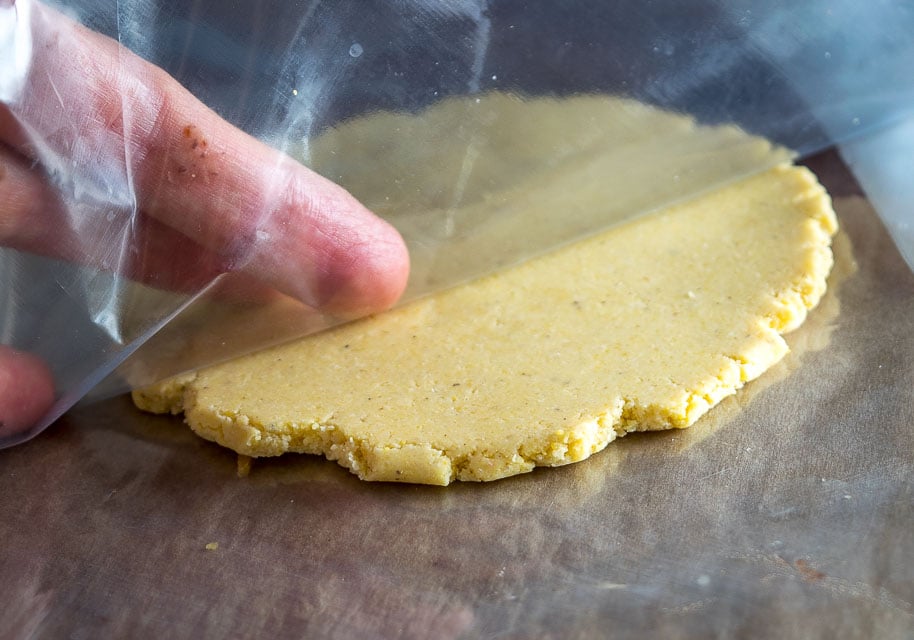
I find it easiest to flatten these in the middle of a Ziploc bag with the top cut off. Sure, you can use a tortilla press, but it's just as easy to use a flat-bottomed casserole dish.
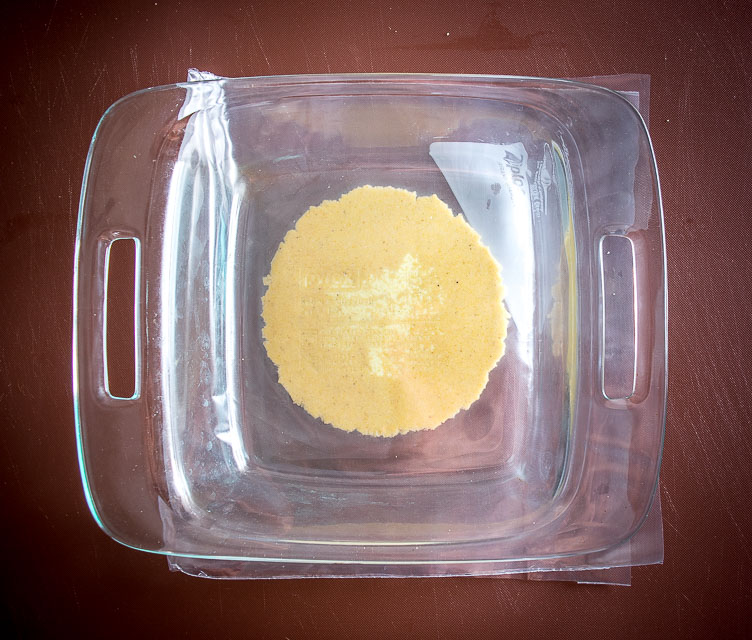
You'll know if the dough has the right consistency when you peel off the plastic. If the dough is sticking to the plastic it's still a little too wet and will need another dusting of masa harina.
Here's how these Gorditas looked at this point:
Keep in mind that you can always make these a little thicker at the cost of increasing the cooking time.
Okay, let's talk about ways to cook these beauties!
Years ago when I made Gorditas for the first time I simply put them in a dry skillet on medium heat and cooked each side for 4-5 minutes.
And I found them to be tremendously disappointing!
Gorditas are thicker than corn tortillas so of course it's going to take longer to get the center cooked. And by the time the center is cooked they get dense and hard if you cook them like this.
So then I went to the other extreme and tried frying them directly in oil.
But I was disappointed with these as well. They absorb way too much oil for my taste. And while the crispy crunch is awesome I felt like they were a little too greasy to be in my regular recipe rotation.
So why not meet somewhere in the middle?
That's become my preferred style and it goes like this:
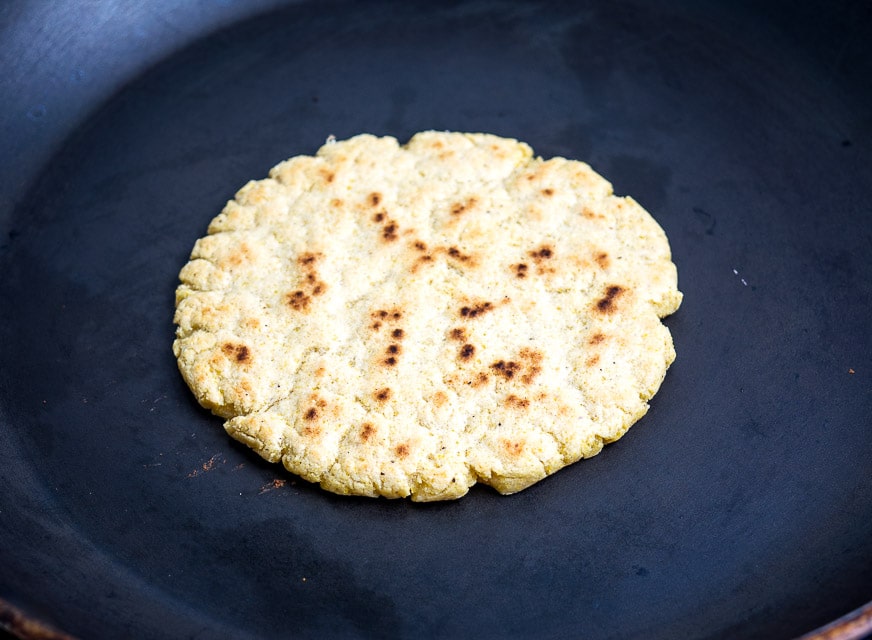
In a dry skillet cook each side of the Gordita for 1-2 minutes or until light brown spots are forming.
In a separate pan, heat up a thin layer of oil to 360F (medium on my stove). How much oil? I'd say as little as it takes to coat the pan, and when you tilt it you'll see a small amount running to the sides.
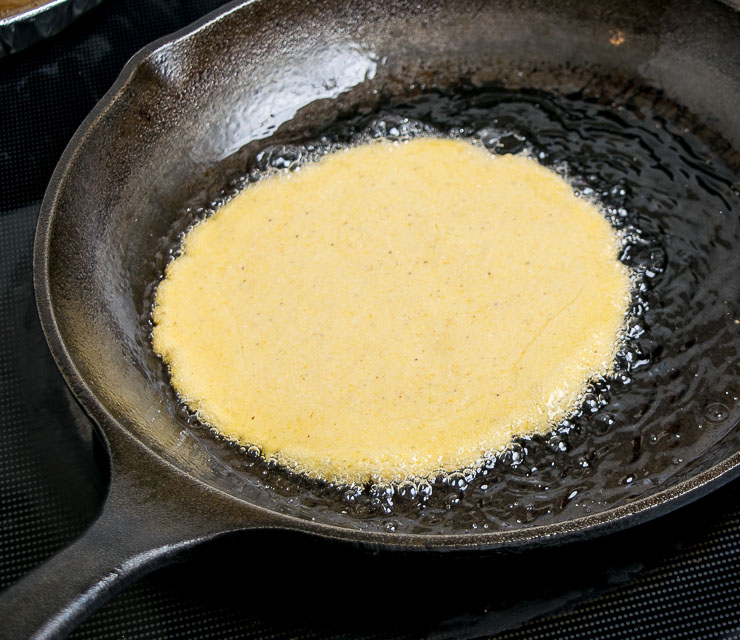
Take the partially cooked Gordita from the first skillet and add it to the hot oil. You'll know the oil is hot enough if it instantly sizzles:
And they will usually puff up when they are added to the hot oil. Perfect! This will make them easier to cut open and insert your favorite fillings.
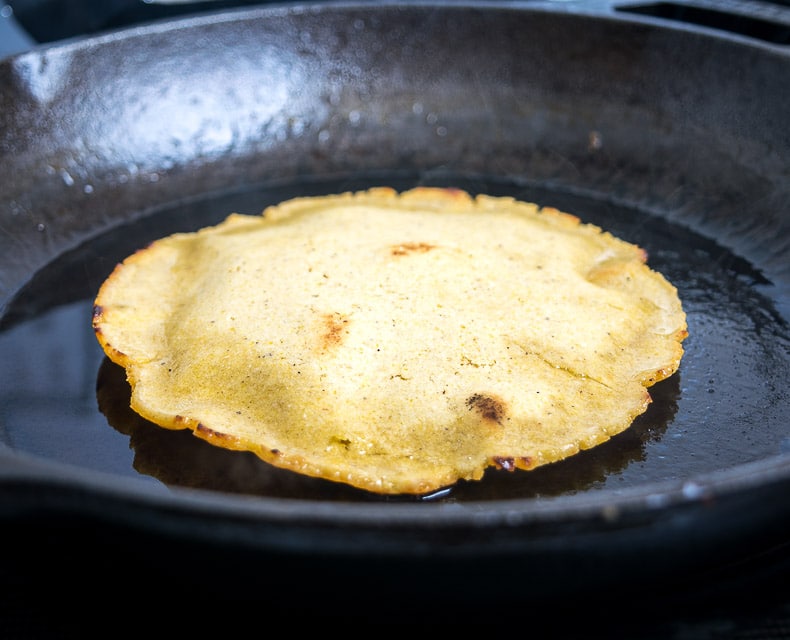
It'll take about 1-2 minutes for the bottom side to get crispy. You can flip and cook the other side for 1-2 minutes, but I'd say the majority of the time I make these I don't cook the second side in the oil. It will already be cooked from the first step and if the Gordita is already puffing up I will usually just take it off and let it drain in some paper towels.
Not cooking the second side limits the amount of oil it will take on but of course feel free to experiment with this to find what works best for your palate.
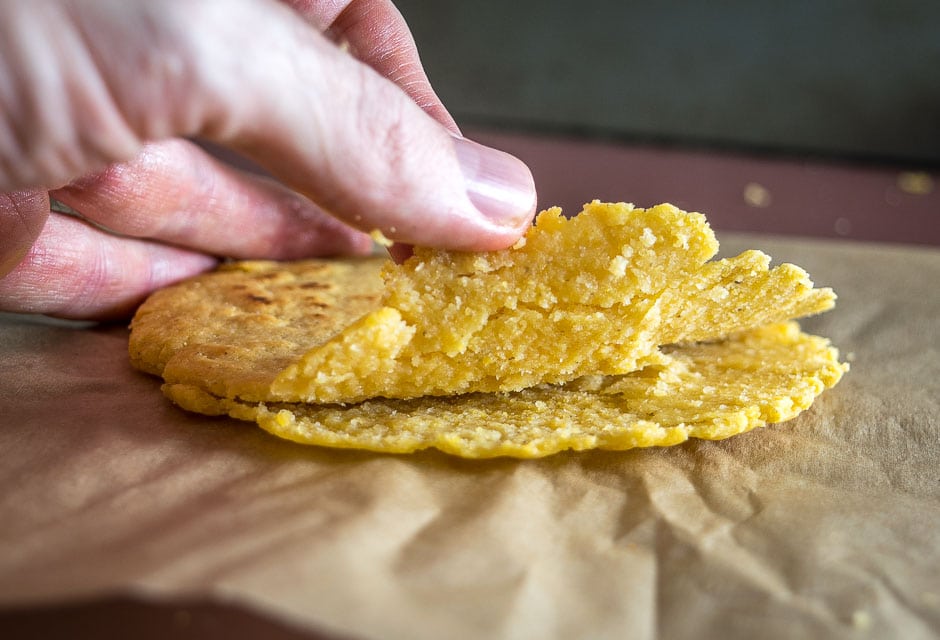
The best way to test them is to take a bite!
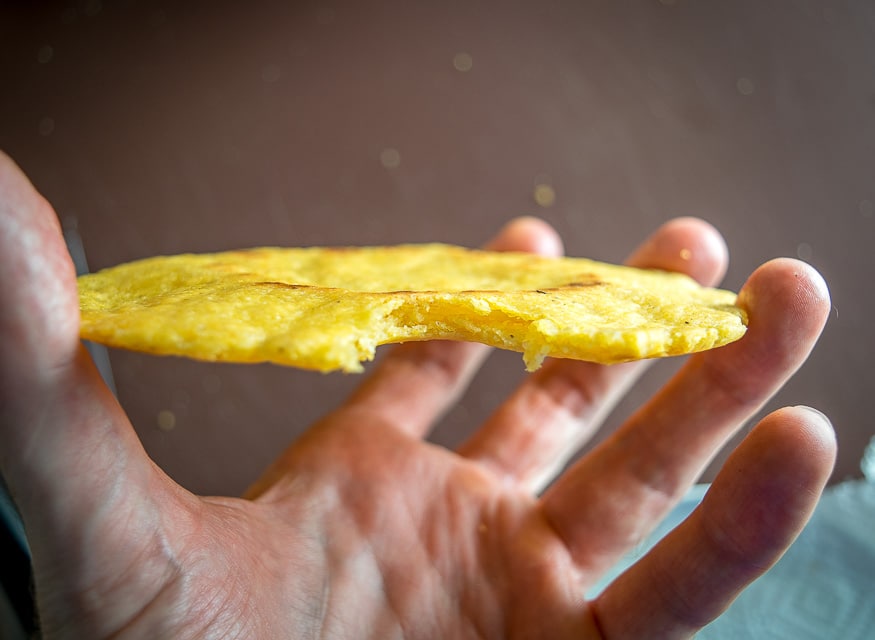
If you have an air pocket in the middle surrounded by moist, cooked masa then all is well!
You can use a knife to make a slit around the edges to pry them open further.
Yum!
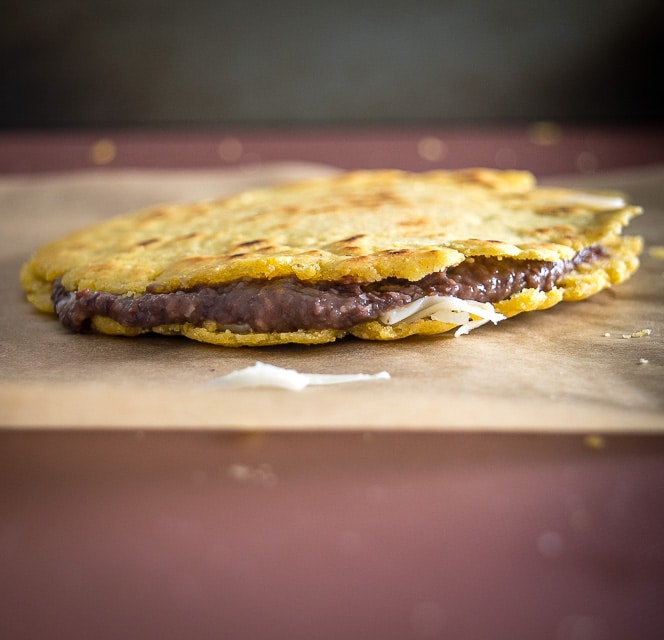
These can easily be eaten on their own but don't forget that the original gameplan with Gorditas is to stuff them with your favorite fillings!
Lately I've been adding some of these chipotle infused refried beans:

Along with plenty of shredded cheese. (And Pickled Jalapenos if I have them in the fridge.)
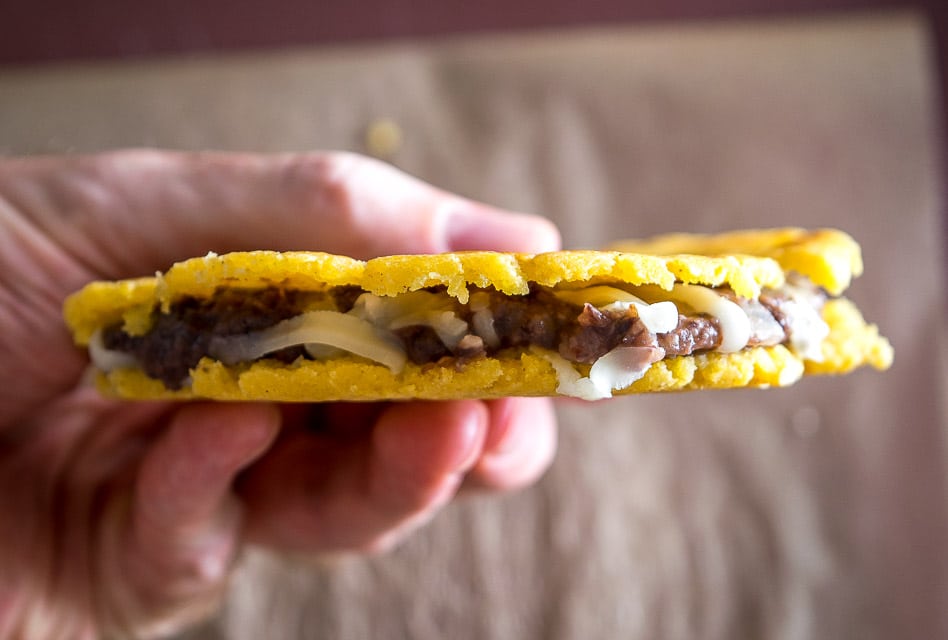
Perfect!
But feel free to get creative with your Gorditas. Here are some additional fillings to consider:
Shredded Beef
Picadillo
Chicken Tinga
But don't sweat the filling too much the first time you make these. I think it's best to get comfortable with the process before worrying too much about what goes inside. There's probably already something in your fridge that could be a worthy test driver.
Okay, that's the skinny on these fattened up Gorditas. Want to try them?
Giving them a quick shallow fry will reward you with that crispy, savory corn flavor. Everything beyond that is just a bonus so feel free to get creative with them!
Buen Provecho.
Update! We just posted a version that adds bacon and serrano directly to the masa dough. Sound crazy?! See Bacon Serrano Gorditas.
Gorditas Recipe
Ingredients
- 2 cups masa harina
- 2 tablespoons lard
- 1 tablespoon butter (optional)
- 1.5 cups warm water
- 1 teaspoon baking powder
- 3/4 teaspoon salt
- cooking oil
Instructions
- In a mixing bowl, combine 2 cups masa harina, 3/4 teaspoon salt, and 1 teaspoon baking powder. Add 2 tablespoons lard and combine well (I usually crumble it into the mixture using my fingers.)
- Now add only 1 cup of the warm water and combine as much as you can using a spoon or spatula. Add the rest of the water incrementally until you have a cohesive ball of masa dough. I usually dump the mixture onto a work surface and add the remaining water a few tablespoons at a time, kneading the dough until it comes together. Set aside and cover until you need it.
- Pull off a 3 oz. chunk of masa dough and use your hands to roll it into a ball. (3 oz. is somewhere between a golfball and a racquetball.)
- Surround the dough ball in plastic (I use a Ziploc bag with the top cut off) and use a flat-bottomed casserole dish to flatten the dough ball to a thickness that lies somewhere between 1/8" and 1/4". Keep in mind that you can always make them thicker at the cost of a longer cooking time. You can alternatively use a tortilla press for this step.
- Pre-heat a dry skillet or comal to medium heat. Cook each side of the Gordita until light brown spots are forming, approximately 1-2 minutes per side.
- Meanwhile, heat up a thin layer of oil in a separate skillet. I use a thermometer to get the oil up to 360F, and this corresponds to a medium setting on my stove.
- Add the partially cooked Gordita from the dry skillet and cook it in the hot oil for 1-2 minutes or until the bottom side is brown and crispy. You can optionally cook the second side in the oil but I frequently will only cook the first side in oil. Set aside to drain on some paper towels.
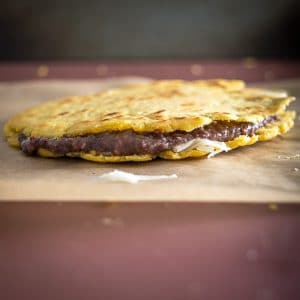
- Use a knife to cut open the edges. Insert your favorite filling and serve immediately. I filled this batch with refried beans and cheese.
Notes
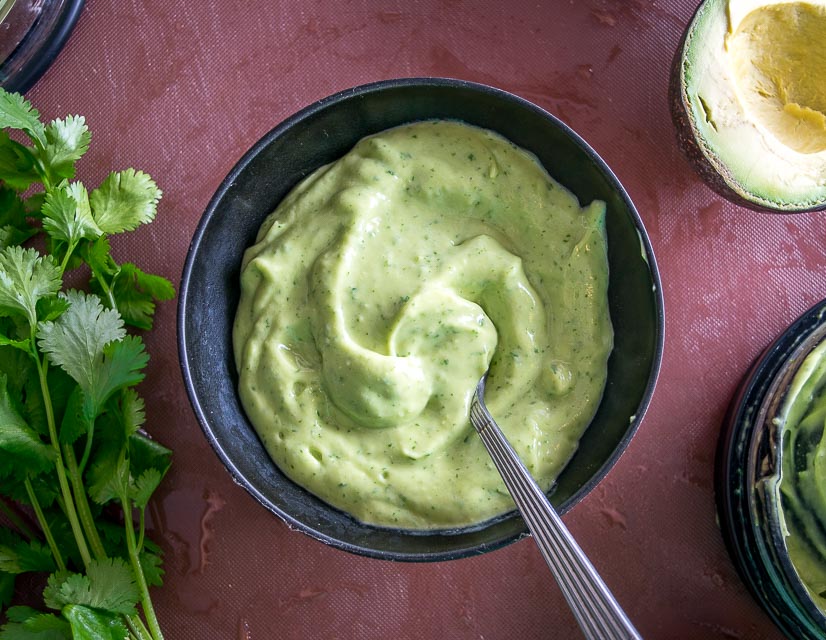
Our latest recipe is Salsa de Aguacate (Avocado Salsa).
Still hungry?!
Want to receive Mexican Please recipes via email when they are posted? Sign up below to subscribe. All recipes are spam free.
Erica
I want to make these for dinner for a crowd of 15 and I can't be making these as my guests arrive. How can I make these earlier in the day? or a day before? Or can I freeze the shaped gorditas and then fry them the afternoon of my dinner?
But how would I reheat them? Any suggestions?
What do you suggest so I can have a successful event?
Patrick
Hi Erica! Hmmm this is a tough one because they always taste best right off the skillet. If I were in your shoes I think I would cook them in a dry skillet the day before or the morning of, but save that final quick fry step until just before serving (or as close as you can get). That final quick fry really enhances their flavor and it would double as a re-heat of the previously cooked gorditas. That final step is pretty fast too and with a helper (and a large skillet) I think you could knock them out pretty quick. Hope that helps a bit! Cheers.
Pearl Reiss
I like them old fashion like when I grew up in the 70s,my mom fixed some fat enough just to eat with butter on top that's it that a gorditasi forgot how to spell it lol Pearl Reiss,thank you
Patrick
Thanks Pearl!
Benjamin Nichols
I tried making this recipe. I cut it in half because it is only me eating them. The gorditas disintegrated in the oil when cooking. flat out just fell apart into a billion pieces. not sure what I did wrong here.
Patrick
Hey Benjamin, bummer! If the dough is crumbly it usually means there isn't enough water. You should be able to handle and knead the dough without it crumbling apart -- simply add splashes of water to achieve this consistency. Cheers.
Mary M
Wonderful tutorial...wish I'd seen it 10 years ago when I was trying to figure this all out for myself.
What I like about your tutorial is that it discusses the pros and cons of griddle vs frying and like you, I also came to think they were tastiest when oil fried a bit after the comal. I have never been able to get my gorditas on the comal to inflate, but that quick dip in the oil really does the trick and makes them delectable.
Three things to add that I've learned from different youtube videos.
1) If you make a test ball and then press two fingers down into it at least 1/2 way, your masa dough is moist enough if no cracks form on the outer edges after doing the "press test". This has helped me a lot!
2) I got a tip that putting some milk in the liquid helps keep the inside of the gordita creamy and also helps them stay more moist if they are sitting around for awhile (or reheated the next day.) This does not impact how crispy they can get on the outside. In that particular recipe, she used almost all milk instead of water, but she emphasized that it didn't much matter. She was doing an all-fried method and this milk tip helped her especially in her restaurant...the gorditas stayed nicer if they had to sit a bit before serving.
3) Related to #2, I did not have any milk, so I used heavy cream with my water. I use about 1 T of cream to 7 oz of water to make each cup of liquid needed. Then, I skip the lard/butter. I do this all the time now and they are wonderful. It's also about what I have on hand...I usually have heavy cream, but don't always have lard (which I do love, too.)
4) Taste the dough! In my opinion, gorditas are the tastiest if the uncooked dough tastes just a hair too salty. Sometimes they underwhelm a bit if they don't have enough salt.
I hope you don't mind my sharing some ideas....I thought your tutorial was one of the best I'd seen, so I thought you might enjoy some tips I've also learned in my quest for gorditas. I will try your recipe as written, and I'm also excited to try a butter version, which I only learned of recently.
Patrick
Hey Mary thanks much for your notes they are super helpful! So good to hear about your heavy cream trick for the Gorditas as I have never tried that.
And now that you mention it... I never taste the dough when making masa and have never even considered it. Probably because raw=bad but that isn't necessarily the case when it's just masa harina and water 🙂
Thanks much for your feedback, I hope your Gorditas quest has a happy ending 🙂 Cheers.
Gilbert Rocha
Gracias for sharing this recipe as I always look for a treat of authentic Mexican food recipes to make for my loved today which is Sunday here in Califas and the gratitude/ live one receives from coming through once. Gracias a ti y suyo.
Patrick
Thanks Gilbert!
Tee
You absolutely can use all butter for tamales.
I've been doing this for years and it makes for delicious masa.
I'm hoping to make some fresh masa here one of these days as it's not available locally.
Gloria Leija
First time making them wish me luck
Patrick
Hope they turned out well Gloria!
Gregory
If I dont have masa harina can I use masa para tamal?
Patrick
Hi Gregory, yeah this should work fine. When in dried form 'masa harina para tamales' usually just means it is a coarser grind but the same product as the masa harina for tortillas. Cheers.