
It's rare to find the words easy and tamales in the same sentence, but with a few simple tricks you can make a scrumptious batch of tamales without having to devote an entire day to them.
Making tamale dough AND making a tamale filling sounds like double duty to me, so I usually make a smaller batch of tamales when I have good filling options leftover in the fridge -- things like Tinga, Barbacoa, or home-cooked beans.
This simplifies the process and it just might get you to make tamales more often than once every few years.
Easy Tamales Recipe
I have leftover Chipotle and Cheese Bean Dip in the fridge from last week's post. Perfect! That means we can devote ZERO time to the filling and just focus on the tamale dough. Got any good filling options in your fridge?
Before we start on the dough it's best to get some corn husks soaking in warm water.
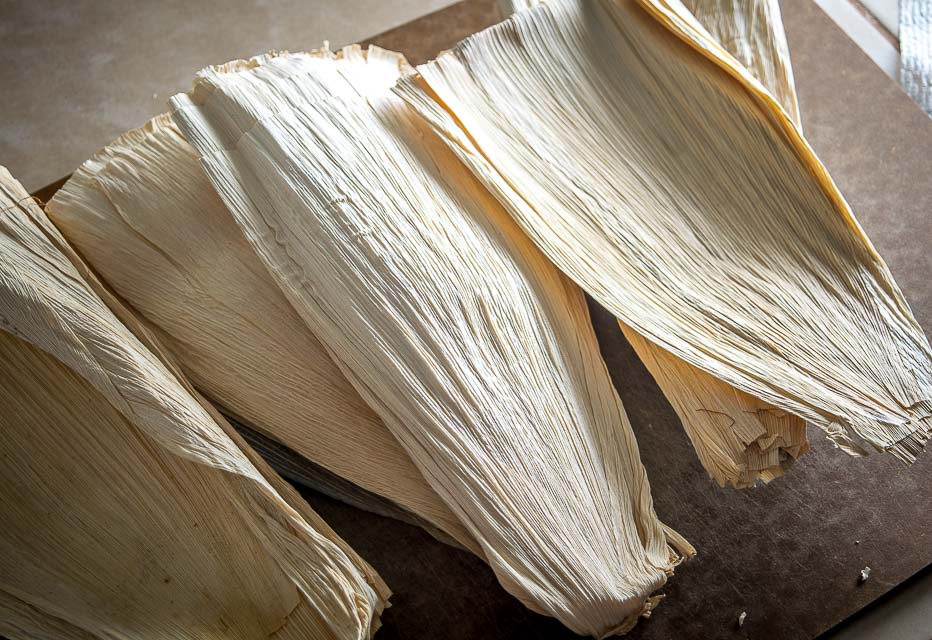
Tamales are traditionally steamed in corn husks or banana leaves, but it's much easier to find the dried corn husks so we'll use those.
Add them to a large bowl and soak them in the hottest tap water you've got -- in about 30 minutes they'll be pliable enough to hug your tamales. If they float to the surface you can use a bowl or plate to keep them submerged. To account for some duds I usually soak twice as many corn husks as I'll need, so about 20 for this batch will do the job.
Okay, let's make some tamale dough...
Tamale dough can be a finicky bird and that's probably another reason people reserve tamales for special occasions. But it's easy once you get the hang of it, so don't sweat it too much if your first go is a bit haphazard.
And as mentioned, we're making a smaller batch here to keep the process as simple as possible. This recipe will make 10-12 tamales.
If you have the option of buying tamale dough from a local Hispanic market then you just simplified things even further! But most of us don't have that option so I'll show you an equally good method to get tamale dough in your kitchen. Note: if you're buying masa or tamale dough from a local Hispanic market, it's best to confirm whether the masa already has lard mixed into the dough. Some markets will sell both plain masa for tortillas (no lard) and masa for tamales (with lard).
For our homemade version, you'll need some of this:
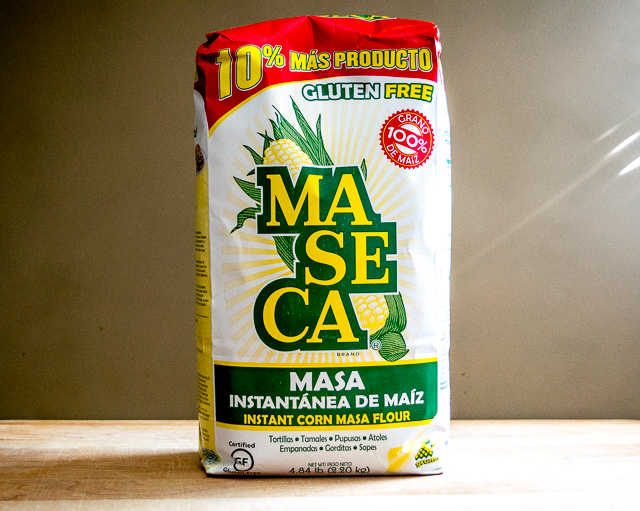
This is Masa Harina, or corn flour, and you can find it in most supermarkets these days, usually in the Latin goods aisle.
And yes, this is the same Masa Harina that you can use to make Homemade Corn Tortillas. It's the dried form of nixtamalized corn; simply add water to reconstitute the corn flour and you've got some high-quality corn dough on your hands.
If you come across Masa Harina that's labeled "for tamales" it usually just means that it has a different consistency, most likely a bit coarser. The Masa Harina for tortillas has a finer consistency and is equally good for making tamales so that's what we're using today.
In a mixing bowl combine:
1.5 cups Masa Harina
1 teaspoon baking powder
1 teaspoon salt
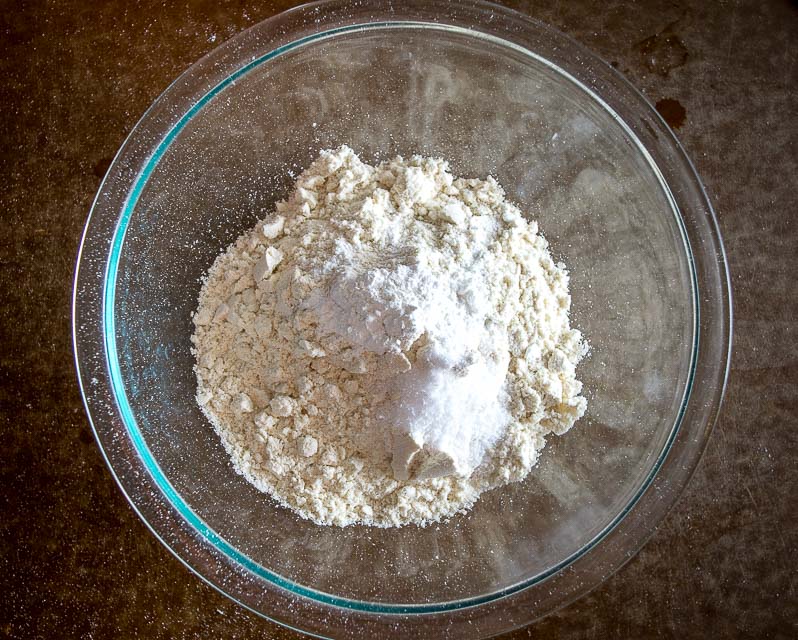
Mix well and then add 1 cup of stock. Roughly combine.
I'm using some Homemade Chicken Stock for this batch and it's unsalted, so if you're using store-bought chicken stock that's high in sodium you might not need to add as much salt.
Your dough will probably look a bit shaggy at this point.
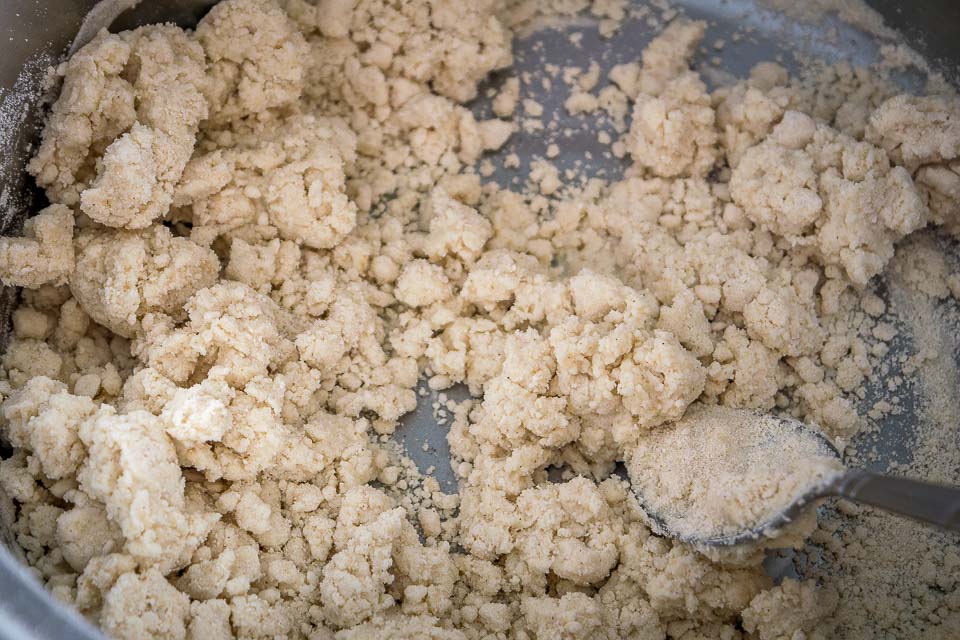
And that's fine. This will combine into a more cohesive dough if you use your hands, but since we're going to use a hand mixer down the road I usually just leave it unkept until I need it.
Okay, let's talk fat!
The main difference between tamales and tortillas is the fat. Tamales traditionally use lard to give them that rich, succulent flavor.
I'm using some home-rendered lard for this batch, but obviously that's not required for this recipe. But it is worth seeking out some higher quality lard at a Hispanic market or your local butcher. I usually stay away from the lard in the baking section of the supermarkets because most of it is hydrogenated.
I'm also going to add a few tablespoons of butter to this batch. I think the butter adds some flava but you can consider it optional. And note that you can get by using vegetable oil as your fat of choice but I'm usually a little disappointed in the flavor of tamales made with oil.
So we'll use 6 tablespoons of lard and 3 tablespoons of butter. (Can I use bacon fat instead of lard?)
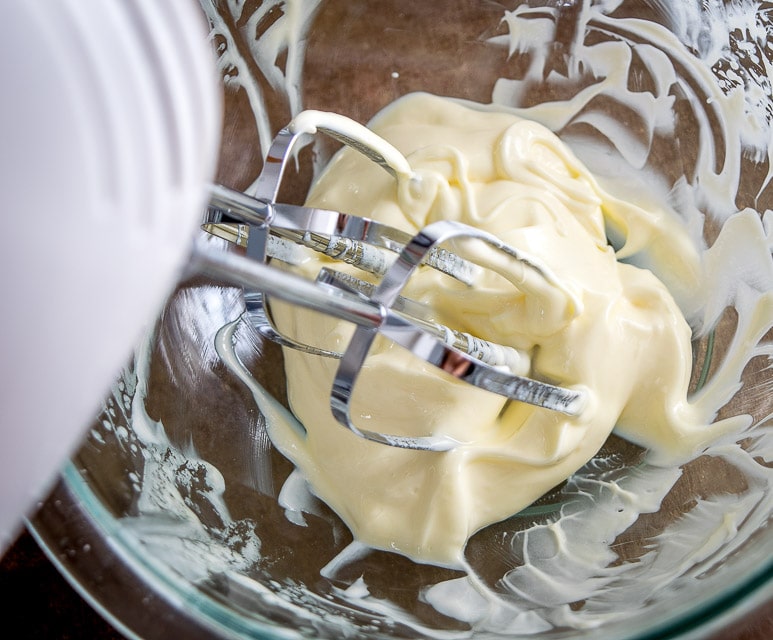
Whipping up the fat is a great trick to keep in mind and should result in a lighter, fluffier tamale dough. I find it's easiest to use a hand mixer on medium-high for a couple minutes. This will put some air in the fat and prevent your tamales from being too dense.
Now we'll start adding some of the shaggy masa dough to this fat. Add half of it and combine with the hand mixer. (Note: you don't need to use a hand mixer but I find it accelerates the process quite a bit.)
Keep some stock close by as you'll probably need to add a few more tablespoons to get it to combine. Mix on medium or medium-low speed.
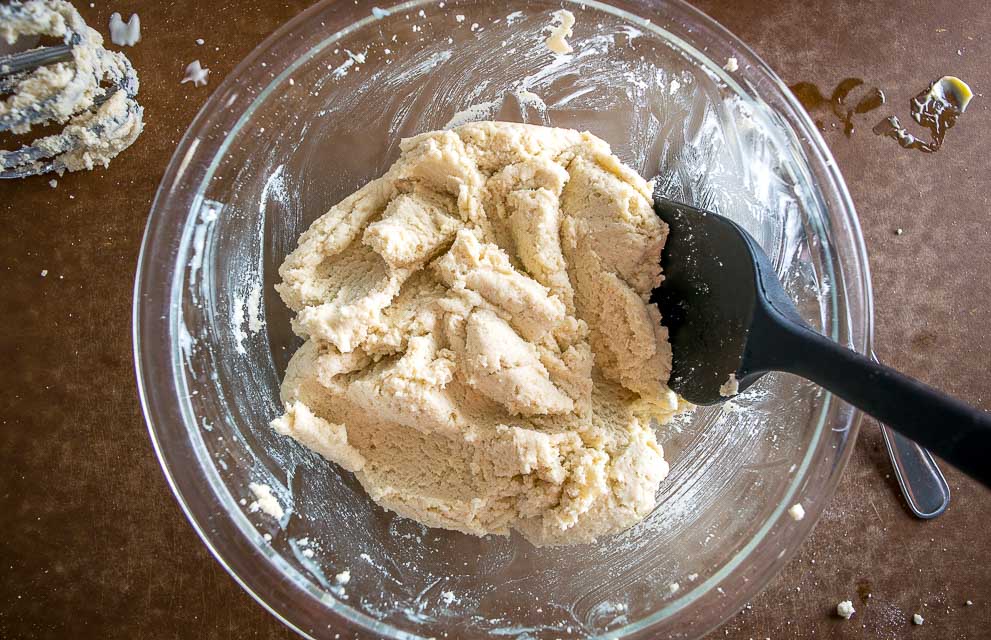
I usually use my hands to get it across the finish line.
Tamale dough is forgiving so don't sweat the exact consistency too much.
As a test, spread some dough in your hand. If it holds its shape without cracking then it's usually good enough. Otherwise, keep adding stock and mixing it further.
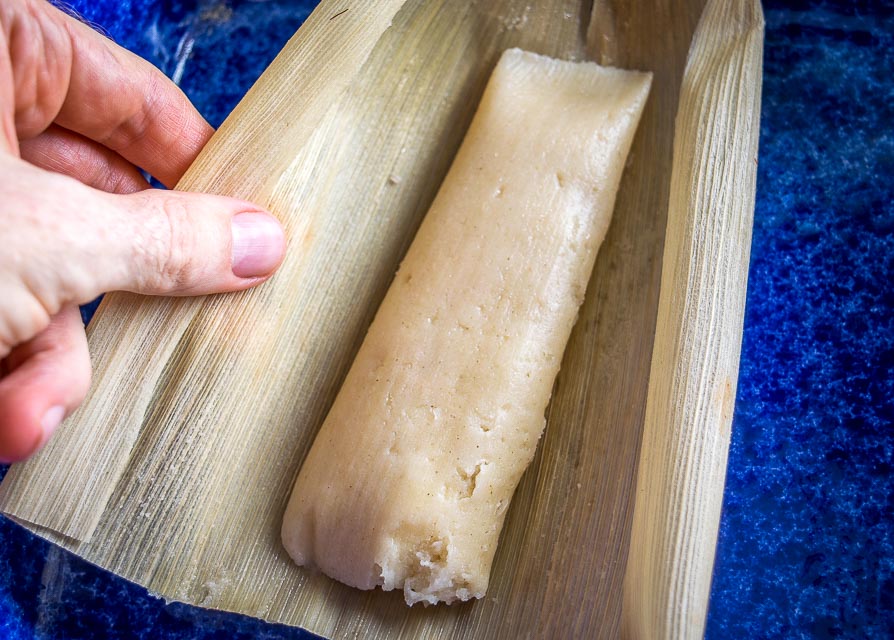
Okay, time to drain those corn husks and pat dry a few of them. We'll use the ones that are wider and intact.
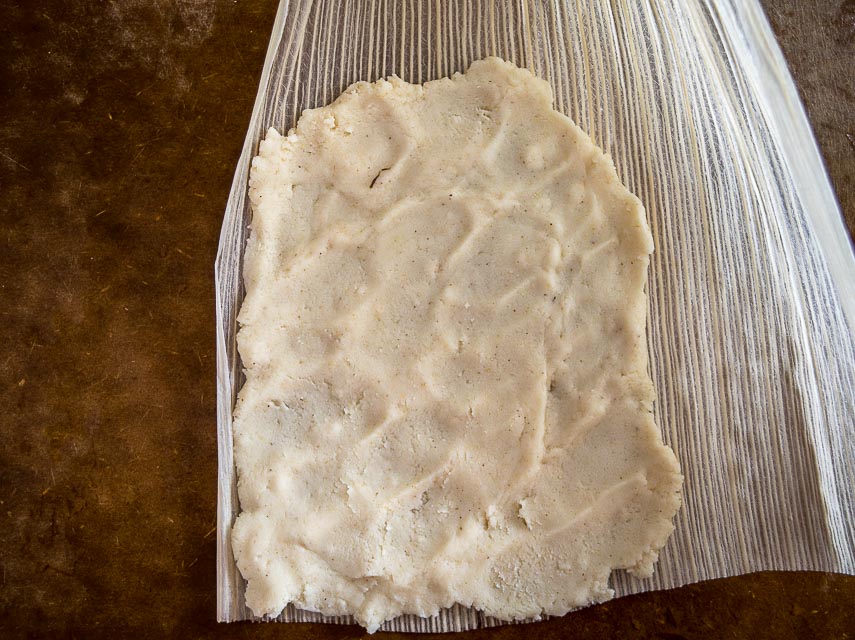
Spread a couple tablespoons of tamale dough on the lower left portion of the husk's wide side, with the tapered end of the husk pointing away from you.
The idea is to favor the left side so you can roll them up easily. You can spread the dough with the back of a spoon, a spatula, or simply use your hands.
I like these tamales best when they have an ample filling-to-masa ratio. In other words, I think they taste best when the masa is thin and there is plenty of filling. To get a layer of super thin masa I find it's easiest to use my hands.
Add a couple tablespoons of filling. We're using Bean Dip and cheese slices for this batch.
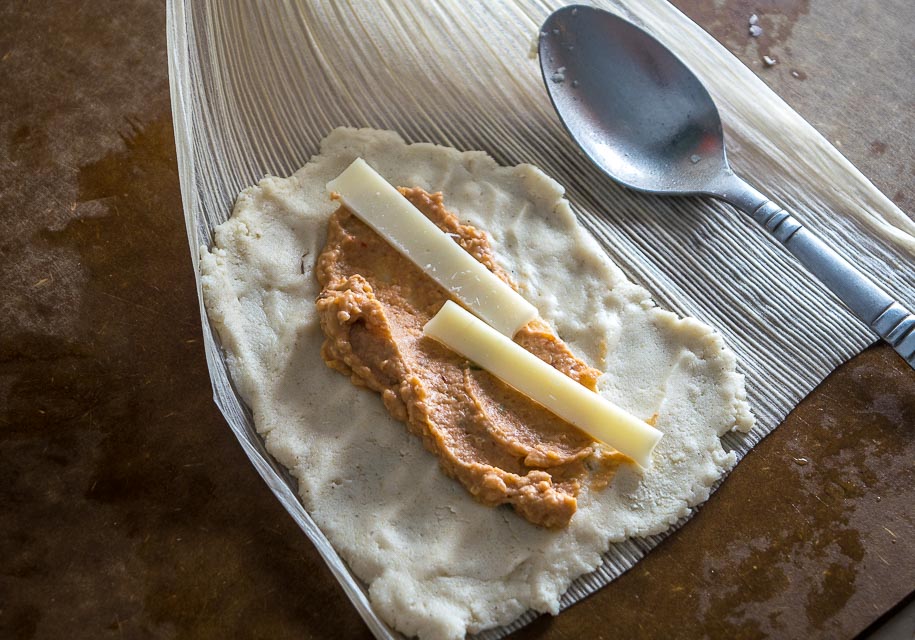
Fold the tamale onto itself, sealing the edges so that you have a cocoon of tamale dough surrounding the filling, then wrap the remaining corn husk around the tamale and fold up the bottom portion of the husk.
That's another trick to make the process more efficient. Instead of tying the tamales we're simply rolling them and folding up the bottom portion. Then we'll rest them in the steamer pot with the seam side against the side of the pot so they don't splay open.

So these are open-ended on the top with the bottom portion of the husk folded upwards.
The easiest way to steam them is to plop them on top of a vegetable steamer.
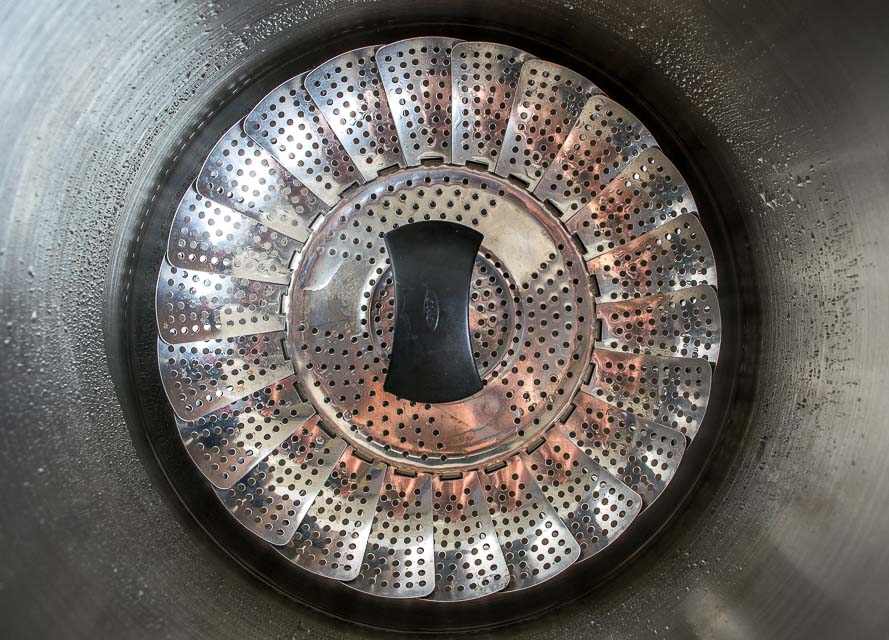
But you can improvise with wire racks or anything that will get the tamales above some steaming water.
I used a stock pot and a vegetable steamer for this batch. Fill the pot with enough water so that it nearly reaches the level of the steamer. This pot has about 1" of water in it.
Bring it to a boil and then reduce heat to mediumish; I used somewhere between medium and medium-high for this batch.
We'll steam the tamales vertically with the open end facing up and the folded portion resting against the side of the pot.
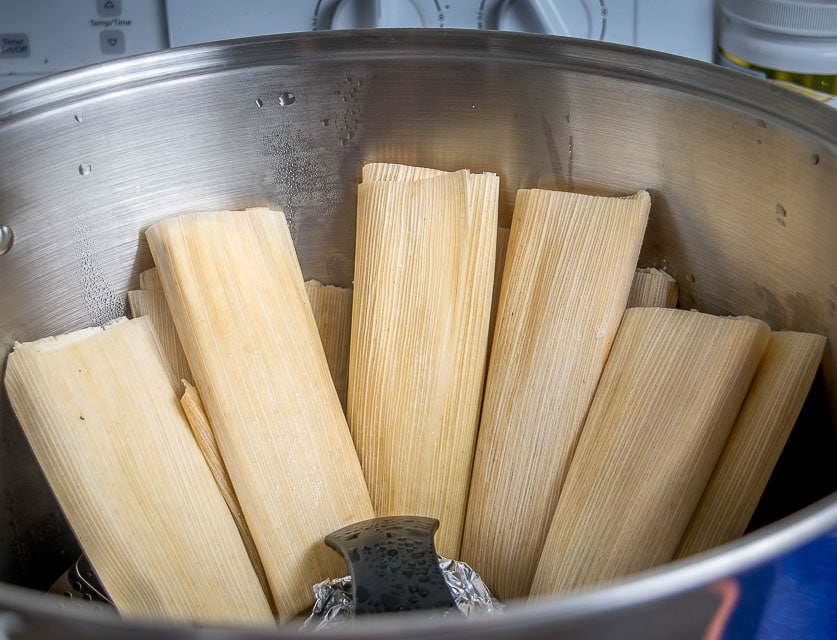
Cover them with any remaining corn husks to prevent water from dripping into the tops.
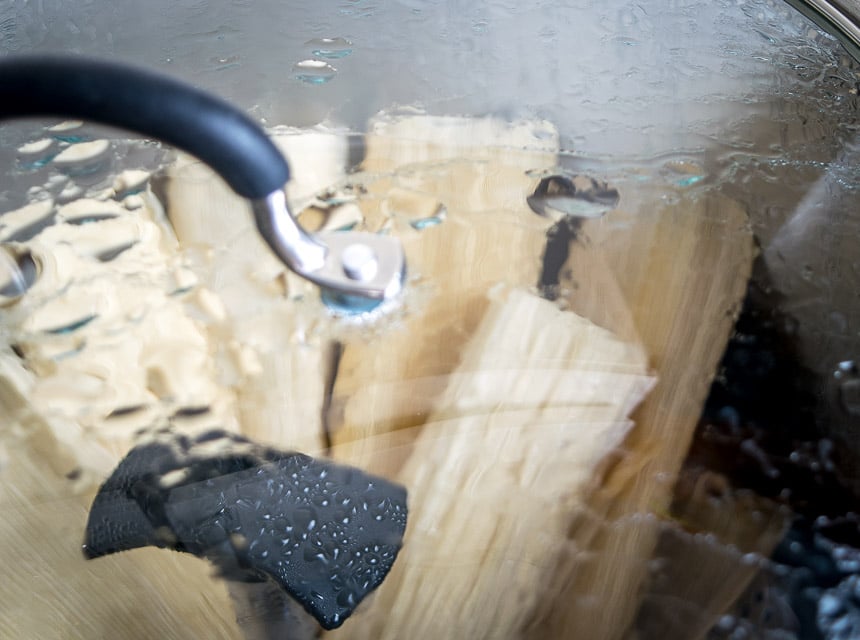
Cover the pot and steam for 60-75 minutes.
Keep an eye on the pot during the steam to ensure that it always has water in it. If it runs low simply add more water to the pot. I used a larger pot for this batch so I didn't have to add any additional water during the steam.
The exact steam time depends a little on your setup.
Start checking on them after an hour. If the husk easily pulls away from the tamale then they are done. If the husk sticks to the tamale then they probably need more time in the steamer.
This batch needed around 80 minutes.
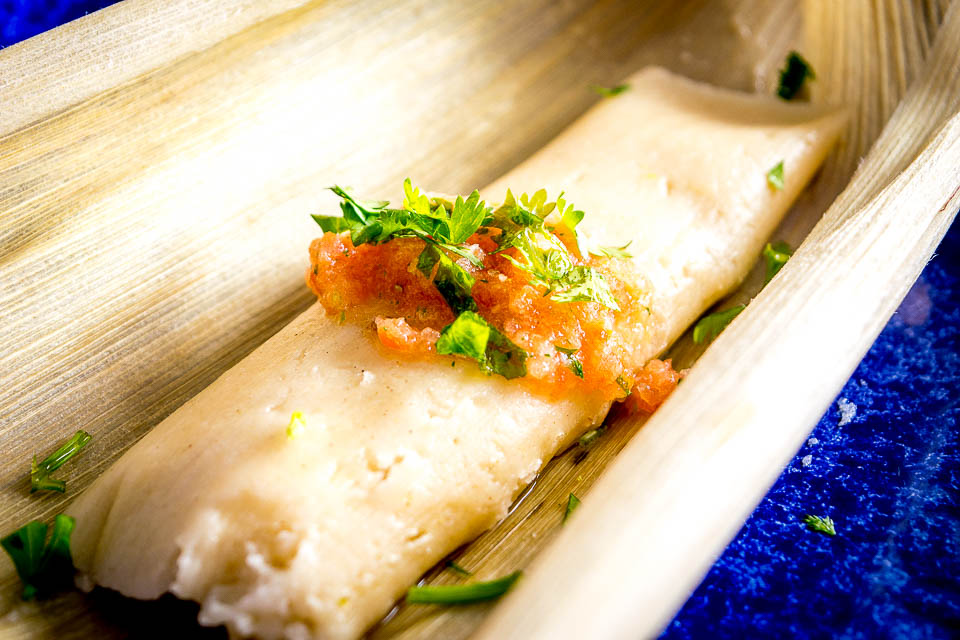
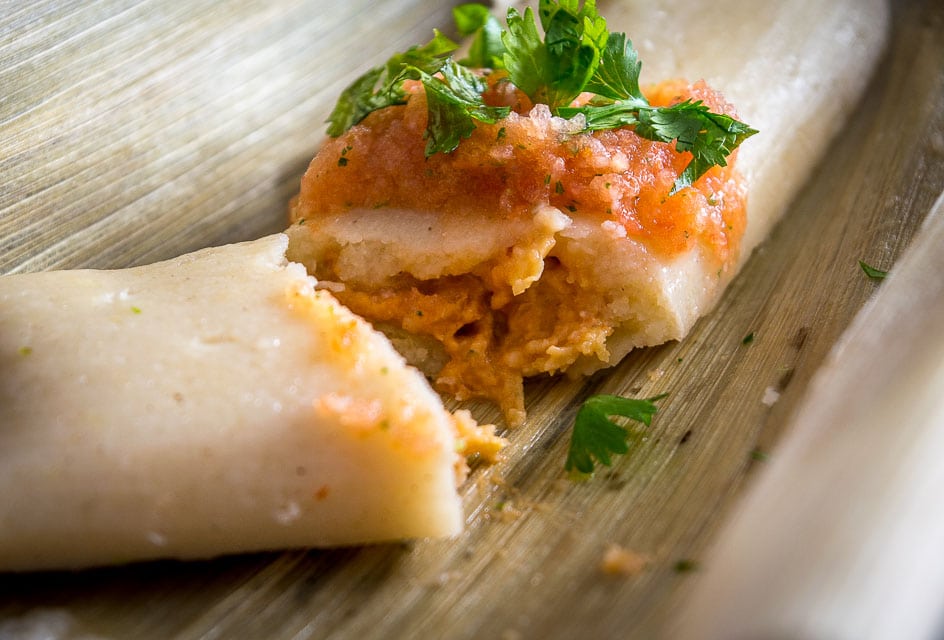
And note that the above tamale is prettier than most of the others in this batch.
If, like me, you make your tamales with a thin layer of masa and a heaping mound of filling then you're going to get some blowouts and visually unappealing tamales.
But they will taste great!
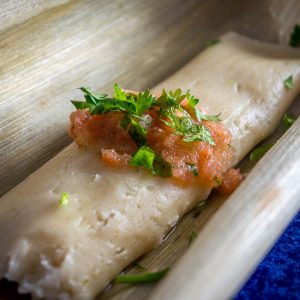
I have some leftover Tomato-Jalapeno Salsa in the fridge. Even better!
I highly recommend serving these up with a homemade salsa if you have the chance. It completes the journey to a different time and place. Plus it makes them taste really good!
Ideally your tamale is light, moist, and a bit fluffy. Whipping up the fat really helps with this so it's worth trying that step with your first batch of tamales.
So what do you think, does it seem doable?!
Tamales are a great dish to add to your arsenal and keep in mind that they are wildly versatile. Once you get comfortable with the tamale dough then you'll come up with all sorts of ways to customize them.
Buen Provecho.
Easy Tamales Recipe
Ingredients
- 1.5 cups masa harina (corn flour)
- 1 cup stock (plus more to combine dough)
- 1 teaspoon salt
- 1 teaspoon baking powder
- 6 tablespoons lard
- 3 tablespoons butter
- 20 dried corn husks
Tamale filling (feel free to customize to your liking):
- 2 cups bean dip
- 1 cup cheese
Instructions
- Start by adding the corn husks to a large bowl and soaking them in the hottest tap water you've got. You can use a bowl or plate to keep them submerged if they float to the surface.
- To make the dough, add 1.5 cups masa harina to a mixing bowl along with 1 teaspoon baking powder and 1 teaspoon salt. Combine well and then add 1 cup of stock, roughly combining into a shaggy dough.
- Add 6 tablespoons of lard and 3 tablespoons of butter to a mixing bowl and let it come to room temp. Use a hand mixer on medium-high to whip the fat to a lighter consistency, approx. 2 minutes.
- Add half of the masa dough to the fat and combine using the hand mixer on medium speed. Add the other half and combine into a cohesive dough. Along the way you might need to add additional stock to get it to combine. I usually end up using my hands to give it a final mix.
- Drain the corn husks and pat dry a few of them. We'll use the husks that are widest and intact.
- Spread 2-3 tablespoons of masa dough on the lower left portion of the husk's wide side. I like these tamales best when the dough layer is super thin and I find that using my hands is the easiest way to get a thin, even layer of dough on the corn husk. You could also use the back of a spoon or a spatula to spread the dough.
- Add 2-3 tablespoons of filling to each tamale. I used bean dip and cheese for this batch.
- Fold the tamale onto itself and seal the edges so that you have a cocoon of tamale dough surrounding the filling. Roll the remaining husk around the tamale and fold the bottom portion of the husk upwards.
- Place a vegetable steamer inside a large pot and fill the pot with enough water to barely reach the level of the steamer. I used a large stock pot with approximately 1" of water in it.
- Bring the water to a boil and then lower heat to mediumish. My stove setting for this batch was between medium and medium-high.
- Stand the tamales up vertically in the steamer, with the open side up and the folded side facing the side of the pot, this will keep them closed as they steam. Cover the tamales with the remaining corn husks to prevent water from dripping into the open ends. Steam for 60-75 minutes. Keep an eye on the pot to ensure that there is always water to steam; if it runs low you can add more. When the husk pulls away readily from the tamale then they are done. Ideally the tamale has a light, moist consistency.
- Serve immediately with your choice of Salsa and sides.
Notes
Still hungry?!
Want to receive Mexican Please recipes via email when they are posted? Sign up below to subscribe. All recipes are spam free.
Linda
I didn't realize tamales were this involved; but this looks good.
Brianna
I made your tamale recipe tonight along with yiue homemade tortillas. Both turned out so well! I got many compliments. From now on, I will only make fresh tortillas. They taste so much better...
Patrick
Thanks Brianna, I'm so glad you found some keeper recipes on my site! I know, it's amazing how much better homemade tortillas are eh? Cheers.
kirk flagg
thanks, great recipe, pictures of consistency were helpful...was great with leftover carnitas
Patrick
Thanks Kirk these tamales would be awesome with leftover carnitas!
Ang
This was the best tamale dough I have ever done- easy to get the consistency right and flavorful! I used butter and duck fat (omg) and did a turkey /veg filling since I had leftover turkey meat. Thank you so much for making this a new go-to!
Patrick
Thanks Ang! So glad they were a hit for you -- would love to try that butter and duck fat combo at some point. Cheers.
Carolyn
Isn't there someway to do this without the husks? I thought I could try cabbage leaves. I'm going to try it today. i really like corn meal (cornbread). I have all the other ingredients. I could just put it into a casserole? I will let you know what happens/ I love this page and read every word.
Thank you,
Carolyn
Patrick
Hey Carolyn! Yeah there are some workarounds for making tamales without the husks, but to be honest I've never tried them before. Parchment paper would be my first choice I guess and I think you could make that work. Not sure about using cabbage leaves but I hope it went okay! Cheers.
Ann B
Hi
Has anyone fixed these in an instant pot? If so, what did you do? First time trying tamales and I’m just staring at my instant pot I gotfor Christmas
Thanks
Callea
Instant pot in steamer basket, 2 cups water in bottom, 18 tamales in basket on steam, less & high settings 20 mins, 5 min NPR, then quick release & remove from ipot, place on paper towels for 15 mins & serve.
Rosie
For us, this is a tradition and we use the whole bag of maseca. I recommend u try some made with hime made pinto beans (refried), some with pork, others with chicken, and some with cheese. The ones with bean and cheese are usually preferred by children. Pico de gallo, guacamole, and sour cream in the side compliment it perfectly well!
Patrick
Hey Rosie, those all sound like great options. I hope the tamales treat you well!
patrick ness
i couldn't get the butter & lard to thicken like the photo ,using same method . ? tanks ,patrick
Patrick
Hey Patrick, yeah I know what you mean. I've made a batch before using store-bought lard and felt like the fat wouldn't whip up as readily. I assumed it had something to do with the lard being hydrogenated but I'm not 100pct sure of that. Either way, I continued on and made the tamales and was still happy with them although they were a little bit more dense. I hope yours still turned out okay!
I'm always trying to get people to render their own lard or find a similar source closeby, I think it's a much cleaner product to work with compared to the baking aisle lard.
Kristi Dalton
I double the recipe and was still not enough for my husband and 2 teenage boys! Easy recipe, first time tamale maker And was a huge success. Thanks!
Patrick
Ha awesome Kristi, so glad the tamales worked out -- such a great dish to add to your arsenal. Cheers.
Simple Abode
Tamales were a new culinary venture for me. I've used your tamale dough recipe twice now, and both times have a great success. First time I used all butter, as that is what I had on hand. The second time I used a combo of pork lard and butter, with more of the fat being butter. Again, amazing. Thanks so much for making your recipe easy to follow.
Patrick
Hey thanks much for your note, so glad you have now conquered tamales!
bonnie mills
i was wondering, i like to keep lots of garlic confit in the freezer for making my own garlic aioli. would the strained olive oil from cooking the garlic work instead of using lard? i keep it in the refridgerator and use it for lots of other things like roasting veggies and making salad dressings so i know it would add an incredible flavor to the dough. i have never tried to whip it tho....any ideas?
Patrick
Hi Bonnie! Hmmm I'm usually disappointed in the flavor of tamales made with oil but it sounds like yours has some additional flavor so it's probably worth trying. I doubt it will whip into a lighter consistency so I would prob just plop it in there and go for it. Given that tamales require some effort I might be tempted to try the oil on only half of the masa and use butter/lard for the other half.