
Here's the other Hatch recipe I make all the time, have you tried it yet?! I use it to make tostadas, but feel free to get creative with it!
Make a big batch of this Hatch Chicken Chile Verde and you'll be in Hatch Heaven over the coming days.
This is a delicious, all-purpose recipe that you can use for tacos, tostadas, burritos -- or even just served up next to some rice and beans for a quick, satisfying meal.
How To Make Hatch Chicken Chile Verde
Keep in mind that Hatch chiles come in different varieties, sometimes labeled as Mild, Medium or Hot.
If you want a milder batch then consider seeking out the Mild variety, but don't sweat it too much as the "hotter" varieties still come in quite low on the Scoville Scale. How Hot Are Hatch Chiles?
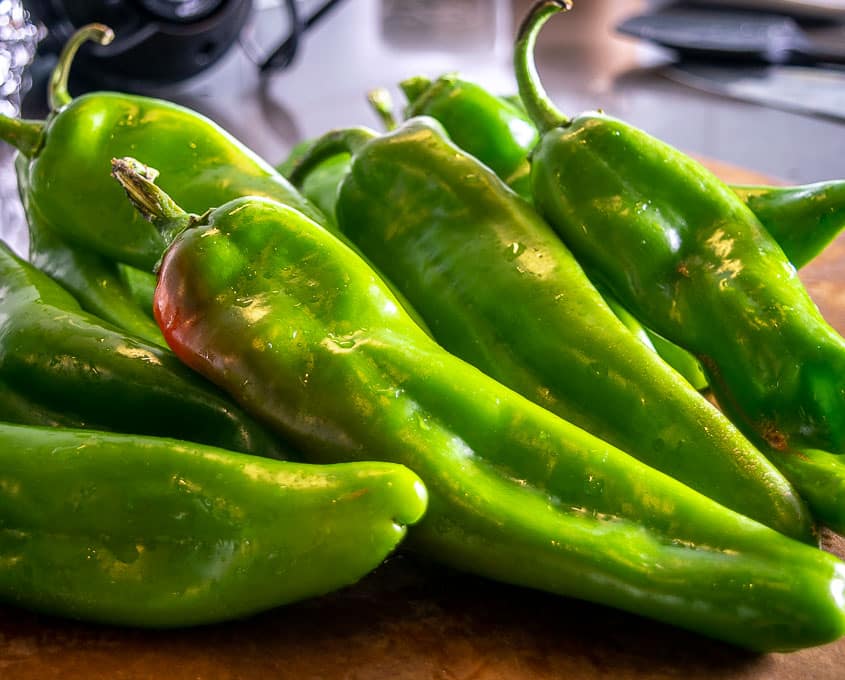
You'll need somewhere around 2-2.5 lbs. of Hatch awesomeness for this recipe.
I used 14 of the Hot variety (Sandia) and that came in just under 2.5 lbs.
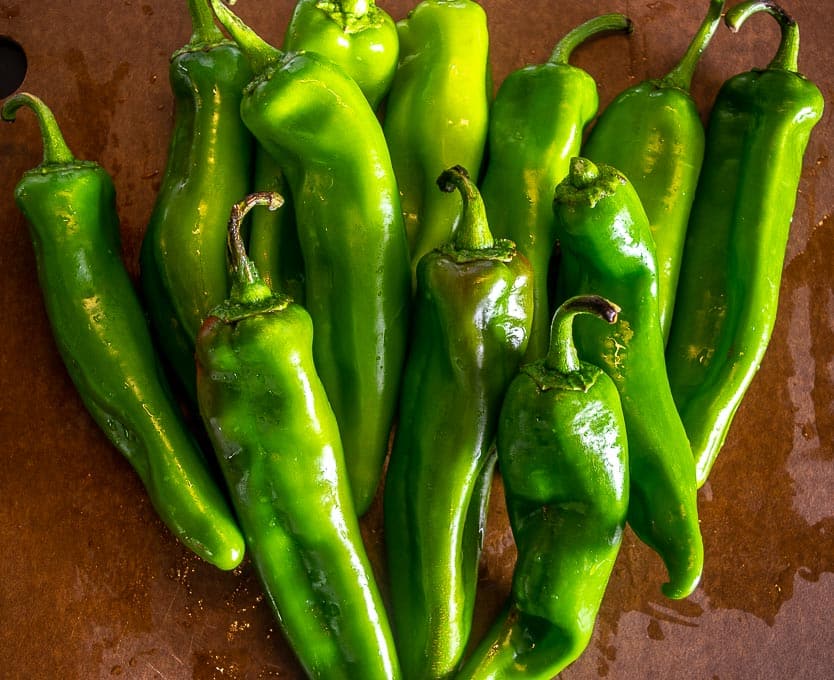
If you're new to Hatch chiles you'll find that they look quite similar to Anaheims.
But when you roast them they develop a unique buttery flavor that has given them a cult-like status in the Southwest.
So we'll start by roasting these in the oven for a half hour or so. Sure, you can roast them on a grill or over an open flame, but I default to the oven for big batches as it seems to be more efficient.
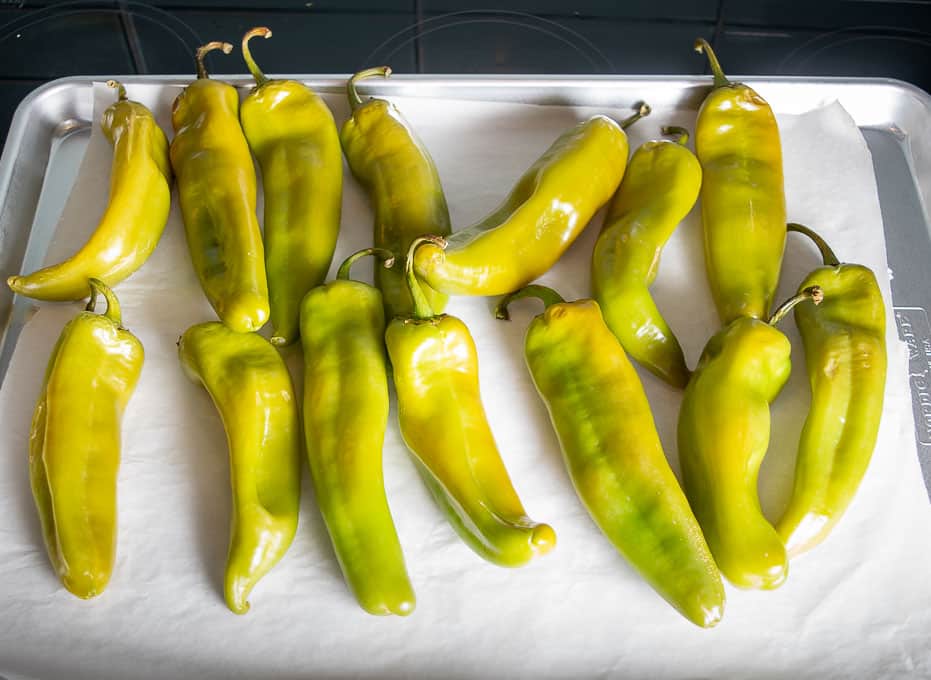
Give your Hatch chiles a good rinse and add them to a baking sheet.
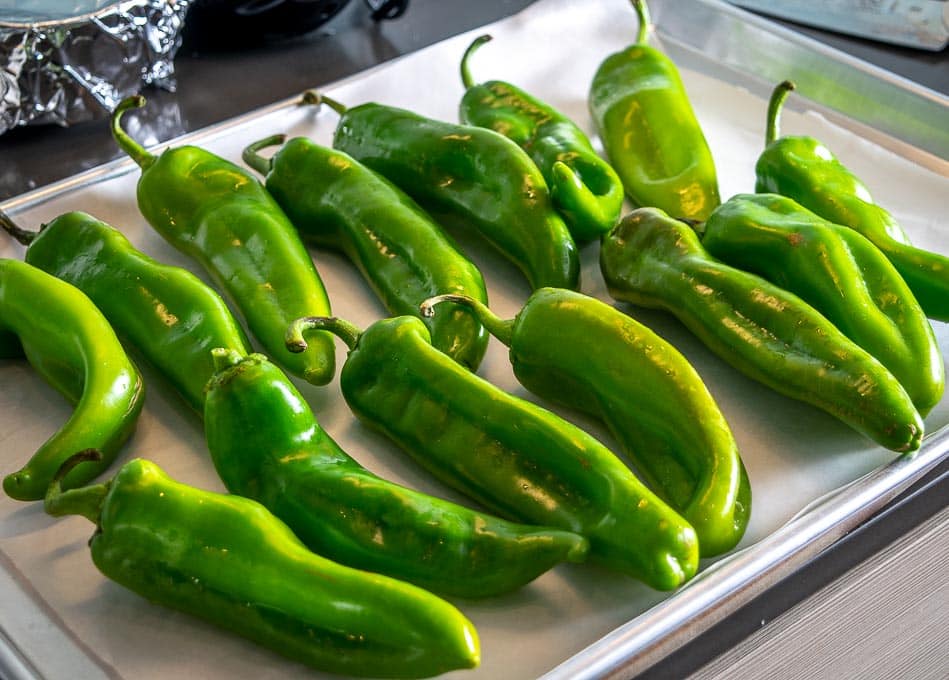
Roast them for a half hour in the oven (400F). I usually check on them halfway through the baking period and give 'em a flip.
As the chiles roast I usually brine the chicken. You'll need 2 lbs. of chicken for this recipe -- I used 3 boneless chicken breasts but feel free to use any chicken that you have available.
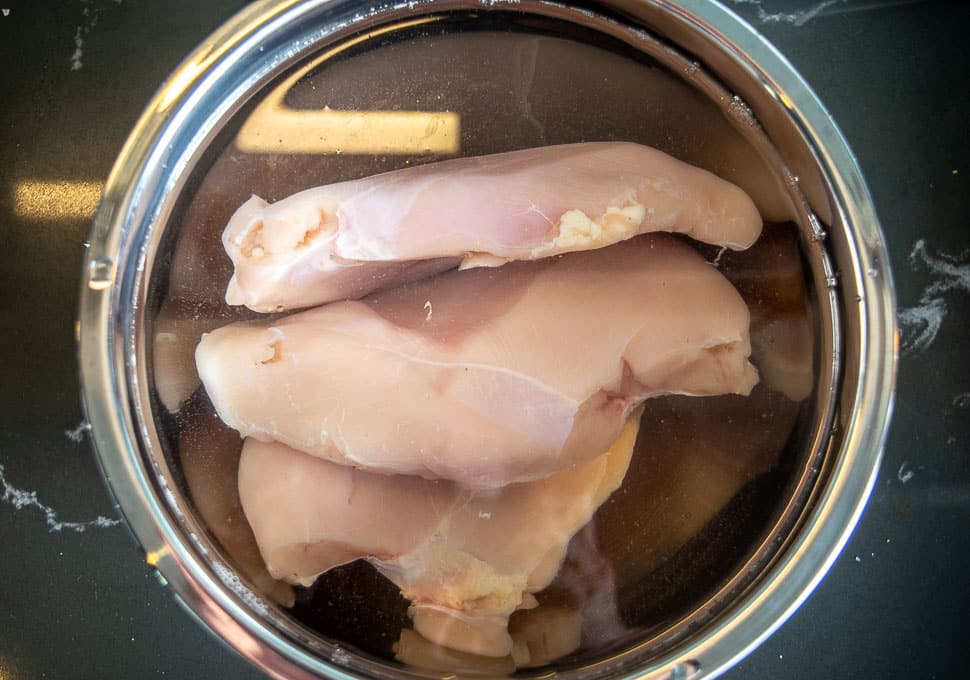
A half hour swim in a simple saltwater brine will dramatically improve the flavor of this dish. Try to do this step if you have time!
Add 2 quarts cold water to a mixing bowl along with 1/2 cup Kosher or sea salt. Stir to dissolve the salt, then add the chicken, cover, and let it brine in the fridge for 30-60 minutes.
I usually let the chicken brine until the Hatch chiles are done roasting, then pat the chicken dry and bake it in the oven for about 20 minutes. Again, you can cook the chicken how you see fit, but I find that this brine-and-bake method works great for big batches that expect to be drenched in sauce.
Here's how the Hatch chiles looked after 30 minutes of roasting:
Not pictured is the heavenly Hatch aroma 🙂
Once they cool a bit you can de-stem and de-seed them, but don't worry about getting rid of every last seed. You can also discard any puffy bits of skin.
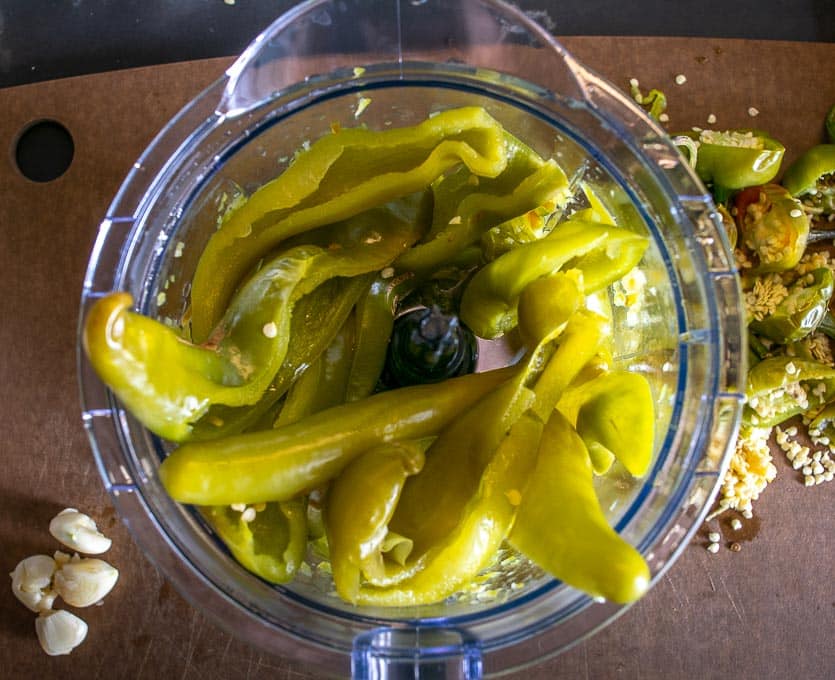
Add the chile pieces to a blender along with:
1 cup stock
1/4 onion
2 peeled garlic cloves
Combine well. You may need to blend the first half before you can fit the rest of the chiles into the blender.
In addition to blending onion and garlic with the chiles, I like to dice some up for the sauce. So I chopped up the remaining 1/4 onion and cooked it in a glug of oil over medium heat.
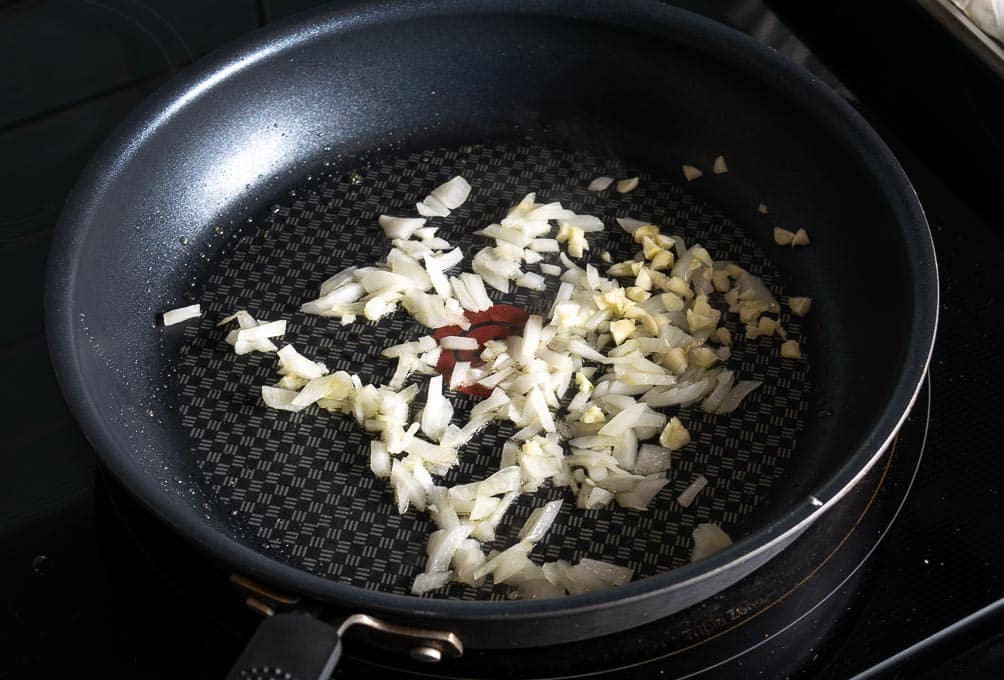
When the onion has softened add 2 minced garlic cloves and cook briefly.
The add the blender full of Hatch awesomeness along with:
1 tablespoon Mexican oregano What is Mexican oregano?
1/4 teaspoon cumin (optional)
1/4 teaspoon salt
freshly cracked black pepper
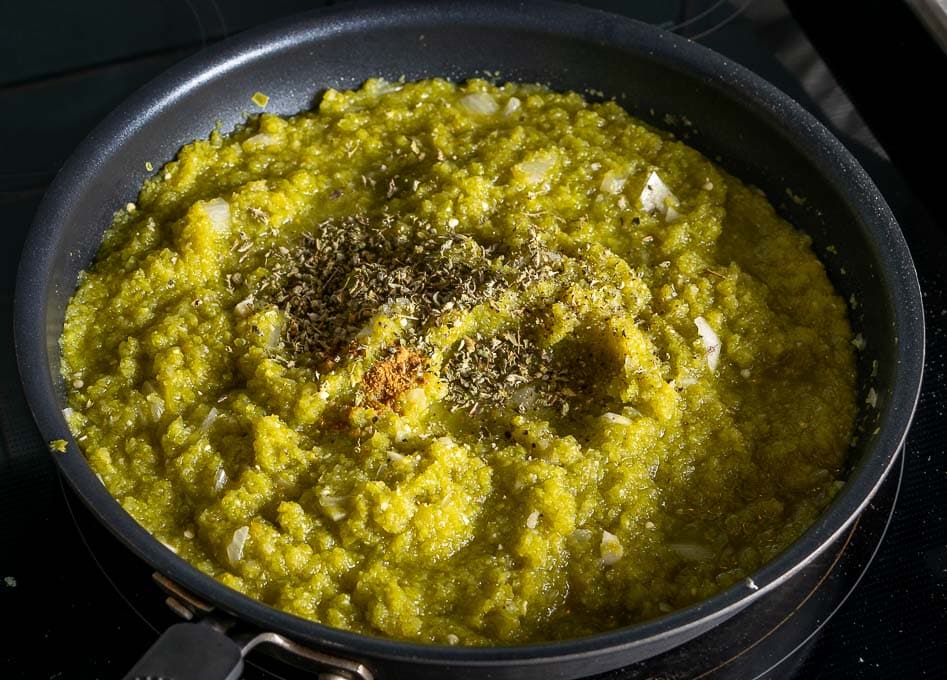
Bring it up to temp over medium heat, stirring regularly.
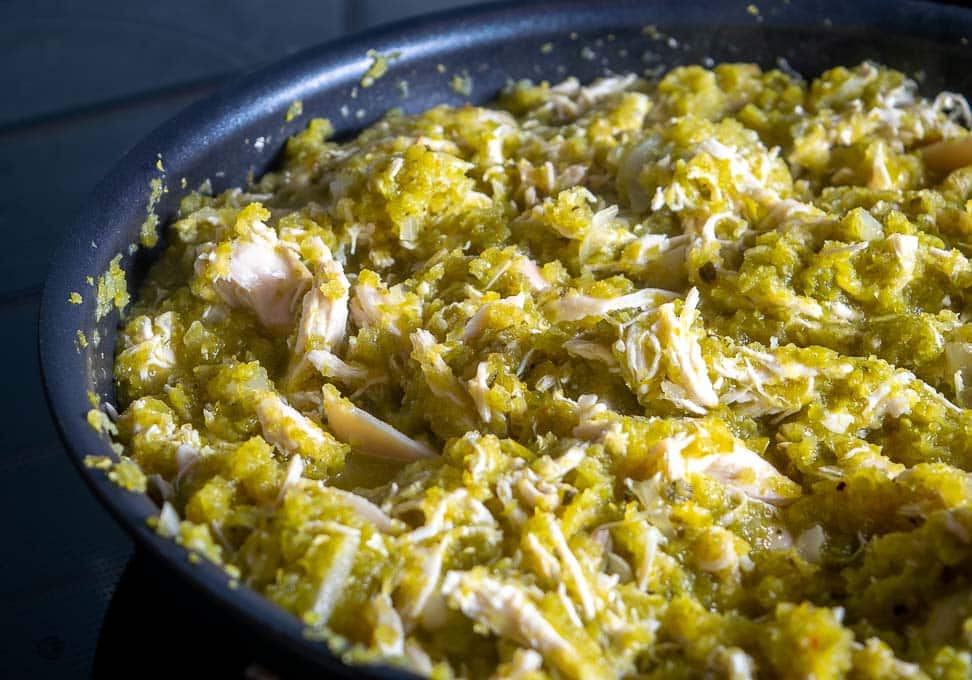
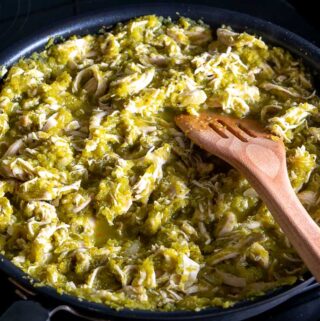
When the chicken is done baking -- usually around the 20 minute mark -- remove it from the oven and let it rest for a couple minutes. Then shred it with two forks and add it to the Hatch sauce.
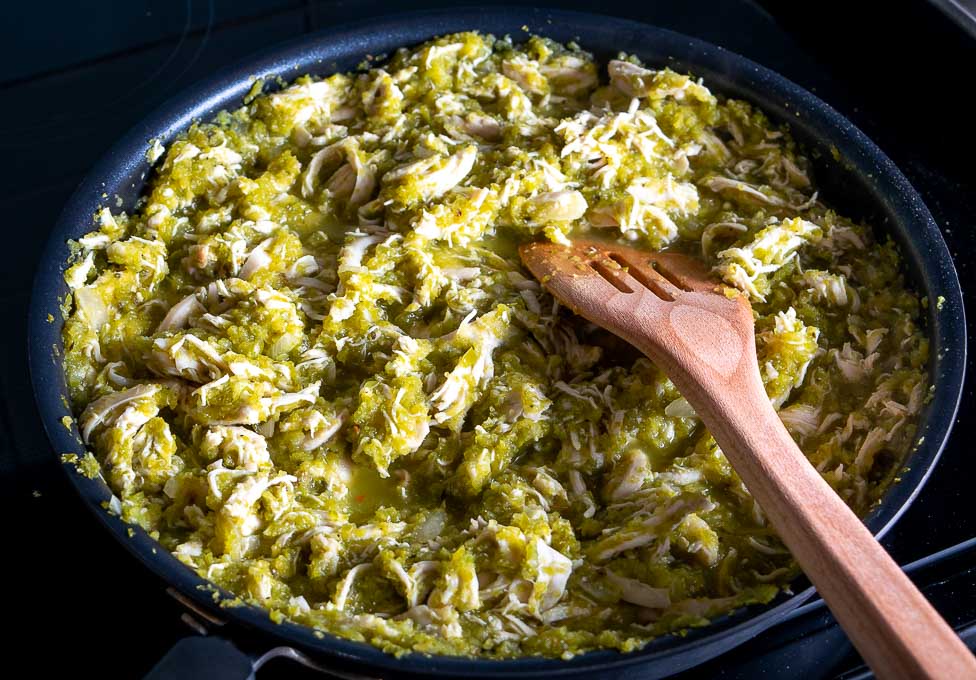
Combine well and take a taste!
The brined chicken is loaded with the rich, buttery flavor of the Hatch chiles -- so good!
You can salt to taste but I find that when you're using brined chicken you really don't need to add much salt to this dish.
And now you've got a huge batch of Hatch awesomeness that will provide an endless stream of Hatch meals over the coming days. Perfect!
There are lots of tasty ways to serve this up, but first I want to mention the most important characteristic of Hatch chiles I've learned...
They like to be in charge!
If there is too much competition the Hatch flavor will disappear into the background.
I learned this the hard way with the Hatch Enchiladas. I tried multiple versions of that enchilada sauce using tomatillos, but the Hatch flavor would get buried by the tomatillos. I found that a simple, Hatch only enchilada sauce was always the tastiest as it kept the flavor of the Hatch chiles at the forefront.
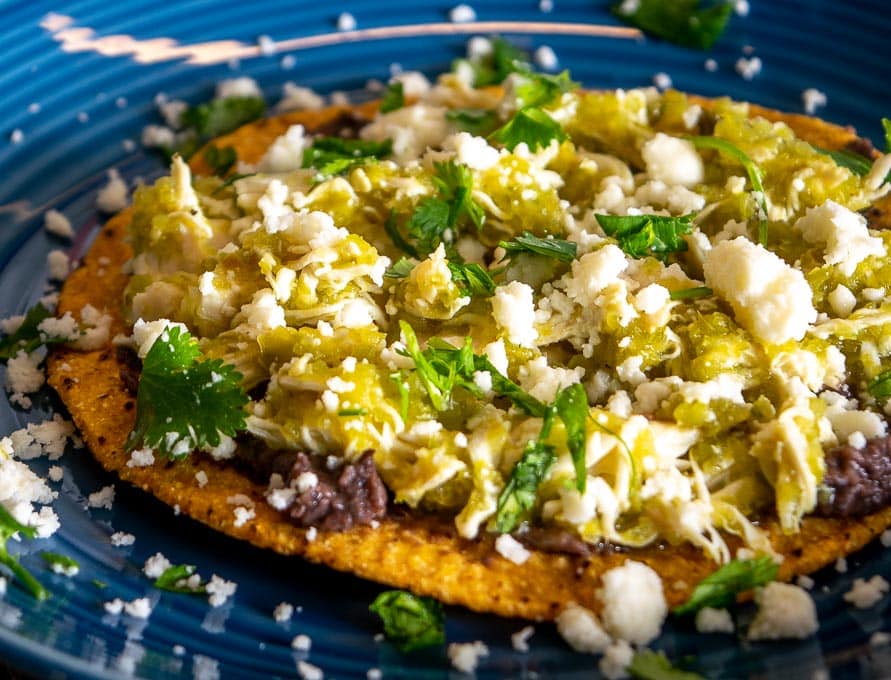
As another example, I made tostadas with this batch using:
a thin layer of refried beans
Queso Fresco What is Queso Fresco?
freshly chopped cilantro
a squeeze of lime
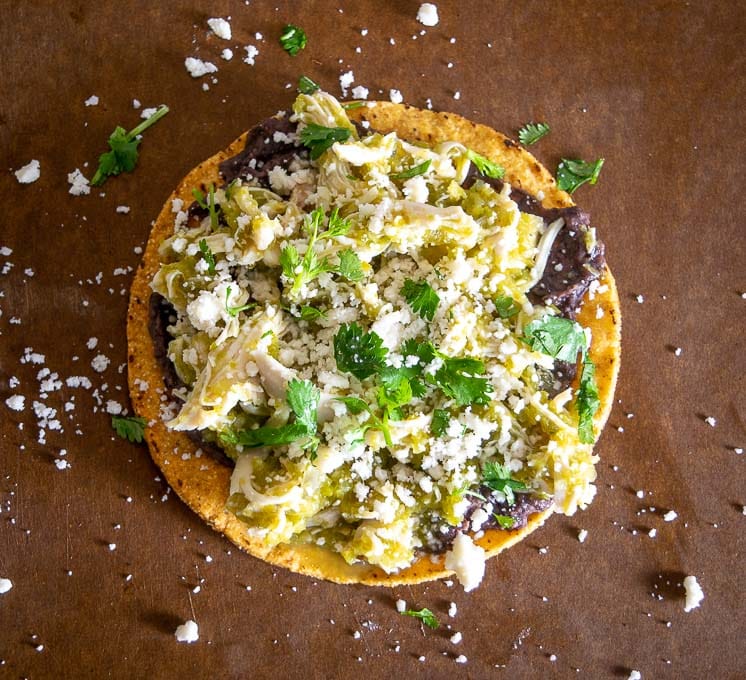
And they are a real treat!
But as the meal progressed I found myself using less cheese and less beans because I wanted more of the Hatch flavor at the forefront.
So it's worth starting with a tostada like this and building from there:
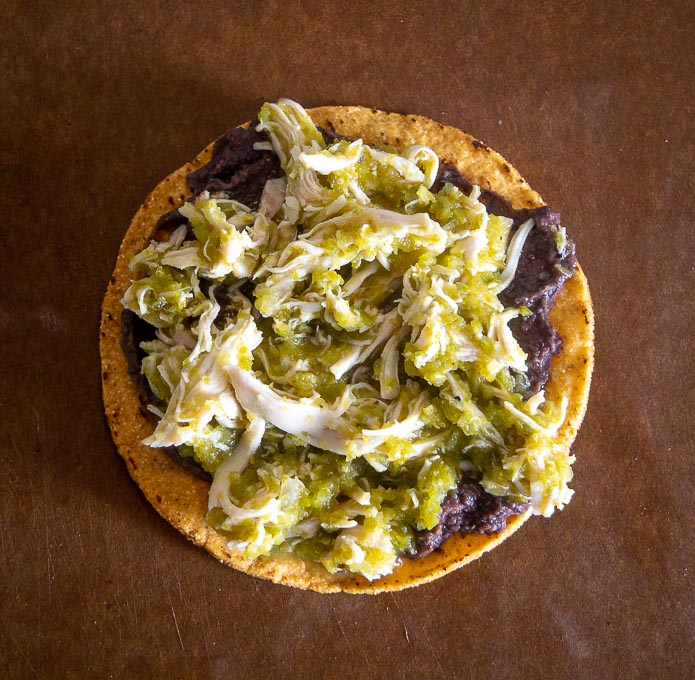
That's just a warm, crispy tostada with a thin layer of beans and plenty of the Hatch chicken. This simple tostada is absolutely delicious because it lets the unique Hatch flavor be the boss!
So please keep this in mind when you are building your Hatch masterpieces over the coming weeks. Start with simple concoctions that let the Hatch flavor shine, then add any additional fixings that you think will complement that flavor without overwhelming it.
You can even serve your Hatch Chicken Chile Verde over white rice and I think you'll still be in Hatch Heaven and loving it. That's the beauty of cooking with Hatch chiles -- just let them do most of the heavy lifting and it will lead to some happy faces at the dinner table.
Okay, I hope this post inspires you to cook with some Hatch chiles! For reference, here are some additional Hatch posts on the site:
Where To Buy Hatch Chiles Online
Want the latest recipe? Click your favorite from these options and follow me: Instagram, Facebook, Pinterest, TikTok, YouTube.
Hatch Chicken Chile Verde
Ingredients
- 2-2.5 lbs. Hatch chiles (I used 14 medium-sized)
- 2 lbs. chicken (I used 3 boneless breasts)
- 1/2 onion
- 4 garlic cloves
- 1 cup stock (or water)
- 1 tablespoon Mexican oregano
- 1/4 teaspoon cumin (optional)
- 1/4 teaspoon salt (plus more to taste)
- freshly cracked black pepper
- olive oil
For the tostadas (optional):
- tostada shells
- refried beans
- Queso Fresco
- cilantro
- lime
Instructions
- Start by giving the Hatch chiles a good rinse. Then place them on a baking sheet and roast them in the oven (400F) for a half hour or so. I usually check on them halfway through the baking period and give them a flip.
- As the chiles roast I usually brine the chicken. Add 1/2 cup Kosher or sea salt to a mixing bowl along with 2 quarts of cold water. Stir to dissolve the salt and then add the chicken breasts. Cover and let brine in the fridge for 30-60 minutes or until you need it.
- You can start baking the chicken when the chiles are close to being done. Remove the chicken from the brine and pat dry. Add the chicken to a baking sheet and bake in the oven (400F) for 20 minutes or until the internal temp reaches 160F.
- Let the chiles cool for a couple minutes after roasting, then de-stem and de-seed them. Don't worry about getting rid of every last seed, just get the majority out. You can also discard any puffy bits of skin but you don't need to remove all of it. Add the chile pieces to a blender along with: 1 cup stock, 1/4 onion, 2 peeled garlic cloves. Combine well. You may have to blend half of the chiles before you can fit the other half in the blender.
- Finely dice the remaining 1/4 onion and 2 garlic cloves. Saute the onion in a glug of oil over medium heat in a large skillet or saucepan. When the onion has softened add the minced garlic and cook briefly. Then add the Hatch sauce from the blender along with: 1 tablespoon Mexican oregano, 1/4 teaspoon cumin (optional), 1/4 teaspoon salt, freshly cracked black pepper. Bring this mixture up to temp over medium heat, stirring regularly.
- When the chicken has finished baking, usually about 20 minutes, remove it from the oven and let it rest for a couple minutes. Then shred it with two forks and add it to the Hatch mixture in the pan. Combine well and take a final taste for seasoning. I've found that when I use brined chicken I don't need to add much salt, but if you're skipping the brine or using rotisserie chicken then you may need to add some additional salt at this point.
- Your Hatch Chicken Chile Verde is already loaded with flavor so feel free to serve it up as you see fit! Even a big spoonful over white rice is a quick, satisfying meal that I frequently munch on.
- If you want to make the Tostadas, start by warming up the tostada shells in the oven for a few minutes. I usually warm up the refried beans too. Then load up each tostada shell with a thin layer of refried beans, plenty of Hatch Chicken, Queso Fresco, freshly chopped cilantro, and a squeeze of lime.
- Store leftover Hatch Chicken Chile Verde in the fridge where it will keep for a few days.
Notes
Still hungry?!
Want to receive Mexican Please recipes via email when they are posted? Sign up below to subscribe. All recipes are spam free.
Jeannine
Just can’t beat Hatch season, can we Patrick?! It's the best, love this recipe AND the Hatch Chicken Enchiladas. Thank you!
Jeannine
Patrick
Thanks Jeannine!
Francis Bercher
Easiest way to roast the chiles - in an air fryer! 400 degrees for 15 minutes, turning halfway. Add 1 minute for turning. Turn off air fryer and leave chiles inside to steam for 15 minutes, then open up air fryer, remove chiles, let cool, then peel & deseed.
Patrick
Hey thanks for mentioning this Francis!
Stefanie
This takes some extra effort, but it's so worth it!
Patrick
Thanks Stefanie!
Julie
Amaze-balls!
Patrick
🙂
Ron Mullin
This was an easy recipe and it tasted great!
Patrick
Thanks Ron!
Lakegal
I spent about 3 hrs in The kitchen, longer than I care to. But the end result is very good and I’ll have a few meals out if it. I plan to eat with rice and as soft tacos (got guac and cilantro). The brining was enough salt for this dish. My peppers were mild with a “tinge” of spicyness, nothing painful or upsetting. I removed 95% of the seeds.
Wondering if the hatch roasting and eventual sauce preparation could be done in advance, and if it could be frozen. If yes, I would add this to my rotation in a NY minute. Thanks for sharing.
Patrick
Hey thanks much for your note!
Yeah, I do think the Hatch sauce would be a good candidate for freezing, but to be honest I haven't tried that yet so I can't say for sure how it will affect the flavor. Cheers.
JG
What a delicious lunch you've directed me to, thanks Patrick. Best.
Patrick
Thanks JG, hope you like this one! Cheers.
Steve Pataka
I ended up changing just a tiny bit and boiling my chicken with bullion in order to have stock to blend with the de-seeded hatch chiles.
No Mexican oregano so I omitted it and went a little heavy on cumin.
Wow! Just chicken, onion, garlic, and the Hatch chile, basically and it's soooo delicious!
Patrick
Hey thanks much for mentioning your adjustments Steve, that is the Hatch chile taking all the credit 🙂 Cheers.