
Chile Verde is a worthy ambassador for all of Mexican cuisine. It has a comforting, otherworldly flavor that people respond to with a Yup, there it is -- as if they are rediscovering a long lost flavor that's been missing for a few generations.
While it's traditionally served as a stew, the great thing about Chile Verde is that you can use it for all sorts of on-the-fly meals. Make a bigger batch and you'll be eating Chile Verde burritos and quesadillas for the rest of the week.
Sound good?
How To Make Chile Verde
Chile Verde is most commonly served with pork, but keep in mind that you've got some leeway on the protein choice as the luscious green sauce is by far the more important element. I'll put up some vegetarian and beef options at some point, but for this version we're using pork shoulder and this is the perfect starting point if you're new to Chile Verde.
You'll frequently see pork shoulder sold in 2 - 2.5 lb. chunks and that's a good size for this recipe. It's an inexpensive cut of meat that responds well to low-and-slow cooking. If you give it enough time it will remind you how the phrase fork tender came into existence.
And while you'll frequently see pork shoulder used in the slow cooker (as in our Slow Cooker Carnitas), an equally good option is a leisurely stove simmer so that's what we'll do for this batch.
But before you start browning the meat, it's best to get the poblanos and tomatillos roasting as these are the key building blocks for the green sauce.
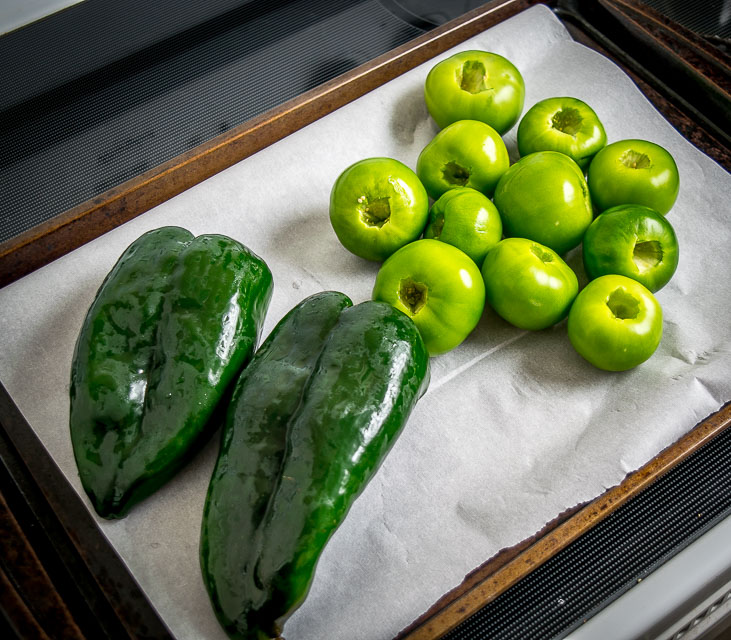
I think it's easiest to just plop these in a 400F oven. If you're in a rush you can get to the finish line quicker by using the broiler, but I usually just put them in the oven and start working on the other ingredients.
I'm also in the habit of cutting out the tomatillo stems knowing that any juice leftover on the roasting pan will go into the blender as well. And yes, you can also roast the jalapenos and onion, but as with our Salsas I tend to add those in raw. (What is a Tomatillo?)
In a half hour the poblanos and tomatillos will look like this:
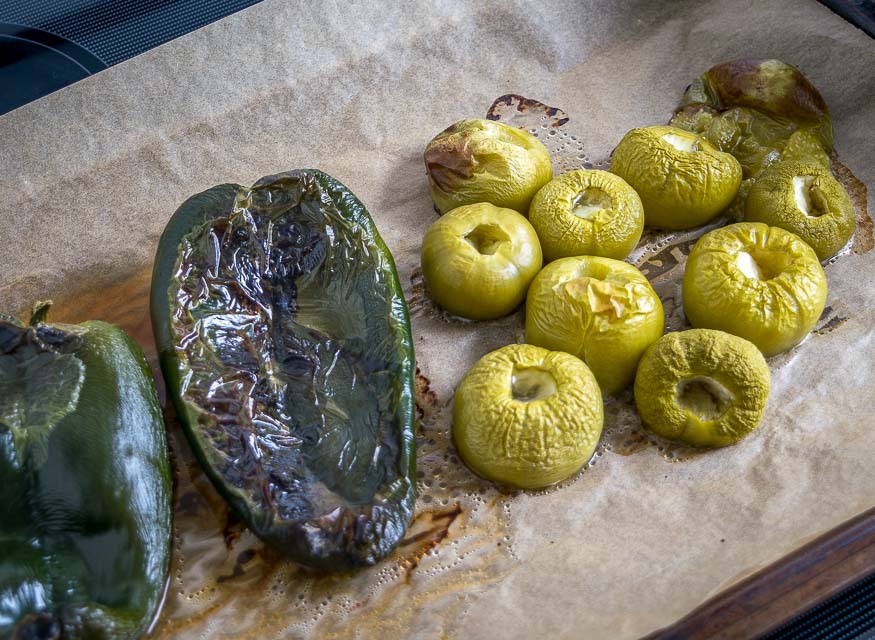
I usually flip the poblanos after 15-20 minutes, and if the tomatillos are disintegrating at that point you can take them off the roasting pan as they don't need as much time in the oven as the poblanos.
See all the wrinkled bits of skin on the poblanos? Once they cool down you can pull off and discard as much of that skin as possible.
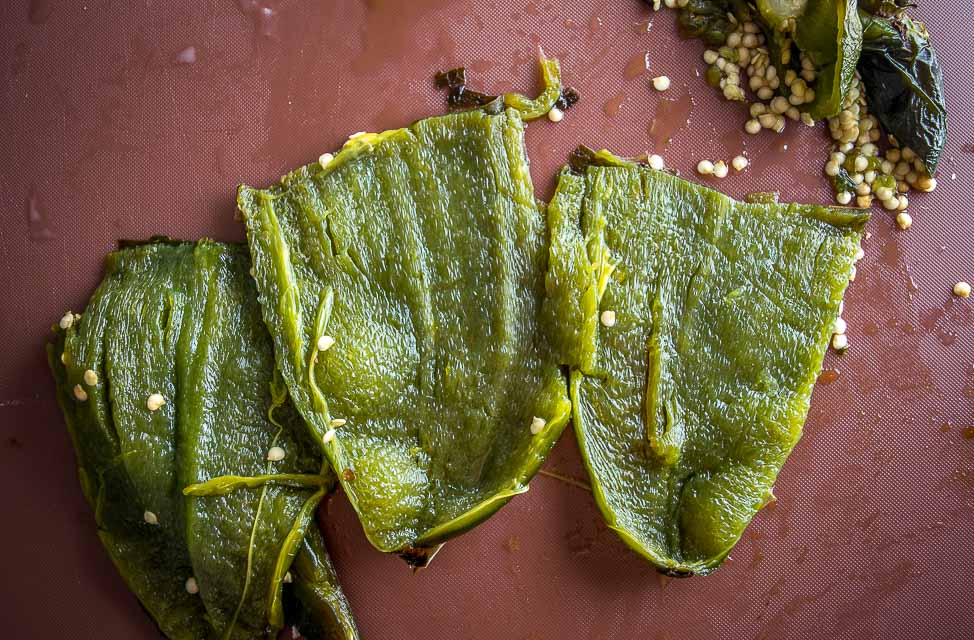
An additional step would be to put the poblanos in a sealed Ziploc to loosen up the remaining skin, but I usually skip this step when the poblanos are headed to the blender as any leftover skin won't affect the flavor. When making a dish like Rajas I am more likely to remove all of the skin as it can affect the texture when the poblanos are served in strips.
You can also de-stem and de-seed the poblanos once they cool off.
Add the poblanos to a blender along with:
the roasted tomatillos (and any leftover juices)
3 de-stemmed jalapenos
2 peeled onions (what kind?)
4 peeled garlic cloves
1/2 bunch rinsed cilantro
I usually just twist off and discard the bottom, thicker portions of the cilantro but use the upper stems that hold the leaves together.
And note that you might have to blend a portion of it first to get everything to fit into a single blender, but eventually you'll end up with a blender full of green Chile Verde goodness.
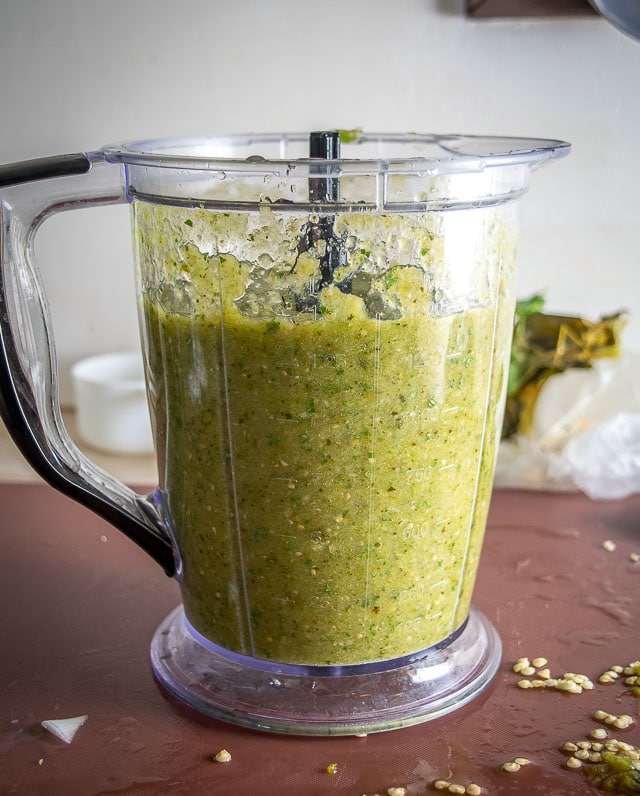
Even without any seasoning there is some serious flavor in this blender. Give it a taste and you'll get a quick preview of the core Chile Verde flavor!
And yes, using three jalapenos will create some serious zip! If you want a milder version you can always dial back on the jalapenos.
Okay, that's the green sauce in a nutshell and once you get the poblanos and tomatillos roasting in the oven you can start working on the pork.
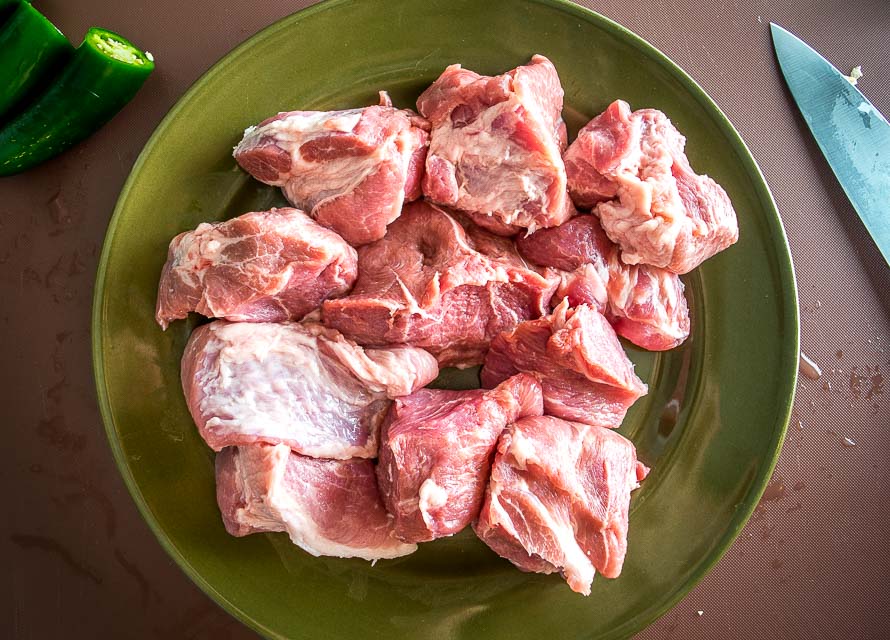
I know it's tempting to remove most of the fat, but the chunks that simmer with some fat attached will usually be the most tender pieces!
So I cut the pork into 1.5-2" chunks and leave plenty of the fat knowing that it can always be trimmed off after the simmer. Season well with salt and pepper.
Warm up a thin layer of oil in a Dutch oven or saucepan over medium-high heat. Add the pork chunks and form a single layer as much as you can.
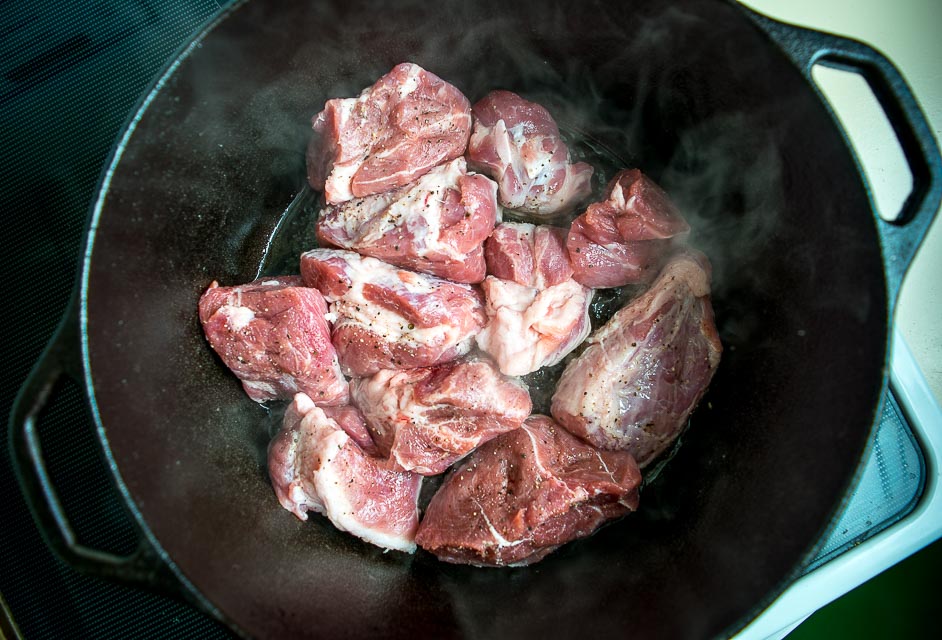
Brown both sides of the pork, approximately 3-4 minutes per side. I find it easiest to use tongs to flip over the individual pieces. You can do this in batches if your pan isn't wide enough.
Once browned, you can drain off any excess fat but it will depend on the cut of meat you're using. I didn't drain off any fat for this batch.
We'll now add:
1 cup chicken stock
1/2 teaspoon salt
freshly cracked black pepper
1 tablespoon Mexican oregano
1/4 teaspoon cumin (optional)
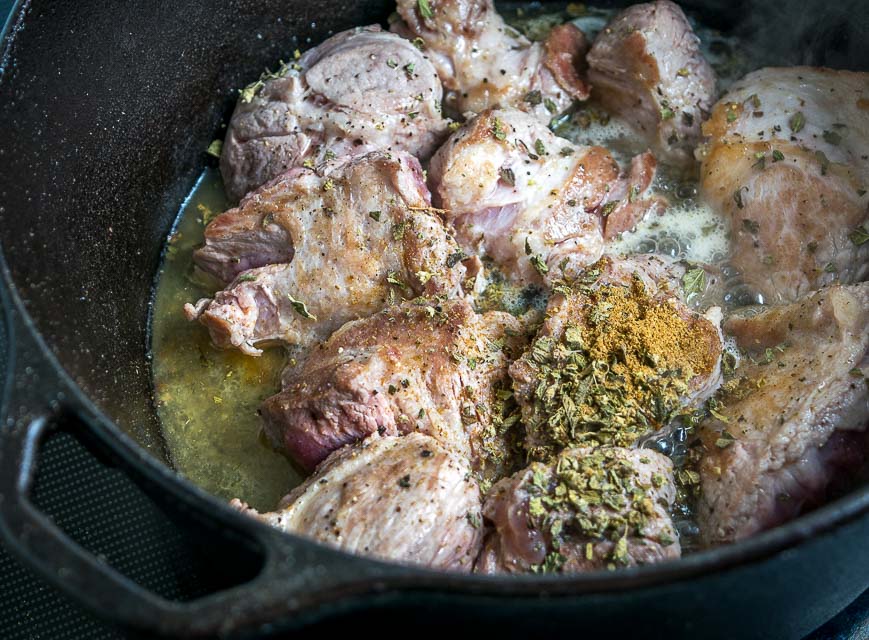
I'm a huge fan of Mexican oregano in this dish so I think it's worth sourcing some out if you're new to it. It won't make or break the dish, but I do think it complements the roasted poblano flavor quite well. I would probably just omit it before adding regular oregano. (What's the Difference Between Regular and Mexican Oregano?)
The stock will quickly come to a boil and this is perfect as it will deglaze the pan. Stir well and scrape up any bits of fond that are stuck to the pot -- this will add additional flavor to the sauce.
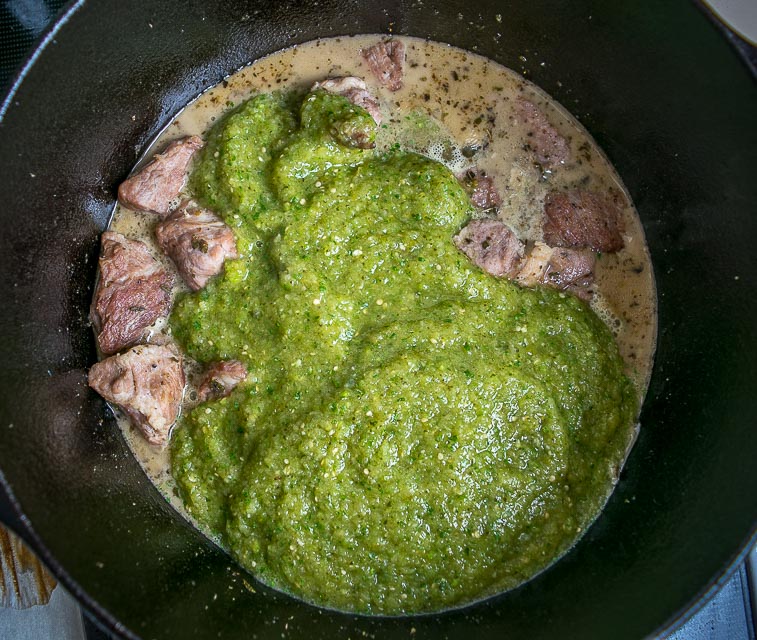
Add the green sauce from the blender along with another cup of stock and combine well. I usually rinse out the blender with the final cup of stock so that you get all the leftover green bits.
Bring to a boil and then reduce heat to a very quiet simmer (medium-low for my stove). This is going to cook low and slow, anywhere from 2-3 hours.
I usually cover the pot so that it retains most of the liquid.
I should also mention that I make this dish extra saucy -- you'll have loads of the green sauce and the pork pieces will be having a comfortable adult swim as they simmer away.
The ample green sauce will give you tons of options for leftovers. You can build meals around it so I like to have plenty of it on hand when I make a batch.
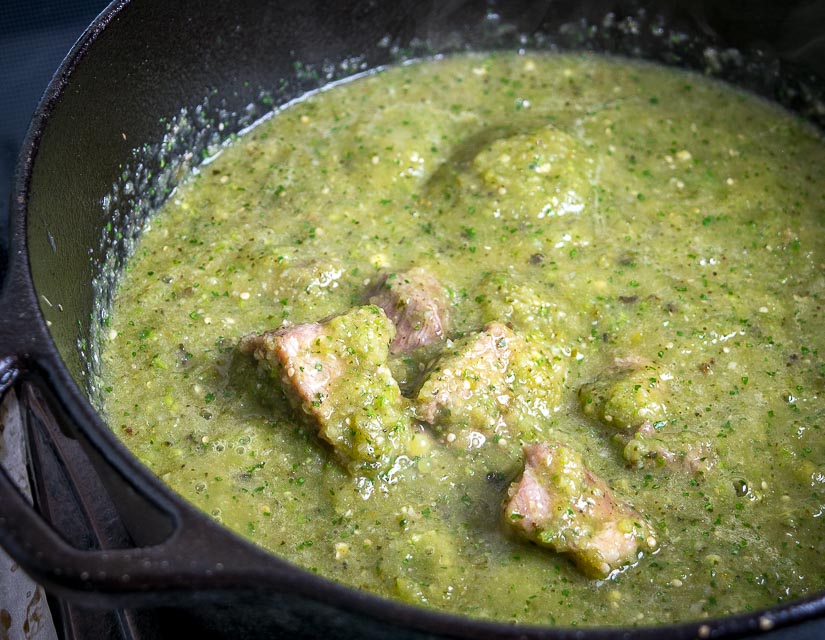
Here's what this batch looked like after simmering away for two hours:
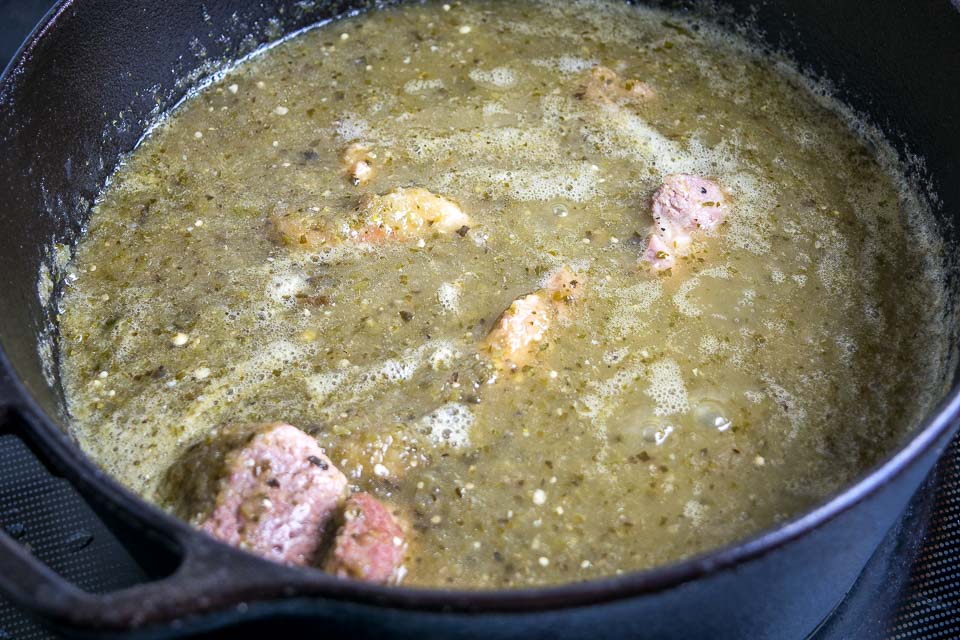
Yes, you're going to lose some of that vibrant green color, but you're going to gain so much more!
I usually start checking the pork for tenderness after two hours. It's done when it nearly pulls apart on its own.
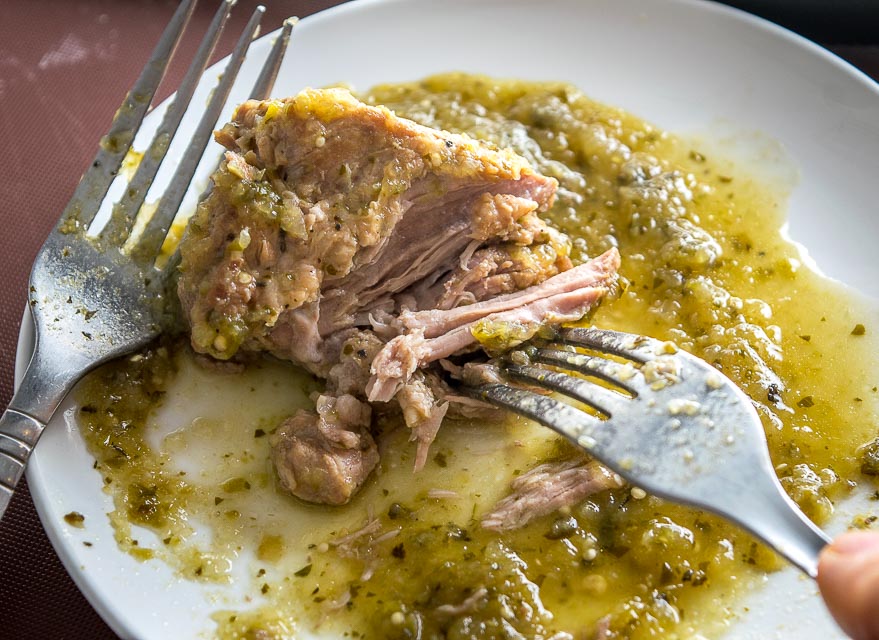
If it's still tough then give it some more time on the stove. The heat will eventually break down the fatty connective strands and give you some tender, moist pieces. This batch simmered for about 2 1/2 hours.
If you follow the recipe you should have plenty of liquid in the pot for the simmer, but if it ever looks low to you then you can always add additional stock.
Once you're happy with the tenderness of the pork then it's time to take a final taste for seasoning! I added generous pinches of salt and Mexican oregano at this point, but keep in mind that this will depend on which stock you're using.
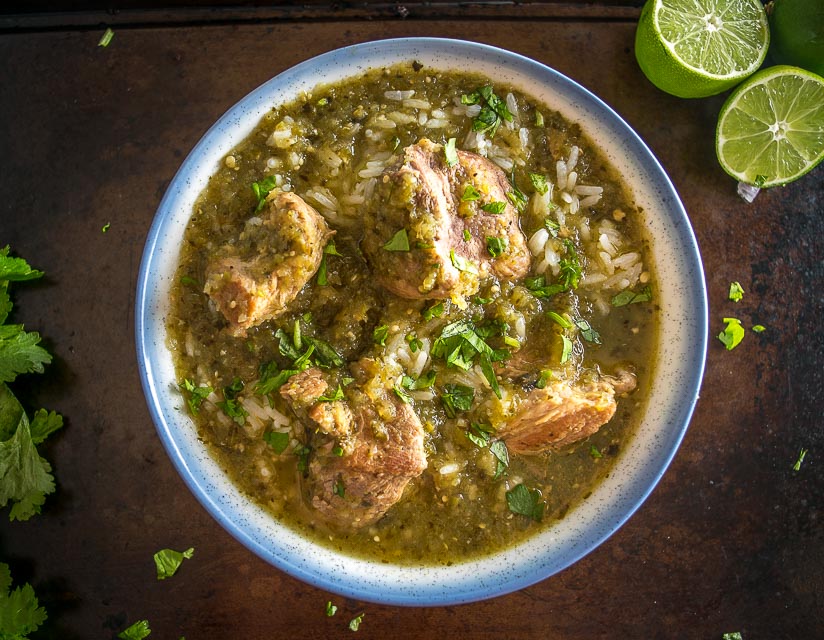
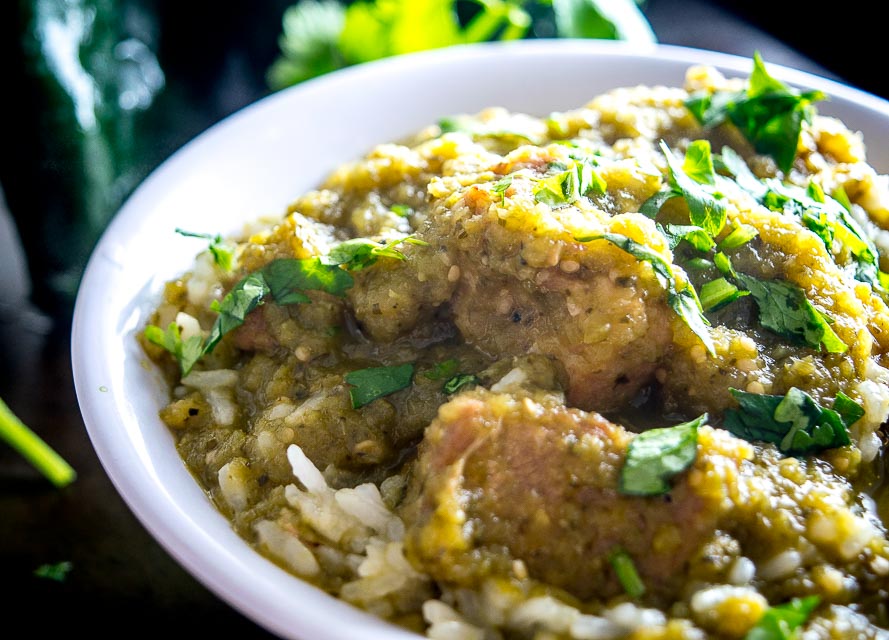
If it's your first time making Chile Verde I recommend serving it over some white rice to see how your palate reacts. The sauce has so much flavor that you really don't need much else and I eat it like this quite often.
In other words, serve some rice and pork with your green sauce, and not the other way around!
Taste good?
And maybe familiar?
Chile Verde is such a great dish to add to your repertoire so I hope it treats you well. Feel free to use the comments section below if you have any questions about it. Once you're comfortable making the sauce I think you'll find all sorts of ways to use it.
Buen Provecho.
Chile Verde
Ingredients
- 2-2.5 lbs. pork shoulder
- 2 cups chicken stock
- 4 cups cooked rice
- 1 tablespoon Mexican oregano
- 1/4 teaspoon cumin (optional)
- oil
- 1/2 teaspoon salt (plus more to taste)
- freshly cracked black pepper
- cilantro for garnish (optional)
- lime for garnish (optional)
For the Green Sauce:
- 10 tomatillos (approx. 1 lb.)
- 3 jalapenos
- 2 white onions
- 3 poblanos (or 2 larger ones)
- 4 garlic cloves
- 1/2 bunch cilantro
Instructions
- Pull off the husks of the tomatillos and give them a good rinse. I usually de-stem them but this is optional. Add the tomatillos to a roasting pan along with the rinsed poblanos and roast them in the oven at 400F. I usually flip the poblanos over after 15-20 minutes, and if the tomatillos are disintegrating you can take them out of the oven at this point. The poblanos will need about 30 minutes total to fully roast.
- Once the poblanos and tomatillos are in the oven I usually start working on the meat, but here are the remaining green sauce instructions that you can do while the meat is browning:
- Add the remaining green sauce ingredients to a blender: 2 peeled onions, 3 de-stemmed jalapenos, 4 peeled garlic cloves, and 1/2 bunch of rinsed cilantro. I usually just twist off and discard the bottom, thicker portions of the cilantro but use the upper stems that hold the leaves together.
- Once the poblanos have fully roasted, remove them from the oven and let them cool down for a few minutes. Pull off and discard as much of the skin as you can. De-stem and de-seed them. I find it easiest to cut off the tops and then make a slit lengthwise. Open up the pepper and use the knife to scrape out the veins and seeds.
- Add the poblanos and tomatillos to the blender and combine well with the other ingredients. You might have to blend half first to get all of it to fit into a single blender.
- Cut the pork shoulder into 1.5-2" chunks. I usually cut off any thick pieces of fat but I do try to leave some fat on each of the chunks. Season well with salt and pepper. Add a thin layer of oil to a Dutch oven or saucepot over medium-high heat. Once the oil is hot add the pork and try to create a single layer so that it browns evenly. You can do it in batches if you have to. Cook until well browned on both sides, approximately 3-4 minutes per side. Once browned, you can drain any fat if you want but I usually leave most of it in.
- Add 1 cup of chicken stock to the pot along with 1/2 teaspoon salt, freshly cracked black pepper, 1 tablespoon Mexican oregano, and 1/4 teaspoon cumin (optional). It will simmer quickly and this gives you a chance to scrape up any bits of fond that are stuck to the pan.
- Add the blended green sauce to the browned pork along with a final cup of stock. I usually add the final cup of stock to the blender and swish it around to get all the leftover green bits.
- Bring the Chile Verde to boil and then reduce heat to a simmer, which was medium-low on my stove. Cover and simmer for 2-3 hours.
- I usually test the pork after 2 hours. If it's tender and pulls apart easily then it's ready to serve. If it's tough then give it some more time on the stove. This batch simmered for about 2 1/2 hours.
- Take a final taste for seasoning. I added generous pinches of salt and Mexican oregano at this point, but keep in mind this will depend on which stock you're using.
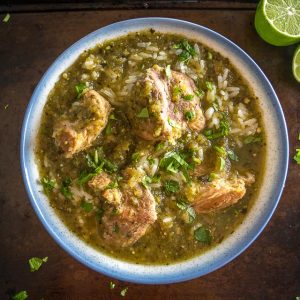
- Serve over rice and optionally garnish with freshly chopped cilantro and a squeeze of lime. Be sure to serve plenty of the sauce in each bowl as that's the key to Chile Verde. Buen Provecho!
- Store leftovers in an airtight container in the fridge.
Notes
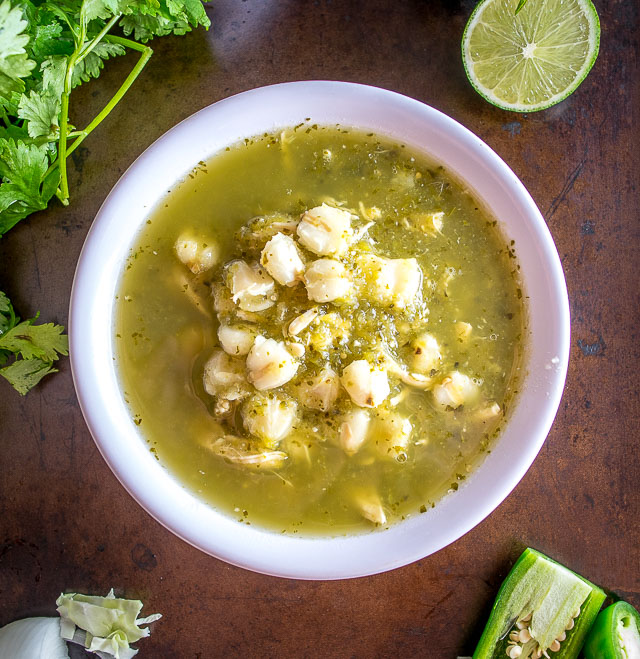
We use a similar green sauce to make an awesome batch of Pozole Verde.
Our latest recipe is a batch of Huevos Divorciados.

Still hungry?!
Want to receive Mexican Please recipes via email when they are posted? Sign up below to subscribe. All recipes are spam free.
Joycelyn
Hi Patrick
I keep Greek, Mexican and Turkish oregano on hand and just thought I'd add, the Turkish oregano is one you might want to give a try one day ( if you haven't ) as the flavour/taste is awesome.
Have a wonderful Christmas/Holiday season!
Patrick
Ahh good to know, thanks for mentioning this Joycelyn as I've never tried that variety. Cheers.
Kat702
Hi I can’t wait to Try your Recipe for chili Verde I read through all of the reviews and didn’t see anyone who mentioned trying this recipe with What I Call a “pressure cooker” but now it’s being called an “Insta pot” lol i’ve always made it on the stove when I’ve made shredded pork burritos just wondering if you think it would transition well to my pressure cooker and again thank you for this recipe I am very happy I found your blog I look forward to train more of your recipe
Patrick
Hi Kat thanks for getting in touch! But hmmmm I don't think I can give a firsthand answer as I've never made this Chili Verde in a pressure cooker. And I'm a little skeptical because pork shoulder responds so well to low-and-slow cooking. But it's probably worth a go if you are curious, it seems like 60-75 minutes is a good starting point for cook time:
Pressure Cooking Pork Shoulder
And don't forget that pork shoulder will be tough if undercooked (at least on the stove) so if you pull it out and it seems hard or tough then most likely it needs more cooking. I always find that a bit counter-intuitive but pork shoulder needs time to become fork tender.
If you give it a try please let me know how it goes! Cheers.
M
Love, love Chile Verde! Your recipe is basically same as mine. Sometimes I've added Anaheim and poblano with all your ingredients too. I like Serrano but not to many of the ribs and seeds to lower the heat. I've found I use more and more ribs and seeds every time I make. I'll be signing up to your blog for more authentic Mexican dishes!
Thanks!
M
Patrick
Thanks M!
Cj
Hello , I was wondering if you could substitute beef broth for chicken ?
Patrick
Hi CJ, yeah beef broth would work fine in this recipe. Cheers.
Ken
I have been trying my hand at Chile Verde recipes for the last year or so. This one nails it, for me. I've made it 3 times, and it's perfect. Today I'm using one and a half serranos, plus one jalapeno for a bit of extra heat.
Thanks for the great recipe, and a very nice website. I'm learning a lot while I browse around!
Patrick
Hey thanks for the feedback Ken, so glad the Chili Verde is a keeper for you. Cheers.
Linda Grindstaff
Love Chili Verde!
I usually serve it with tortillas (flour), rice and beans.
Thank you so much for the recipe. I think it would also taste great using chicken.
Patrick
Thanks Linda!
Janice
Hi Patrick... first of all, thanks for your excellent blog. You provide many great tips and references! I'm going to be trying out your chili verde recipe soon and I wanted to ask you a couple of questions. First, I've seen other chili verde recipes that call for serrano peppers. Have you ever tried them in your chili verde? I think I will add one in, but I'm likely going to de-seed it, as serranos can be decidedly hotter than either poblanos or jalapenos. I am curious as to why you decided to de-seed the poblano, though. It really is mild by other chili pepper standards and is the pepper of choice for chili rellanos, which is a mild dish. Secondly, what type of onion do you recommend for this recipe? I'm thinking yellow, but I'm unsure about that. Thanks again for your recipes and valuable advice!
Patrick
Hi Janice, I hope the Chili Verde treats you well!
You can definitely use serranos for this recipe. I consider them to be mostly interchangeable with jalapenos as long as you keep an eye on the heat when using serranos. (How hot are serranos?)
I almost always de-seed poblanos but not for heat, more for texture reasons. They can be loaded with larger seeds and since the seeds don't contribute to the flavor I will usually take them out.
And I use white onion the majority of the time onion is called for, but yellow is a worthy substitute. (Which Onion Should I Use For Mexican Recipes?)
Okay hope this helps. Good luck!
Janice
Hi Patrick,
Thank you for responding to my chili verde questions a few days ago. My first "rodeo" with your chili verde recipe was a huge success! Everyone loved it and this recipe goes right into rotation! For the record, I did include a non-roasted de-seeded serrano chili in the blender and I went for the white onion. All in all, it was a great meal with corn tortillas. I say "was" because it sure didn't last long, lol. I'll be looking to make more of your recipes as time allows. I think Pozole might be next...Thanks again!
Patrick
Ahh good news, glad it was a success!
Kathy
High your recipes sound wonderful I have some pork tri-tip but I'm going to use for this dish hopefully it'll turn out well let me know what you think
Patrick
Hi Kathy! I haven't tried the Chili Verde with tri-tip but I'm not convinced it's the best choice for this recipe. For low-and-slow cooking you'll typically want to start with the tougher, collagen heavy cuts that will tenderize over time:
https://www.seriouseats.com/2016/01/best-cut-beef-stew-braise.html
The tri-tip is coming from the sirloin area and this cut will most likely toughen up when cooked for an extended period of time.
In general it seems like the cuts (for both pork and beef) that respond best to low-and-slow cooking are the portions of the animal that are most active, so I think it's probably worth seeking out some pork shoulder/butt if you want to simmer it for awhile -- with the equivalent for beef being chuck and brisket.
Okay hope that helps a bit. Cheers.
Jeffrey Swain
I can't tell you how impressed I was with our batch of chili verde. I'm not much of a cook but followed your recipe as close to verbatim as I could and it was amazing. I did have a hard time finding a new bottle of Mexican oregano so ended up using stuff that we had for years. Not sure how much of a difference it would have made. Thanks for the recipe and looking forward to trying another one soon.
Patrick
Thanks Jeffrey, I'm so glad the Chili Verde was a hit! I think it gets most of its flavor from the roasted poblanos and tomatillos so you prob didn't miss out much by using some older spices. Cheers.
Bill
Wonderful recipe as usual Patrick. I easily converted it to fit my Instant Pot pressure cooker with very few changes. It cooked in 25 minutes with and additional 20 minutes natural release. Absolutely a keeper recipe. Thank you!!!
Patrick
Thanks Bill! And thanks for the instant pot notes -- I really like the idea of an expedited Chili Verde heh.